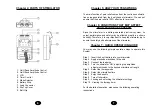
ZZAEV820OTC
PAIN RELIEF SYSTEM
V1.0
Manufactured for:
BodyMedHudson, Ohio 442361.866.528.2152
C
M
Y
CM
MY
CY
CMY
K
820.ai 1 2015/5/27 下午 01:30:16
Страница 1: ...ZZAEV820OTC PAIN RELIEF SYSTEM V1 0 Manufactured for BodyMed Hudson Ohio 44236 1 866 528 2152 C M Y CM MY CY CMY K 820 ai 1 2015 5 27 01 30 16 820 ai 1 2015 5 27 01 30 16...
Страница 2: ...s 8 9 Lead Wire Maintenance 8 10 Electrode Options 9 11 Electrode Placement 9 12 Tips For Skin Care 9 13 Application Of Re Usable Self Adhesive Electrodes 10 14 Operating Instructions 12 15 Battery In...
Страница 3: ...diac pacemaker implanted defibrillators or any other implanted metallic or electronic device Do not use this System if you have undiagnosed chronic pain If you are under the care of a physician consul...
Страница 4: ...the removal of electrodes do not use the stimulator again until after the excessive redness has disappeared Turn off the stimulator if the stimulation feels unpleasant or does not provide pain relief...
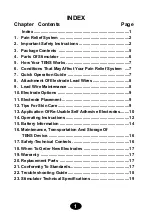
Страница 5: ...QUICK OPERATION GUIDE Your may use the following simple operation steps to operate this System Step 1 Insert the 9 volt battery into your stimulator Step 2 Apply electrode electrodes to the skin Step...
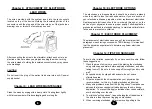
Страница 6: ...r quality Follow application procedures outlined in electrode packing to maintain optimal stimu lation and to prevent skin irritation Chapter 11 ELECTRODE PLACEMENT The placement of electrodes can be...
Страница 7: ...l on the lead wires because it may damage the electrodes 2 Place the electrodes on the liner and remove the lead wire by twisting and pulling at the same time Care and Storage 1 Between uses store the...
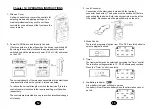
Страница 8: ...itch the device off turn the control counter clockwise to the required setting or off position respectively The controls are protected by a cap to avoid unintentional change of intensity 3 Lead Connec...
Страница 9: ...o use BATTERY CHARGING 1 Plug the charger into any working 110 or 220 240v mains electrical outlet The use of any attachment not supplied with the charger may result in the risk of fire electric shock...
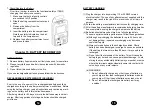
Страница 10: ...output sockets 2 Check the device for defective operating elements Legibility of inscriptions and labels Make sure the inscriptions and labels are not distorted 3 Check the usability of accessories Pa...
Страница 11: ...2 With the TIME button pressed turn the unit on 3 Press the UP arrow once to turn the LOCK symbol off 4 Turn unit off 5 Turn the unit on normally it will back to normal function The stimulator has a...