13
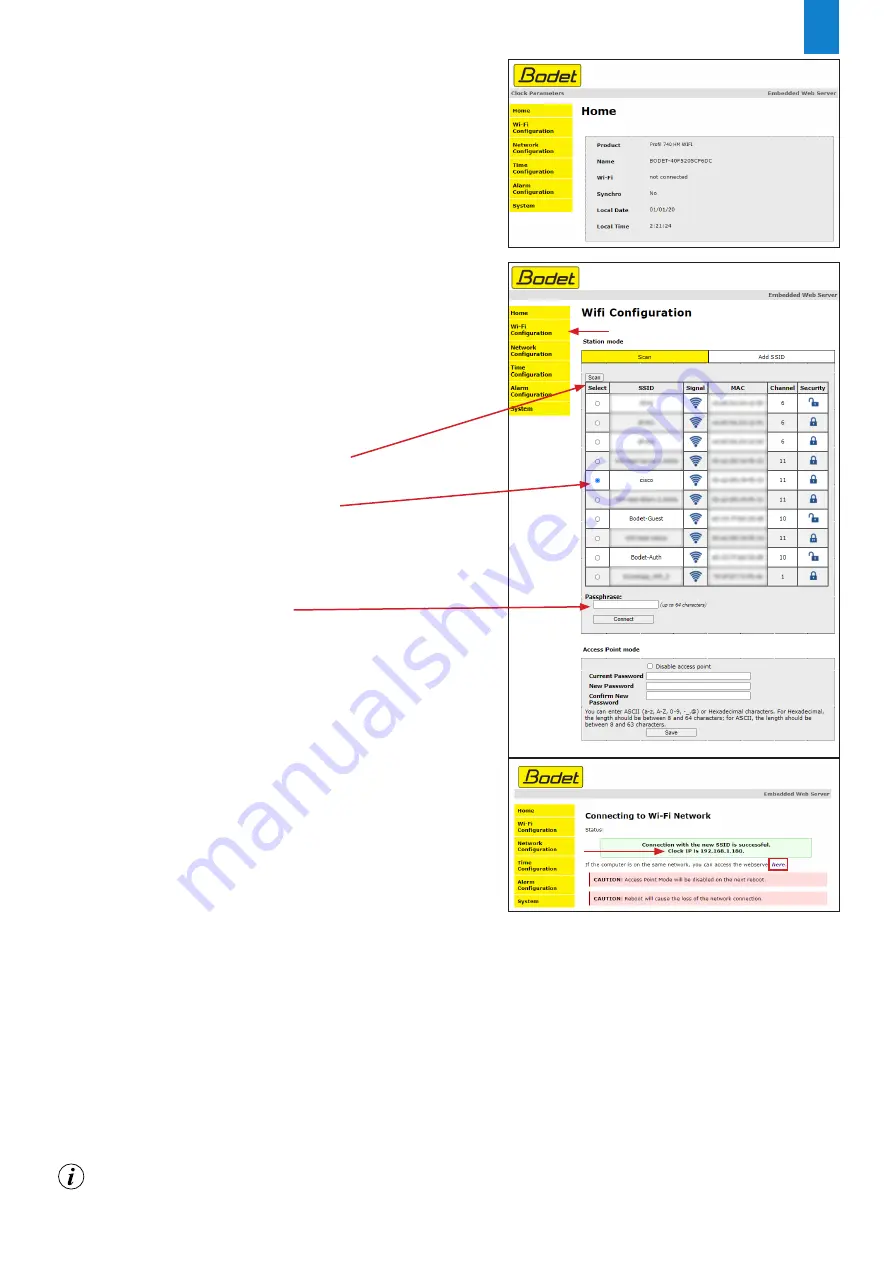
7/ If the connection is successful, re-enter the IP
address of the access point (192.168.100.1) in the
browser. The clock web server is now accessible
and its Home page is displayed in on the PC screen.
Note: the clock is not yet connected to you network.
8/ To choose the network open the page
“Wi-Fi Configuration":
"Scan" Station mode
By default, the Wi-Fi Configuration page opens in "
Scan
"
mode which automatically lists all Wi-Fi networks.
Click on "
Scan
" to refresh the list.
Select the desired Wi-Fi network.
(for example, Cisco)
9/ Enter the password associated with the SSID
and click on "
Connect
"
10/ Once the connection with the SSID is successful,
the following message is displayed confirming
the connection.
Note: The first warning message indicates that the
Access Point mode will be disabled at the next reboot.
11/ To continue the clock configuration,
- Browse through the web server pages and configure
all settings,
- Connect a PC to the wireless network and:
• Click on "
here
",
• Or enter the IP address displayed to access
to the clock's web server again.
Note: Configuration is available after the PC has been connected to the same network as the
clock.
This proced
ure should be repeated for each Wi-Fi clock to be configured.
EN


