background image


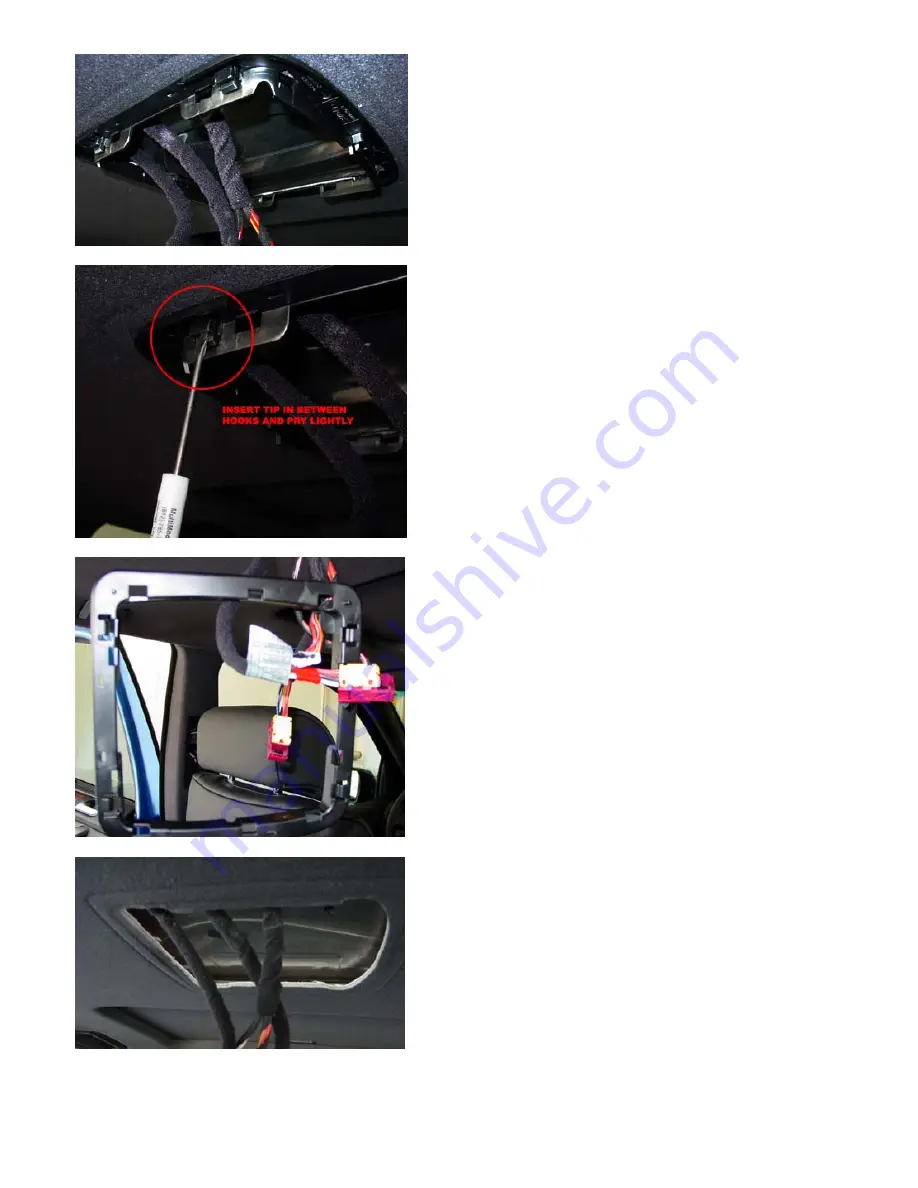
6. Here is the dome light mounting bracket that mounts onto the 

upper mounting ring. 


7. To remove the bracket, insert a small, flat-tip screwdriver into 

the gap between the tabs and pry slightly to unlock them.  There 
are 10 tabs around the bracket. 

 
Save this bracket as you will re-use it to mount the dome light 

onto the overhead monitor of the entertainment system. 


8. Here is a picture of what the bracket looks like.  Notice the tabs 
around the bracket. 


9. With one hand carefully pulling apart the headliner from the 

roof, move the upper mounting ring by sliding it under the 
headliner with the other hand.  Maneuver the ring to get it out of 

the headliner through the opening.  You will not need this 
mounting ring for the installation of the overhead monitor. 

 
Here is the picture of the headliner with the mounting ring 

removed. 


Содержание X5 DVD Video System II

Страница 1: ...and not damage the interior or headliner If your headliner color is other than black make sure you use a clean pair of painter s gloves to protect the headliner from smudges Also make sure that you la...

Страница 2: ...t the connector cables for the ultrasonic sensor module dome light and if you have the electric seatback adjustments the left and right seatback switches 4 If you have the electric seatback adjustment...

Страница 3: ...to the overhead monitor of the entertainment system 8 Here is a picture of what the bracket looks like Notice the tabs around the bracket 9 With one hand carefully pulling apart the headliner from the...

Страница 4: ...nough to disengage from the roof The Torx 25 should still remain in the hole as in the picture 12 Locate the two forward cargo separator mounting points on the headliner on left and right sides Slide...

Страница 5: ...the left rear door from the headliner to the seat area 17 Remove the left rear seat side cushion by pulling the top outward to release the connector then lift the whole cushion upward to remove from...

Страница 6: ...lower the C pillar trim panel Be careful not to scratch or damage the seat with the trim panel 21 Position the dome light mounting bracket on the overhead console making sure that it is seated evenly...

Страница 7: ...unting brackets 26 Push on the edges of the overhead console and slide it toward the rear of vehicle until the bracket seats in slot 27 Locate the 2 pre drilled holes in the overhead console near the...

Страница 8: ...d console up to headliner and position it on the mounting brackets Push and slide the overhead console rearward to mount it onto the headliner 37 Insert 2 screws into the holes drilled in step 30 by t...

Страница 9: ...arness center and connect it to one of the white harness in the DVD power harness Connect the other harness of the DVD power harness to the wire harness center 48 Adhere the supplied hook tape to one...

Страница 10: ...Picture of the rear component center with the DVD drive seating on top shelf The middle DVD drive is for the navigation system...

Страница 11: ...PICTURES OF KIT CONTENTS OVERHEAD CONSOLE WITH MONITOR COVERED IN PROTECTIVE WRAP DVD DRIVE MADE BY ALPINE MODEL DVA5205 OVERHEAD MOUNTING HARWARD...

Страница 12: ...DVD INSTALLATION KIT PLASTIC BLIND RIVET AND RIVET SETTER can be bought from Napa Auto Store...

Отзывы: