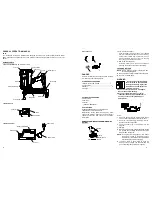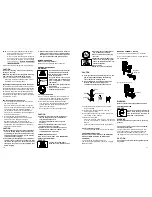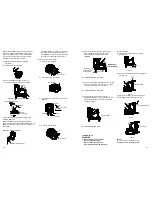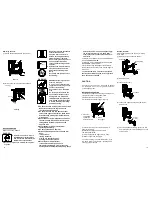
NOTE
: The battery charging time becomes longer
when temperature is low or the voltage of
the power source is too low.
When the green pilot lamp does not light on
even if more than three hours has passed
after start of the charging, stop the charging
and contact your
5. Disconnect battery charger from the power plug.
CAUTION
Do not pull the plug out of the receptacle by
pulling on the cord.
Make sure to grasp adapter plug when removing
from receptacle to avoid damaging adapter.
6. Remove the battery from the battery charger.
Supporting the charger base with hand, pull out
the battery from the charger base.
Regardingelectricdischargeincaseofnewbatteries,etc.
As the internal chemical substance of new batteries
and batteries that have not been used for an extended
period is not activated, the electric discharge might
be low when using them the first and second time.
This is a temporary phenomenon, and normal time
required for recharging will be restored by recharging
the batteries 2 - 3 times.
How tomakethebatteryperformlonger
1. Do not recharge the batteries after they become
completely exhausted.
When you find the power pilot lamp change from
green to red on the nailer handle, you should stop
operating the nailer and recharge its battery. If
you continue to use the nailer and exhaust the
electric current, the battery may be damaged and
its life will become shorter.
2. Avoid recharging at high temperatures.
A rechargeable battery will be hot immediately
after use. If such a battery is recharged
immediately after use, its internal chemical
substance will deteriorate, and the battery life will
be shortened. Leave the battery and recharge it
after it has cooled for a while.
CAUTION
■
When the battery charger has beencontinuously
used, the battery charger will be heated, thus
constituting the cause of the failures. Once the
charging has been completed, give 15 minutes
rest until the next charging.
■
If the battery is recharged when it is warmdue
to battery use or exposure to sunlight, the pilot
lamp may not light. The battery will not be
recharged. In such a case, let the battery cool
before charging.
■
If the battery charger does not work while the
battery is mounted correctly, it is probable that
the battery or charger is malfunctioning. Take
it to your dealer authorized Service Center.
BEFORE OPERATION
Read section titled “SAFETY”
Make sure of the followings before operation.
WORKING ENVIRONMENT
WARNING
■
No flammable gas, liquid or other
flammable objects at worksite.
■
Use outside or well- ventilated
areas.Do not inhale.
■
Keep the Nailer, fuel cell and
battery away from sunshine and
from temperature exceeding
120°F (50°C).
■
Keep away from ignition sources.
No smoking.
■
Clear the area of children or
unauthorized personnel.
COLD WEATHER CARE
■ Do not store the Nailer, fuel cell and battery in a
cold environment. Keep the Nailer, fuel cell and
battery in a warm area until beginning the work.
■ If the Nailer, fuel cell and battery are already
cold, bring it in a warm area and allow the Nailer
to warm up before use. Observe temperature
limit of max. 120°F (50°C).
Do not expose to an open flame and sparks!
CAUTION
■
This Nailer may not drive completely when:
1.At low temperatures, fuel cell loose the
required propellant force;
2.At high temperatures, because of fuel
overdose.
■
Do not use the Nailer in the rain or where
excessive moisture is present.
■
This Nailer is not recommended for use at
altitudes above 5,000 feet (1,500 m), or in
temperature below 23°F (-5°C).
PREPARING THE FUEL CELL
Read section titled “FUEL CELL IMPORTANT
SAFETY INSTRUCTIONS”.
DANGER
■
The fuel cell is flammable.
■
Keep away from ignitionsources.
120
°
F MAX
(50℃)
■
Do not spray to a naked flame or
any incandescent material.
■
Do not smoke when handling
fuel cell.
■
Keep stem of fuel cell away from
face or skin. Expanding gases
cause low temperatures. Do not
contact with gases.
■
Do not inhale.
■
Keep out of reach of children.
CAUTION
■
If the gas leaks from the metering valve or the
gas cartridge after attaching the metering
valve, replace the metering valve.
■
Do not attempt to reuse the metering valve.
Replace with the new metering valve.
To attach the metering valve to a fuel cell.
(1) Separate the metering valve and the cap from
the gas cartridge.
(2) With the stem angled downward, snap the
metering valve in place.
(3) Press downward on the rear of the metering valve
until it seals, no gas leakage.
Check the metering valve:
Press the metering valve stem on fuel cell two
or three times against a stationary object and
release.
If gas is not dispersed, fuel cell is empty. Replace it. .
Observe Safety Regulations.
The fuel cell is now ready to insert into the Nailer.
PREPARING THE BATTERY
Read section titled “SAFETY, IMPORTANT
SAFETY INSTRUCTIONS FOR BATTERY
CHARGER”.
You must charge the battery before use.
The charging method of battery is shown as “Charging
Method” chapter.
MAGAZINE ASSEMBLY INSTALL
(1) Remove fuel cell and battery from the Nailer.
(2) Fit on the magazine assembly. Insert magazine
into the Nail Seat.
(3) Tighten the lock bolt.
WARNING
Never use Nailer after taking off the magazine.
TESTING THE NAILER
DANGER
Operators and others in work area
MUST wear safety glasses with
side shields which conforms to
ANSI Z87.1 specifications.
WARNING
Never use Nailer unless push lever is operating
properly.
The machine employs a preventive mechanism
for unloaded operation.
The machine enters a state where the push lever
cannot be pushed up. This takes place when the
magazine is not loaded with nails or when the
remaining number of nails becomes less than 2 or 3
CAUTION
Use caution not to throw the firing head tip onto
any object.
Cap
Metering Valve
Stem
Fuel Cell
Magazine
Assembly
LockBolt
10
11


