background image

61

| Converting DVD files |

| Upgrading Transcoder |

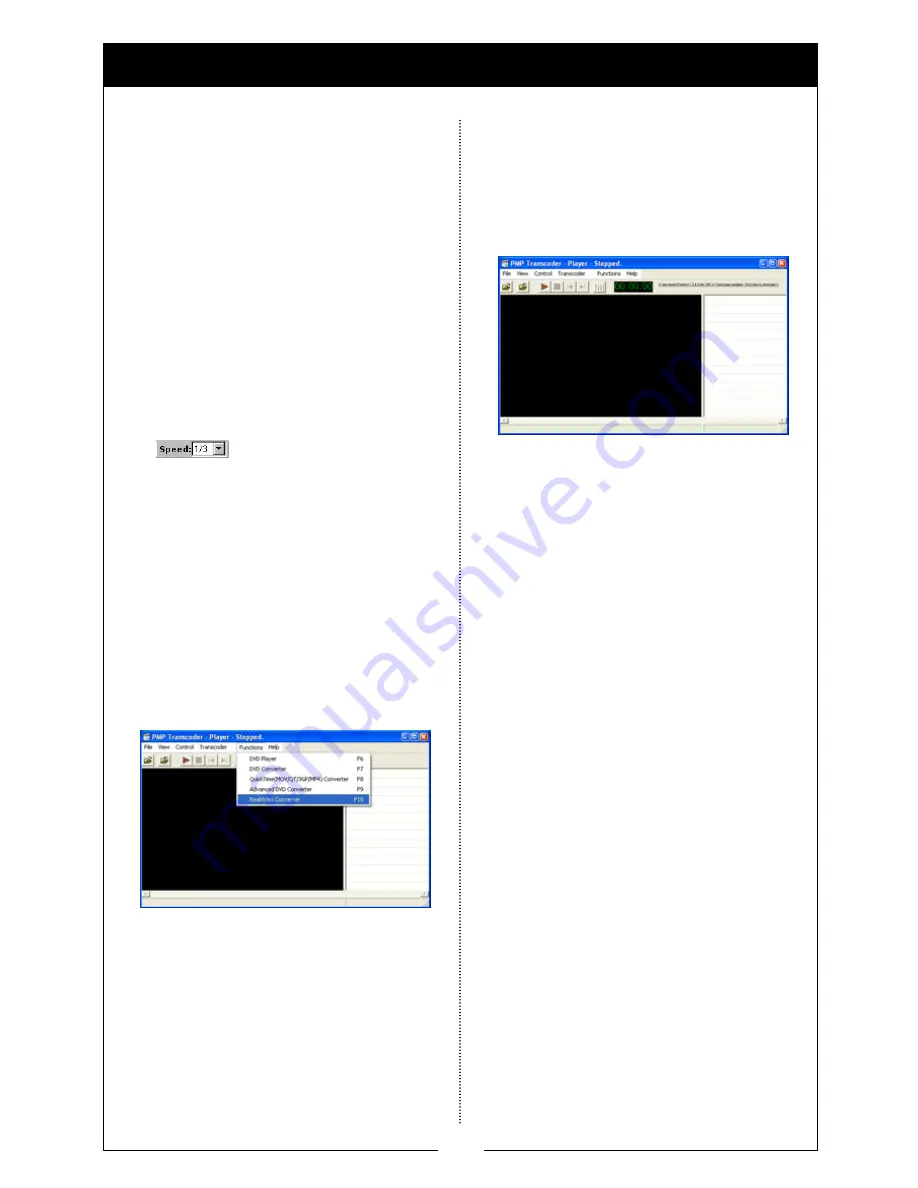
| RealVideo Converter |

TRANSCODER

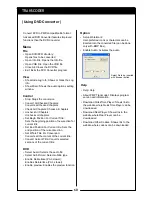
Conversion speed setup.

Works similar to that of the DVD Converter, 
but with more features.

Option

• Enable Full Speed Mode 

(the subpicture maybe distorted): 
Conversion speed depends on the user’s 
PC specifications.

• Convert Selected Chapter(s) to One File: 

Converts selected chapters only.

Added Icons

Converting

Refer to DVD Converter instructions.

Convert RealVideo files.

• Select Functions 

RealVideo Converter

menu.

• Directions for usage is same as that of the 

Transcoder. 

1. During running Transcoder, program to be 

upgraded will appear in the right upper side 
with updated version Information.

2. Click the highlighted items and save the 

program.

3. Run the upgrade program to complete upgrade.

Содержание N4410

Страница 1: ...using this product please be sure to read this manual Actual product specifications may differ from what is indicated in this manual as product enhancements are implemented without prior notice Printed at the time of production this manual may contain technical or editorial mistakes or omission ...

Страница 2: ...2 ...

Страница 3: ...IEWER 35 CAR DIARY 36 FILE BROWSER 43 CALCULATOR 44 CONTROL PANEL SCREEN DISPLAY 45 VOLUME SOUNDS 46 STYLUS 47 POWER 48 ADDITIONAL FUNCTIONS PC LINK FUNCTIONS Linking with a PC 50 Delinking from a PC 50 Moving deleting files 50 Firmware Upgrade 51 TRANSCODER Before using the Transcoder 52 Installing the Transcoder 53 Using the Transcoder 54 Whole file conversion 56 Partial file conversion 57 DVD P...

Страница 4: ...ith the instructions may cause harmful interference to radio communications However there is no guarantee that interference will not occur in a particular installation If this equipment does cause harmful interference to radio or television reception which can be determined by turning the equipment off and on the user is encouraged to try to correct the interference by one or more of the following...

Страница 5: ... cosmetics chemicals or any water filled vessel on top of the product Avoid exposing this product to shock or impact and keep it away from magnetic fields or vibration Avoid simultaneously pressing multiple buttons This may cause malfunction or product failure Do not disassemble repair or reconstruct without an authorized technician Placing the product in wet and dusty places may cause malfunction...

Страница 6: ...efer to the instruction manual and then contact our service center Do not attempt to disassemble repair or reconstruct the device without an authorized technician Please promptly recharge the device with the supplied power adaptor as soon as the Low battery warning message appears Ignoring the warning message and continuing to use the device will completely discharge the battery and may cause all ...

Страница 7: ...xplode When temperature is high such as during the summer do not to leave this device in the car The navigation holder is a glass suction type holder that normally strongly attaches to any glass surface Before driving always check if it is properly attached If not the vibration during driving may cause the holder to separate and fall off User is responsible for any damage incurred in such a case I...

Страница 8: ... be used for a long time keep the suction holder separated from the glass Before driving always check whether the navigation is properly installed inside the car The user is responsible for any damage incurred arising from improper product installation There might be some difference between the voice guide map path and actual road conditions Always follow street signal systems and traffic regulati...

Страница 9: ...ocations In case of unstable GPS signal reception we recommend you to install an external GPS antenna An external GPS antenna is optional Caution Caution While driving never perform any operation such as location registration location search and run other programs Always park the car in a safe place first before operating the device Operating the navigation system or looking at the screen while dr...

Страница 10: ...10 ...

Страница 11: ...11 BEFORE STARTING ...

Страница 12: ... device generating electromagnetic waves is also installed in the car e g some of wireless alarms some MP3 or CD players other GSP devices using GPS like camera alarm If a receiver is connected through cable changing the location of a receiver antenna may cause jamming When there is heavy cloud cover when a car is located in places like under a bridge or an elevated road or within a tunnel an unde...

Страница 13: ...G Product parts SD memory card slot Battery ON OFF switch Speaker Power button Key hold switch Earphone DC input Stylus pen Menu key Volume control USB slot TMC port Reset hole GPS module GPS antenna GPS Ant Stand ring ...

Страница 14: ...14 BEFORE STARTING Accessories Option Suction mount cradle Cigarette lighter adaptor USB sync cable Holder Manual Pouch Installation CD AC DC adaptor ...

Страница 15: ...발 위험이 있 습니다 난로 전자레인지 등 가열시킬 수 있는 곳에 제품을 절대 넣지 마세요 과열 및 폭발 위험이 있습니다 지정된 충전기를 사용하세요 배터리가 과충전되어 폭발할 수도 있으며 고장의 원인이 됩니다 배터리 충전시 주의사항 Charging the battery with the AC DC power adaptor or cigarette lighter adaptor Charging time Approx 3 hours after complete discharging Charging LED Red Battery discharging Green Battery charging completed Play time Video Approx 4 hours Music Approx 7 hours 재생 조건 이어폰 출력 볼...

Страница 16: ...ure the glass surface is clean to ensure a stronger attachment 5 Put the product at the bottom of the cradle Then as shown in the picture push the top of the product backward and attached e the product with the car s cradle 6 Connect the cigar jack s power connector with the product s power connector Connect the cigar jack to the car s cigar light jack 7 After installation is complete turn on the ...

Страница 17: ... 1 Please do not pross the upper side of this device The stylus pen may be damaged 2 Please keep away the stylus pen from the children to avoid puttiy it in their mouth A B Pull out a stylus pen from A Insert a stylus pen into B to stand this device ...

Страница 18: ...18 ...

Страница 19: ...19 USING THE BASIC FUNCTIONS ...

Страница 20: ...ccess on the main menu 2 Click on the icon in the sub menu in the main menu to execute that program Programs Navigation Movie plyer Juke box Bluetooth Office Set up White board Image viewer Car diary File Explorer Calculator Power Screen Display Volume Sound Stylus ...

Страница 21: ... Enough Power Lack of Power Low battery Charging TITLE BAR Program title Battery Indicator Shows the text being typed Keyboard Minimizes the currently running program Minimize Shuts down the program End Program Title Keyboard Minimize End Battery Indicator ...

Страница 22: ...22 Click the first icon Navigation on the main menu to execute the Navigation program Please refer to a separate manual to use navigation NAVIGATION How to use ...

Страница 23: ...e screen into Title window MOVIE PLAYER Click the 2 nd icon Movie Player on the main menu to execute the Movie Player program Basic screen Opening a file Playing pointing bar Play the previous file Play Stop temporarily Stop playing Play the next file Playing status Display playing point Playing time of a file Option Open a list Open a file Volume bar Remove sound ...

Страница 24: ...ected file Register a file Delete Play Close MOVIE PLAYER How to use Editing the play list During playback the Elapsed Time and the Point of Play Bar show current status Play Pause Stop Point of Play Bar and Volume Bar are also available There are Play Pause Stop conditions and current status shall be displayed if selected Files are played automatically as soon as the previous one is finished Clic...

Страница 25: ... a file There are two available functions Repeat Play List and Resume Last File Repeat Play List When the player finishes playing the last file the first file is played automatically Resume Last File If you replay Movie Player after you close it once during playing the player starts playing from the stopped point Option ...

Страница 26: ...t B Spectrum C Caption D Settings JUKE BOX Click the 3 rd Icon Juke box on the main menu to execute Juke Box program Screen Layout Play Playing time Play the previous file Play Stop temporarily Stop Play the next file Playing status Playback time Sampling frequency Repeat play Random Repeat a section Open a file Beat rate Stereo Mono File extension Equalizer Volume Remove sound ...

Страница 27: ...ou want to add to a desired folder 3 Click the OK button to add desired files 4 To play the added play list select desired files and click the Play button ADD a file 1 Select a file you want to delete from its play list 2 To delete the selected file click the Delete button 3 Deletion only affects the play list and does not delete the original file 4 Deleting the currently played file stops its pla...

Страница 28: ...folder including the file being played shall appear at the upper part of the screen including ID3 information artist s name and song title If the file contains no ID3 information the file name shall be displayed instead of the song title If the file contains the embedded lyrics the lyrics are automatically displayed To include lyrics in the file use a program supplied separately Lyrics Configurati...

Страница 29: ...Paring status Bluetooth enable disable status Home dialing Editing Home number Connection Exit Click the 4th icon Hands Free to execute Hand Free Hands Free Screen Dial Pads Volume up Volume down Exit Back space Clear Dial pads Call Telephone no ...

Страница 30: ... telephone number Delete whole telephone list Call button with a selected Tel no Call History list Call History screen Editing Home No Tel no Exit Back space Clear Dial pads Edit Connection Screen Bluetooth enable Bluetooth disable Exit Delete Explore Connect Disconnect Explored Bluetooth device list ...

Страница 31: ...tatus screen to change the calling status or stop the call 4 If dial pad is needed for ARS on calling please click dial pad on the calling status screen to pop up the dial pads 5 To change the calling device from the Hands Free of this device to the mobile phone or diverse case please click 6 On calling if you do not want an opposite person to hear your side conversation please click Mic mute Dial...

Страница 32: ...hange the calling status or stop the call 5 In case that you receive another call on the line please click icon to see the 2nd call status screen At this time if you want to change an opposite person please click button 6 To change the calling device from the HandsFree of this device to the mobile phone or diverse case please click change the calling device button 7 On calling if you do not want a...

Страница 33: ...e existing picture Zoom In Out This icon allows you to double the size of picture or return the enlarged picture to its original size WHITE BOARD Click the third icon White Board on the Office program of the main menu to execute the White Board program Using the stylus pen you can write letters or draw diagrams in the center of the screen on the white board In the toolbox at the upper side of the ...

Страница 34: ...ve the file and the Bitmap file name Save as a Bitmap File Drawing Configuration 1 Click on the Pen menu and select Color 2 Select the pen color Changing the Color 1 To change the pattern of the pen click on the Pen menu and select Type 2 To change the size of the pen after clicking on the Pen menu and Type select Size 3 You can also set your own desired size by selecting User Defined 4 You can ch...

Страница 35: ...5 Open a file Enlarge Reduce Next Previous Open Enlarge Reduce Previous image Next image IMAGE VIEWER Click the 2 nd icon Viewer on the Office program of the main menu to execute the Viewer Screen Layout ...

Страница 36: ...chase mileage data and input data CAR DIARY Click the 3 rd icon Car Diary on the Office menu to execute Car Diary program Click on the tabs on top to switch between different menus Screen Layout Car information Refueling records Repair records Other expenditure Statistics Enter the car information mode by clicking on the first tab Car Information You can check basic car data or enter new informati...

Страница 37: ...ADD Refueling date Name of gas station Oil type Refueled amount Up to date mileage Refueled volume 1 You can enter the following screen by double clicking on the item to modify or by clicking on the Modify button after click selecting the item 2 Modify the data 3 You can modify the refueling data by clicking on the Modify button 4 You can cancel the procedure by clicking on the Cancel button Edit ...

Страница 38: ...de switch Add Delete Items 1 You can open the following screen by clicking on the Check button on the bottom of the righside You can manage each item by choosing Add or Delete on the Select Item menu 2 Add Click on Add on the left side Enter the data to add 3 Delete Click on Delete on the left side Select the item to delete from the combo box 4 Add or delete the maintenance item by clicking on OK ...

Страница 39: ...icking on Cancel Add Change Inspection Item Date Price Memo 1 You can enter the following screen by double clicking on the item to modify or by clicking on the Modify button after click selecting an item 2 Enter data 3 Add maintenance data by clicking on Record 4 You can cancel the procedure by clicking on Cancel Modify Change Inspection Item Date Price Memo 1 Click on the Delete button after clic...

Страница 40: ...left side of the screen Enter data to add 3 Delete Click on Delete on the left side of the screen Select the item to delete from the combo box 4 Click on OK to add or delete other expense item 5 You can cancel the procedure by clicking on Cancel Expense item add delete Add Delete Item Date 1 You can open the following screen by clicking on the Record button 2 Enter data 3 Click on Record to add ne...

Страница 41: ...e data by clicking on the Modify button 4 You can cancel the procedure by clicking on the Cancel button Modify Inspection points Inspection date Amount Memo 1 Click on Delete after click selecting an item to delete 2 You can delete other expense data by clicking on the OK button in the confirmation window 3 You can cancel the procedure by clicking on the Cancel button in the confirmation window De...

Страница 42: ...o the table mode by clicking on Table Mode 2 Select the year to view from the combo box Table mode Year selection Switch table graph modes Statistics for each item 1 You can switch to the graph mode by clicking Chart Mode 2 Select the year to view from the combo box Graph mode Year selection Switch table graph modes Cost mileage graph ...

Страница 43: ...e Pastes a cut file or folder Delete Deletes a file or folder New folder Creates a new folder Rename Renames a file or folder Open Opens a file or a folder Big Icon Marks folder and files with big icon Small Icon Marks folders and files with small icons Details Marks with detailed information like names of folders and files sizes forms date of modification etc 참고 파일탐색기에서는 실행파일을 실행할 수 없습니다 ...

Страница 44: ...or The calculator consists of the general calculation section and scientific calculation section Screen Layout By using the numeric keypad and calculation code on the screen you can make general calculation To perform scientific calculation use the buttons on the left panel General and Scientific Calculation ...

Страница 45: ...wn or Up button to adjust screen brightness 2 Complete the adjustment by clicking OK Brightness control 1 Control time it takes until backlight turns off you can control time in the order of length None 5 minutes 15 minutes 30 minutes Battery life varies depending on time 2 Close the window by clicking the Confirm button Backlight 참고 BACKLIGHT 끄기 옵션은 배터리 가동 상태에서만 동작됩니다 전원을 인가한 상태에서는 항상 켜져 있습니다 ...

Страница 46: ...me Sound on the Control Panel program of the main menu to execute Volume Sound Set up items related to volume Screen Layout 1 Adjust the volume level by moving the slider from left to right or by clicking on the bar 2 Click OK to finish Volume ...

Страница 47: ...47 STYLUS Click the 3 rd icon Stylus on the Control Panel program of the main menu to execute the Stylus 1 You can adjust the stylus point by clicking on Recalibrate 2 Click OK to finish Calibration ...

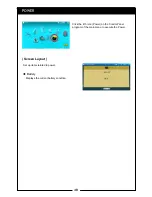
Страница 48: ...48 POWER Click the 4 th icon Power on the Control Panel program of the main menu to execute the Power Set up items related to power Screen Layout Displays the current battery condition Battery ...

Страница 49: ...49 ADDITIONAL FUNCTIONS ...

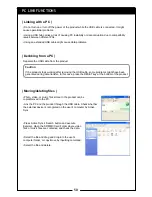
Страница 50: ...stored in the product can be copied moved to the PC Link the PC and the product through the USB cable Check whether the external device is recognized on the user s computer by Active Sync Press Active Sync s Search button and execute Explorer Open the SDMMC Card Folder where video files or music files are contained and check the data Select the file and drag and drop into the user s computer folde...

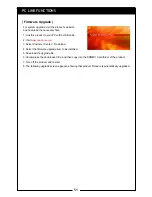
Страница 51: ...cable 2 Visit www ooooooooooo 3 Select Customer Center Download 4 Select the firmware upgrade item to be installed 5 Download the upgrade file 6 Uncompress the downloaded file and then copy into the SDMMC Card folder of the product 7 Turn off the product and restart 8 The following upgrade screen appears showing that product firmware is automatically upgraded ...

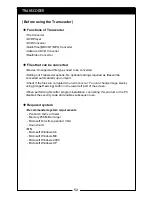
Страница 52: ... left part of the screen When performing first after program installation connecting this product to the PC disables the security code and enables subsequent use Files that can be converted Recommended system requirements Pentium3 1Ghz or faster Memory 256 MB or larger Microsoft DirectX supported VGA Sound card OS Microsoft Windows 98 Microsoft Windows ME Microsoft Windows 2000 Microsoft Windows X...

Страница 53: ...scoder TRANSCODER 1 Insert the provided CD and select Transcoder Installation 2 Select Next 3 Select Next 4 Select Next 5 Select Yes then click Next 6 Select Next 7 Then installation will begin 8 Select Next and press Finish ...

Страница 54: ...ts options automatically Image Resizing Select file size limit the resolution under 640 x 480 for images whose resolution is 640 x 480 or over Destination Locate converted file Frame Rate Sets the frame rate Audio Format Sets audio file sampling frequency and bit rate Defaults are 192 kBit s 44 100 Hz stereo Video Format Video option setting window Automatic setup Icons 1 Open 2 Close 3 Play 4 Sto...

Страница 55: ...to list Remove Checked Files from List Removes the checked files from list Clear File List Clears the current file list Exit Exits Transcoder View Show Hide Log Info Shows or hides the Log Info Show Mixer Shows audio option setting window Toggle Window Full screen Mode Full screen mode Toggle with Esc Control Play Starts file conversion Stop Stops file conversion Check All Files Selects all files ...

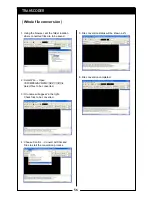
Страница 56: ...are to be saved 2 Select File Open VCD MPEG AVI WMV ASF VOB File Select files to be converted 3 File name will appear in the right Check files to be converted 4 Choose Control Convert All Checked Files to start the conversion process 5 File conversion status will be shown as 6 File conversion completed ...

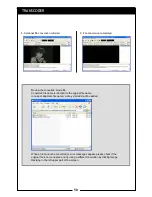
Страница 57: ...n the bottom to the starting point of conversion 5 Select Control Set Begin Position For Converting menu in the pop up to set the starting position of sectional file conversion 6 Same as setting the starting position move the button on the status bar to the end position and select Control Set End Position For Conversion in the pop up menu to set the end position of file conversion 7 Select Control...

Страница 58: ...ted file name is identical to the original file name In case of duplicate file name video yy mm dd will be added When a file cannot be converted or error messages appear please check if the original file is not corrupted and try using a different resolution by clicking Image Resizing in the left upper part of the screen ...

Страница 59: ...R 1 Select Functions DVD Player in the menu 2 The screen below will be displayed 3 Select File Open DVD from the menu 4 Choose DVD and play 5 Double click Chapter List to play in the right Stop or resume playback by using the Control menu ...

Страница 60: ...ent of the current title Convert Current Title Converts selected sections of the current title DVD Select Audio Selects the audio file Select Sub Picture Select subtitle type Enable Deinterlace PAL slower Enables Deinterlace PAL slower Enable preview Enables the preview function Convert DVD to PMP compatible file format Advanced DVD Converter features improved functions than the DVD Converter Opti...

Страница 61: ...ications Convert Selected Chapter s to One File Converts selected chapters only Added Icons Converting Refer to DVD Converter instructions Convert RealVideo files Select Functions RealVideo Converter menu Directions for usage is same as that of the Transcoder 1 During running Transcoder program to be upgraded will appear in the right upper side with updated version Information 2 Click the highligh...

Страница 62: ...elect File Open DVD DVD Directory in the menu bar then the DVD Title Select window will appear Choose the DVD file 4 Click OK after choosing the title 5 Check Chapter List in the right and select Control Convert All Checked Chapters to start the conversion Convert QuickTime files with MOV QT MP4 extensions Select Functions QuickTime MOV QT MP4 Converter menu Follow the Transcoder Manual afterwards...

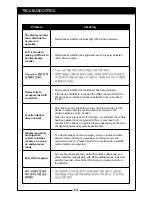
Страница 63: ...quired by the device to function properly When this happens please resolve the power supply issue for your vehicle first The device does not work with cigar jack adaptor Please check if the device is discharged Please check the HOLD switch Buttons do not work Checking Problem The device may cease to function when buttons are pressed excessively or when the device attempts to play unsupported illeg...

Страница 64: ...riod of time it may take 5 30 minutes for the device to function properly depending on the level of supplied power and system inspection time Location tracker does not work Please check whether the Backlight OFF mode is selected The display monitor turns off while the device is in operation Checking Problem Transcoder 변환이 정상적으로 되었는지 확인해 주세요 변환한 파일을 PC에서 재생시켜 보세요 재생이 되더라도 본 제품에 맞 게 정상적으로 변환되지 않을 수도...

Страница 65: ...s Battery SDIO Card External SD Slot up to 4 GB Memory 2 GB Internal Flash Interface USB 2 0 SLAVE GPS Ant Intenna active type VIDEO AUDIO GENERAL Power SPECIAL FEATURES Navigation SPECIFICATION Bluetooth Class Class 2 Profile Hands free profile Input AC Adapter DC 5 0 V 2 A Cigar jack DC 12 24 V MPEG4 320x240 500 Kbps MP3 average volume the second from highest brightness earphone output MP3 avera...

Страница 66: ...66 MEMO ...

Отзывы: