


!
12
iSender Portal
Devices Config
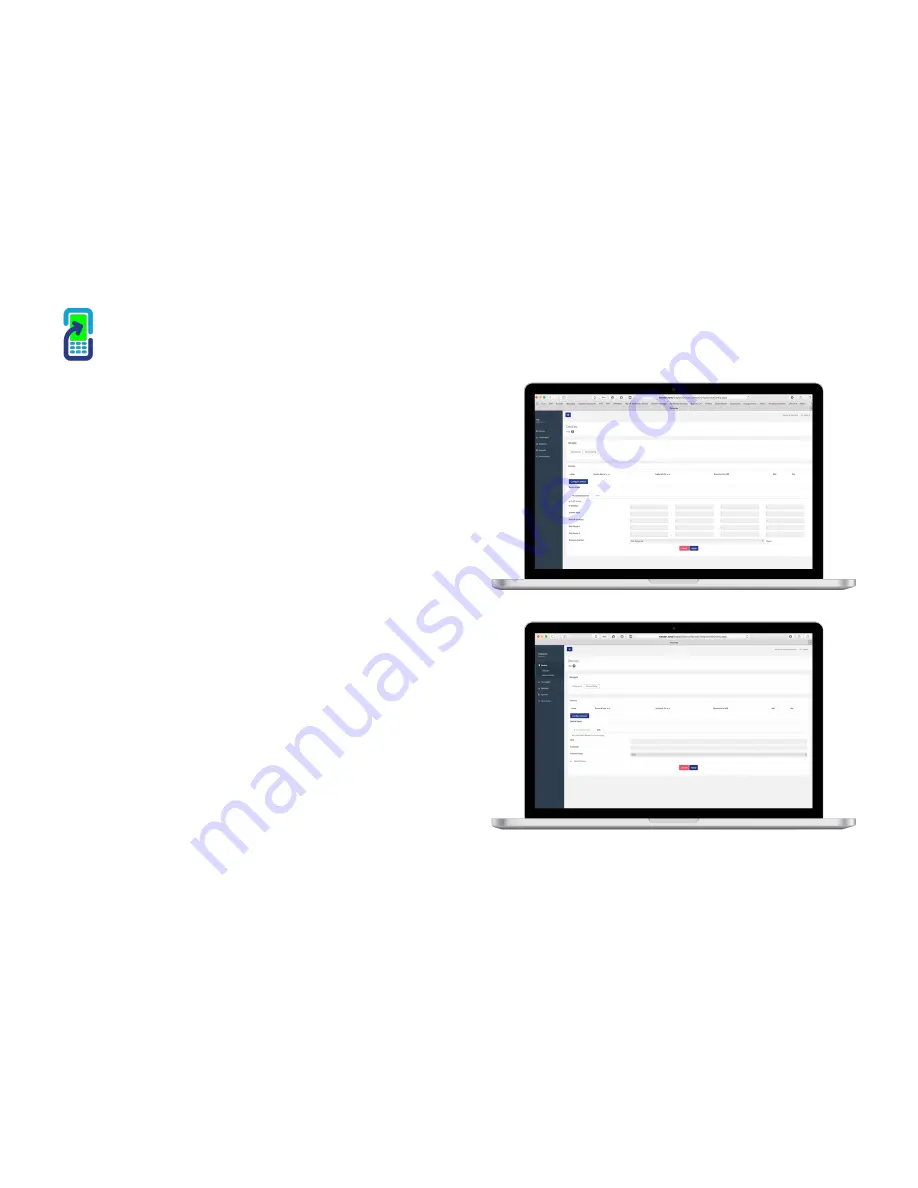
Your iSender devices already comes pre configured for use. This area of the
portal will allow you to customise your iSender device to interact with your
router wirelessly or allocate it a specific IP address. It will also allow you to
close the broadcasting range if required.
This page will enable you to:
1. Assign Specific IP Address.
2. Close iSender Broadcasting Range.
3. Configure your iSender to connect to your router wirelessly.
1. Assign IP address:
To assign a specific IP address, simply click the Configure Device button,
then uncheck the DHCP check box and input the IP & Subnet Mask
address you want to assign the iSender device.
(DHCP -
Dynamic Host Configuration Protocol
) is a network protocol
that enables the iSender to have an IP address automatically assigned by
your router.)
2. Reduce Broadcasting Range
To shorten the iSender broadcasting range then this can be achieved using
the ‘Distance Control’ drop down feature. First click the ‘Configure Device’
button, then click on the dropdown menu and select the required range.
3. Config Wireless or Mobile 3 or 4G Router
If you prefer to connect your iSender to your router wirelessly, check the
WiFi tab next to the IP address tab and input your routers SSID network
name and network password in the appropriate fields.
Once you have completed your configurations a new file will be created.
Insert a USB drive into your computer and download the file to that USB.
Once done, place the USB drive into any one of the two USB ports at the
back of the device.
The device will then reboot. When the device lights come back on you can
remove the USB.
IP/Distance
Wireless WiFi


