background image

Contact 1.800.762.1142 for assistance.

Do not return to place of purchase.

Owner’s manual: model GWU511A outdoor patio heater

5

Contact 1.800.762.1142 for assistance.

Do not return to place of purchase.

Owner’s manual: model GWU511A outdoor patio heater

6

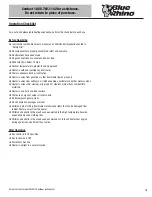
Hardware

A Small Screw  

3 pcs

5/32” - 32 x 8 Stainless Steel Round Head Screw

B Medium Screw 

6 pcs

3/16” - 24 x 15 Black Zinc Plated Philips Head Screw


C Large Screw 

4 pcs

1/4” - 20 x 16 Stainless Steel Philips Head Screw


D Small Bolt 

3 pcs

1/4” - 20 x 15 Nickel Plated Hex Head Bolt


E

Medium Bolt 

12 pcs

1/4” - 20 x 20 Nickel Plated Hex Head Bolt

F

Dome Bolt  

1 pc

3/8” - 16 x 35 Stainless Steel Hex Head Bolt


G Carriage Bolt  

1 pc

3/8” - 16 x 95 Nickel Plated Hex Head Bolt

H Small Nut 

4 pcs

3/16” - 24 Nickel Plated Hex Nut

I

Medium Nut 

18 pcs

1/4” - 20 Nickel Plated Hex Nut

J

Large Nut 

1 pc

3/8” - 16 Stainless Steel Hex Nut

K Extra Large Nut 

1 pc

3/8” - 16 Nickel Plated Hex Nut

L

Small Lock Washers 

4 pcs

ø5 Nickel Plated Lock Washer

M Medium Lock Washer 

15 pcs

ø6 Nickel Plated Lock Washer

N Large Lock Washer 

1 pc

ø10 Nickel Plated Lock Washer

O Gas Line Clip* 

1 pc

P AA Battery* 

1 pc

Hardware Not Included

Q

7/16” Wrench 

1 pc

R

9/16” Wrench 

1 pc

S

3/4” Wrench 

1 pc

T

7/16” Socket and Socket Wrench 

1 pc

7/16"

U

#2 Phillips Head Screwdriver 

1 pc

For a complete list of hardware, please visit 

www.bluerhino.com

Содержание Endless Summer GWU501E

Страница 1: ...Outdoor Use Only Outside any enclosure Solamente Para Uso En Exteriores Fuera de cualquier recinto WARNING FOR YOUR SAFETY Improper installation adjustment alteration service or maintenance can cause...

Страница 2: ...ration service or maintenance can cause injury or property damage Read the installation operation and maintenance instructions thoroughly before installing or servicing this equipment WARNING Californ...

Страница 3: ...or assembly 10 Step 11 Assemble dome 11 Step 12 Attach dome 11 Step 13 Insert battery 11 Install LP Gas Tank 12 Check for Leaks 13 Operation Before Turning Gas Supply ON 14 Before Lighting 14 Lighting...

Страница 4: ...used and replacements must be those specified by the manufacturer Inspect heater before each use If a damaged part is detected do not operate until an original equipment replacement part has been pro...

Страница 5: ...webs or insects Inspect heater before each use Have heater inspected annually and repairs should be made by a qualified service person Check heater immediately if any of the following conditions exis...

Страница 6: ...Dome Rib 3 56 01 109 6 Bottom Plate 56 01 111 7 Emitter Assembly 56 01 118 8 Gas Line 56 01 351 9 Pole 56 01 354 10 Shroud 56 01 164 11 Platform 56 01 353 12 Regulator Hose Assembly 56 01 355 13 Legs...

Страница 7: ...eel Hex Head Bolt G Carriage Bolt 1 pc 3 8 16 x 95 Nickel Plated Hex Head Bolt H Small Nut 4 pcs 3 16 24 Nickel Plated Hex Nut I Medium Nut 18 pcs 1 4 20 Nickel Plated Hex Nut J Large Nut 1 pc 3 8 16...

Страница 8: ...dboard pack and numbered to match their assembly step Additional Requirements The following items are not included but are necessary for the proper assembly of your heater Do NOT attempt to assemble w...

Страница 9: ...l assembly cover A Attach wheel assembly cover to base using 4 sets of medium screws B small lock washers L small nut H B Tighten screws once all screws are in place Step 5 Attach weight plate A Lay b...

Страница 10: ...rench 3 sets of medium bolt E medium lockwasher M medium nut I B Attach post to platform using 7 16 wrench 3 sets of medium bolt E medium lockwasher M medium nut I C Fully tighten all nuts and bolts f...

Страница 11: ...pole before securing engine to pole C Attach engine to post using 4 large screws C Note Do not fully tighten screws until all screws are inplace Step 9 Attach gas line clip A Lift shroud cover to expo...

Страница 12: ...the rolled bottom edge If necessary for proper alignment of dome sections loosen each screw prior to assembly A Slide dome rib onto pin side of dome panel B Slide two dome panels togther Secure with...

Страница 13: ...Gas Tank Place precision filled LP gas tank into heater base upright so it is arranged for vapor withdrawal Secure LP Gas Tank Secure tank in place by attaching loose end of tank restraint chain to ho...

Страница 14: ...er several attempts contact 1 800 762 1142 for assistance Check Gas Line Tank valve for leaks Turn tank valve ON Spoon several drops of solution onto gas line and tank valve connection Inspect the sol...

Страница 15: ...ssembly specified by manufacturer Lighting Note This heater is equipped with a Pilot Light that allows for safer startups and shutdowns Pilot must be lit before Main Burner can be started Turn Tank Va...

Страница 16: ...e level of heat desired When heater is ON Emitter screen will become bright red due to intense heat The color is more visible at night Burner will display tongues of blue and yellow flame These flames...

Страница 17: ...oline or other flammable liquids or vapors q Heater is away from windows air intake openings sprinklers and other water sources q Heater is at least 36 clearance top and 24 clearance side from combust...

Страница 18: ...and pilot assembly is loose Tighten connection and perform leak check Thermocouple is not operating correctly Replace thermocouple Burner won t light Gas pressure is low Turn tank valve OFF and replac...

Страница 19: ...me yellow tipping of flame Heater does NOT reach the desired temperature Heater glow is excessively uneven Heater makes popping noises Spiders and insects can nest in burner or orifices This dangerous...

Страница 20: ...rea sheltered from direct contact with inclement weather such as rain sleet hail snow dust and debris If desired cover heater to protect exterior surfaces and to help prevent build up in air passages...

Страница 21: ...rd party failure to perform normal and routine maintenance on the heater shipping damage normal adjustment to burner damage or repairs related to insects birds or animals of any kind and damage due to...

Страница 22: ...t 5 90 Canadian National Standard CAN1 2 23 M82 Rating Maximum 40 000 BTU hr input Heat Range Up to 20 foot diameter Fuel Liquid Propane Gas LP Tank Size Nominal 20 lb 5 Gallon Inlet gas supply pressu...

Страница 23: ...ilice gasolina ni cualquier otro gas o l quido inflamable cerca de ste o de cualquier otro aparato ADVERTENCIA PARA SU SEGURIDAD Una instalaci n ajuste alteraci n reparaci n o mantenimiento inadecuado...

Страница 24: ...gas y regulador 10 Paso 11 Arme la c pula 11 Paso 12 Fije la c pula 11 Paso 13 Inserte la pila 11 Instalaci n del tanque de gas propano LP 12 Comprobar si hay fugas 13 Operaci n Antes de activar la a...

Страница 25: ...on la unidad deben usarse siempre y cuando sea necesario reemplazarlos los repuestos deben ser los que especifica el fabricante Debe utilizarse el regulador de presi n y el conjunto de mangueras inclu...

Страница 26: ...antenga el rea de los quemadores limpia de ara as telas de ara a o insectos Revise el calentador antes de cada uso Haga inspeccionar anualmente el calentador de exteriores y realizar las reparaciones...

Страница 27: ...3 56 01 109 6 Placa del fondo 56 01 111 7 Conjunto emisor 56 01 118 8 L nea de gas 56 01 351 9 Poste 56 01 354 10 Recubrimiento 56 01 164 11 Plataforma 56 01 353 12 Conjunto de manguera y regulador 56...

Страница 28: ...3 8 16 x 35 G Perno de carruaje 1 Perno niquelado de cabeza hexagonal de 3 8 16 x 95 H Tuerca peque a 4 Tuerca hexagonal niquelada de 3 16 24 I Tuerca mediana 18 Tuerca hexagonal niquelada de 1 4 20 J...

Страница 29: ...e su calentador No intente el armado del equipo sin las herramientas adecuadas 1 Soluci n para la detecci n de fugas Las instrucciones sobre c mo elaborar la soluci n se incluyen en el p rrafo Comprob...

Страница 30: ...ta del conjunto de ruedas en la base usando 4 tornillos medianos B 4 arandelas de cierre peque as L y 4 tuercas peque as H B Apriete los tornillos una vez que todos se han colocado en su lugar Paso 5...

Страница 31: ...cas medianas I B Fije el poste a la plataforma usando la llave de 7 16 3 pernos medianos E 3 arandelas de cierre medianas M y 3 tuercas medianas I C Apriete completamente los pernos y las tuercas colo...

Страница 32: ...a m quina al poste usando 4 tornillos grandes C Nota No apriete completamente los tornillos hasta que los haya colocado todos en su lugar Paso 9 Fije el gancho de la l nea de gas A Levante el recubrim...

Страница 33: ...nte las secciones de la c pula afloje cada tornillo antes de armarla A Pase la costilla de c pula por el lado de la espiga del panel de c pula B Junte los dos paneles y aseg relos con un tornillo pequ...

Страница 34: ...llenado de precisi n en la base del calentador en posici n vertical de manera que sea posible la extracci n de gas Asegure el tanque de gas propano Asegure el tanque en su lugar fijando el extremo sue...

Страница 35: ...ia t cnica Compruebe si hay fugas en la l nea de gas y en la v lvula del tanque Gire la v lvula del tanque a la posici n ON encendido Vierta varias gotas de la soluci n en la l nea de gas y en la cone...

Страница 36: ...de que todos los componentes retirados durante el montaje o reparaci n vuelven a colocarse en su sitio antes de la puesta en marcha Antes del encendido El calentador deber a ser revisado meticulosamen...

Страница 37: ...deseado Cuando el calentador est encendido ON La pantalla del emisor tendr un color rojo brillante debido al intenso calor El color es m s visible por la noche El quemador mostrar lenguas de llama azu...

Страница 38: ...ualquier otro l quido o vapor inflamable q El calentador est lejos de ventanas aperturas de admisi n de aire aspersores y cualquier otra salida de agua q El calentador est situado como m nimo a 36 91...

Страница 39: ...y lleve a cabo una comprobaci n en busca de fugas El termopar no funciona correctamente Sustituya el termopar El quemador no se enciende La presi n del gas es baja Gire la v lvula del tanque hasta la...

Страница 40: ...ga limpios los controles el quemador y los conductos de aire circulante Entre las se ales de una posible obstrucci n se incluyen Olor a gas con una punta de la llama extremadamente amarilla El calenta...

Страница 41: ...ricas como la lluvia el aguanieve el granizo el polvo y la suciedad Si lo desea cubra el calentador para proteger las superficies exteriores y ayudar a evitar las obstrucciones en los conductos de ai...

Страница 42: ...r naturaleza ni da os debidos a condiciones clim ticas como se explica en este manual del usuario Adem s la garant a limitada no cubre da os al terminado de la unidad tales como rasgu os abolladuras d...

Страница 43: ...Consumo Entrada m xima 40 000 BTU hora Alcance calor fico Hasta 6 metros de di metro Combustible Gas propano l quido LP Tama o del tanque de gas Nominal 9 kg 19 litros Presi n del suministro de gas d...

Страница 44: ...cing LLC 104 Cambridge Plaza Drive Winston Salem NC 27104 USA 1 800 762 1142 www bluerhino com 2005 Blue Rhino Global Sourcing LLC All Rights Reserved Blue Rhino is a registered trademark of Ferrellga...

Отзывы: