background image

15

Owner’s manual and assembly instructions: 91000 portable outdoor heater          7/02

Contact 1-800-762-1142 for assistance.

Do not return to place of purchase.

Warranty

Warranty Period

Heater’s warranty extends for 1 years from date of purchase by original purchaser.

Warranty Terms

Manufactured by UniFlame Corp. 1817 Kenosha Road. Zion, Illinois 60099.  1-800-762-1142.

Manufacturer will cover:  All parts found to be defective due to materials or workmanship for 1 years from the date of original purchase.

Proof of purchase is required before warranty performance will be rendered.  Sales receipt and validation of product registration are
valid forms of proof of purchase.

Manufacturer will repair or replace parts returned prepaid freight in the U.S.A. at its sole discretion.

There are no other express or implied warranties.

Warranty Exclusion

Manufacturer will NOT cover:

Assembly or start-up

Normal adjustment to burner

Cleaning and/or general maintenance

Shipping damage

Any misuse which will be determined at the sole discretion of manufacturer

Damage or repairs due to service by an unauthorized agency or the use of unauthorized parts

Improper assembly, such as: no regulator, improper hook-up, etc.

Damage or repairs related to spider or insect nesting

Damage due to weather conditions

Warranty Procedures

For service or replacement parts, please call 1-800-762-1142 for return authorization and further instructions. 

All returns must be sent via prepaid freight.

Legal Rights

No one else is authorized to make any warranties on behalf of manufacturer. 

THIS WARRANTY IS IN LIEU OF ANY OTHER WARRANTY, EXPRESS OR IMPLIED, ORAL OR WRITTEN, INCLUDING, BUT NOT
LIMITED TO, ANY WARRANTY OF MERCHANTABILITY OR FITNESS FOR A PARTICULAR PURPOSE.

UNIFLAME SHALL NOT BE LIABLE FOR ANY INCIDENTAL OR CONSEQUENTIAL DAMAGES RESULTING FROM ANY
DEFECTIVE PRODUCT, INCLUDING, BUT NOT LIMITED TO, LOST REVENUE OR PROFITS, BUSINESS INTERRUPTION, 
OR ANY LEGAL THEORY UPON WHICH ANY CLAIM MAY BE BASED.

PURCHASER ASSUMES ALL RISK IN THE ASSEMBLY AND OPERATION OF THIS UNIT.  FAILURE TO FOLLOW THIS MANUAL’S
WARNINGS AND INSTRUCTIONS CAN RESULT IN SEVERE PERSONAL INJURY, DEATH OR PROPERTY DAMAGE.

Some states do not allow limitations on how long an implied warranty lasts, or the exclusion or limitation relevant to incidental or
consequential damages.

This warranty gives you specific legal rights.  You may also have other legal rights which vary from state to state.

Since product improvement is an ongoing process at the manufacturer, we reserve the right to change this product’s
specifications or design without notice.

Содержание Endless Summer 91000

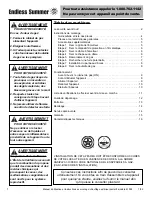
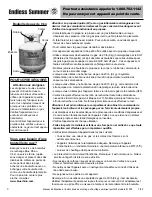
Страница 1: ...AVERTISSEMENT POUR VOTRE SECURITE Tout mauvais réglage ainsi que toute installation modification ou maintenance incorrecte risque de provoquer des blessures ou des dégâts matériels Lire complètement les instructions concernant l instal lation le fonctionnement et l entretien avant d installer ou de procéder à la maintenance de cet appareil AVERTISSEMENT POUR VOTRE SÉCURITÉ À utiliser uniquement à ...

Страница 2: ...E OF LOCAL CODES THE NATIONAL FUEL GAS CODE ANSIZ223 1 1988 CAN1 B149 INSTALLATION CODE Save these instructions for future reference If you are assembling this unit for someone else give this manual to him or her to save for future reference WARNING FOR YOUR SAFETY If you smell gas 1 Shut off gas to appliance 2 Extinguish any open flame 3 If odor continues contact your gas supplier or local fire d...

Страница 3: ...d be seriously damaged Do not modify heater in any manner The pressure regulator and hose assembly supplied with the appliance must be used and replacements must be those specified by the manufacturer Inspect heater and extension hose before each use of the appliance If a damaged part is detected do not operate until an original equipment replacement part has been properly installed Use of unautho...

Страница 4: ...nually and repairs should be made by a qualified service person Check heater immediately if any of the following conditions exist The smell of gas in conjunction with extreme yellow tipping of burner flames Heater does not reach proper temperature Note At temperatures less than 40ºF 5ºC heat output will be restricted Heater s glow is excessively uneven Burner makes popping noises during use Note A...

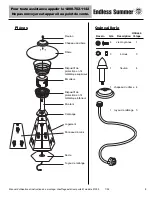
Страница 5: ...d Emitter Assembly Bottom Wire Guard Post Shroud Cover Housing Access Panel Base Components Used In Picture Qty Description Step 4 Medium Screw 1 3 Nut 3 1 Finial 4 1 Dome Cap 4 1 Extension Hose 5 Hardware Extension Hose Owner s manual and assembly instructions 91000 portable outdoor heater 7 02 Finial ...

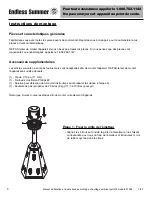
Страница 6: ...contact 1 800 762 1142 for assistance Additional Requirements The following items are not included but are necessary for the proper assembly of your heater Do NOT attempt to assemble without proper tools 1 7 16 Wrench 1 2 Phillips Head Screwdriver 1 Leak Detection Solution Instructions on how to make solution are included in Step 6 1 20 lb 4 5 gallon precision filled LP Gas Grill Cylinder Note You...

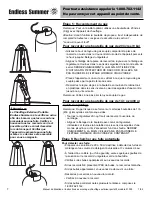
Страница 7: ...ine them up with the holes Step 3 Attach Dome to Emitter Line up three studs in Emitter with holes in Dome Slide Dome carefully over studs clamping Top Wire Guard securely in place Note It may be necessary to adjust prongs of the Top Wire Guard slightly to provide a secure fit Install 3 Nuts on studs and tighten with 7 16 wrench Do not over tighten Step 4 Attach Dome Cap Lay Dome Cap on dome cover...

Страница 8: ...inder Note Some 1 lb cylinders may form frost when near empty Rotate regulator to point towards opening in shroud Line up threads on canister with those on regulator insert and rotate canister clockwise until they fit snugly together HAND TIGHTEN ONLY BE CAREFUL NOT TO CROSS THREADS WHEN SCREWING IN CANISTER Step 6 Check for Leaks To check for leaks Make 1 2 oz of leak solution by mixing one part ...

Страница 9: ...re mounting it to Place the bracket halves around the object and insert the 2 bolts through the open holes in one bracket and into the matching threaded holes in the second bracket Position bracket within 6 of the middle of the cylinder Finger tighten bolts Slide the 20 lb cylinder into the curved portion of the bracket making sure strapping ends are not between cylinder and bracket Enclose cylind...

Страница 10: ...er always wait at least 5 minutes for gas to dissipate Lighting 1 Turn Gas Control Knob to OFF position 2 Push in Control Knob and rotate to ON position This will light burner If necessary keep depressing and rotating Knob until burner lights 3 Once burner is lit hold Control Knob in for at least 30 seconds and release 4 If burner does not stay lit wait 5 minutes and repeat steps 2 and 3 5 Once bu...

Страница 11: ... or produce thick black smoke indicating an obstruction of airflow through the burners If yellow flame is detected turn off heater and gas supply and consult Troubleshooting on page 12 Re lighting Note For your safety Control Knob cannot be turned ON without first depressing Control Knob in OFF position and then rotating to ON 1 Turn Gas Control Knob to OFF 2 Wait at least 5 minutes to let gas dis...

Страница 12: ... ventilation Heater is away from gasoline or other flammable liquids or vapors Heater is away from windows air intake openings sprinklers and other water sources Heater is at least 36 from combustible materials Heater is on a hard and level surface There are no signs of spider or insect nests All burner passages are clear All air circulation passages are clear Children pets clothing flammable mate...

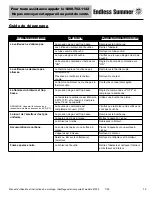
Страница 13: ...uple Replace thermocouple Clean contact Contact certified technican Burner flame is low Note Heater operates at reduced efficiency below 40ºF 5ºC Gas pressure is low Outdoor temperature is less than 40ºF and tank is less than 1 4 full Control knob fully ON Turn Control Knob OFF and replace cylinder or canister Use a full cylinder or canister Check burner and all openings for blockage Emitter glows...

Страница 14: ...ating air passageways clean Signs of possible blockage include Gas odor with extreme yellow tipping of flame Heater does NOT reach the desired temperature Heater glow is excessively uneven Heater makes popping noises Spiders and insects can nest in burner or orifices This dangerous condition can damage heater and render it unsafe for use Clean burner holes by using a heavy duty pipe cleaner Compre...

Страница 15: ...ail snow dust and debris If desired cover heater to protect exterior surfaces Note Wait until heater is cool before covering Never leave LP cannister exposed to direct sunlight or excessive heat Service To learn how to service and procure parts for worn out defective or damaged components contact 1 800 762 1142 for assistance or e mail customerservice uniflame com Please supply model number and se...

Страница 16: ...tc Damage or repairs related to spider or insect nesting Damage due to weather conditions Warranty Procedures For service or replacement parts please call 1 800 762 1142 for return authorization and further instructions All returns must be sent via prepaid freight Legal Rights No one else is authorized to make any warranties on behalf of manufacturer THIS WARRANTY IS IN LIEU OF ANY OTHER WARRANTY ...

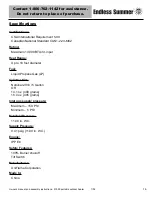
Страница 17: ...al Standard CAN1 2 23 M82 Rating Maximum 14 000 BTU hr input Heat Range Up to 10 foot diameter Fuel Liquid Propane Gas LP Cylinder Size Nominal 20 lb 5 Gallon OR 14 1 oz 400 grams 16 4 oz 465 grams Inlet gas supply pressure Maximum 150 PSI Minimum 5 PSI Manifold Pressure 11 00 in W C Supply Pressure 0 41 psig 11 00 in W C Engine IPP E8 Safety Features 100 Burner shut off Tilt Switch Manufacturer U...

Страница 18: ...17 Owner s manual and assembly instructions 91000 portable outdoor heater 7 02 Contact 1 800 762 1142 for assistance Do not return to place of purchase ...

Страница 19: ...18 Owner s manual and assembly instructions 91000 portable outdoor heater 7 02 Contact 1 800 762 1142 for assistance Do not return to place of purchase ...

Страница 20: ...LITÉ OU EN L ABSENCE DE CODES À LA NORME ANSIZ223 1 1988 DU CODE NATIONAL SUR LES APPAREILS À GAZ CAN1 B149 CODE D INSTALLATION Conservez ces instructions afin de pouvoir les consulter ultérieurement Si vous êtes en train d assembler cet appareil pour quelqu un d autre veuillez lui fournir le manuel afin qu il puisse le consulter plus tard AVERTISSEMENT Proposition 65 de Californie L État de la Ca...

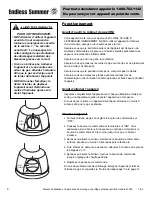
Страница 21: ...ppareil Certains matériaux ou articles risquent d être sérieusement endommagés en raison de la chaleur rayonnante si ces derniers sont placés sous l appareil Ne modifiez en aucune façon l appareil Vérifiez le radiateur extérieur et son tuyau de rallonge à chaque fois avant d utiliser l appareil Si vous détectez une pièce endommagée n utilisez pas l appareil avant d installer une pièce d origine L ...

Страница 22: ...llez à ce que la zone du brûleur demeure propre et sans toiles d araignées ou insectes Vérifiez l appareil avant chaque utilisation Faites inspecter le radiateur extérieur une fois par an et veillez à ce que toute réparation soit effectuée par un réparateur qualifié Vérifiez immédiatement l appareil dans les cas suivants Vous sentez une odeur de gaz et les crêtes des flammes sont extrêmement jaune...

Страница 23: ...l au point de vente Dôme Chapeau du dôme Dispositif de protection en fil métallique supérieur Émetteur Dispositif de protection en fil métallique inférieur Montant Carénage Logement Panneau d accès Socle Pièces Utilisé à Dessin Qté Description l étape 4 vis moyennes 1 3 écrous 3 1 fleuron 4 1 chapeau du dôme 4 1 tuyau de rallonge 5 Quincaillerie Tuyau de rallonge Fleuron ...

Страница 24: ... ou endommagées appelez le 1 800 762 1142 Accessoires supplémentaires Les articles suivants ne sont pas fournis mais sont nécessaires afin de monter l appareil NE PAS tenter de monter l appareil sans outils adéquats 1 Clé de 7 16 po 11 mm 1 Tournevis cruciforme Phillips 2 1 Solution pour détection de fuite voir instructions pour préparer la solution à l étape 6 1 Bouteille de gaz propane de 20 liv...

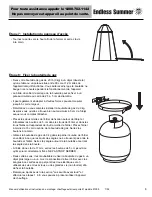
Страница 25: ...c les trous Étape 3 Fixer le dôme à l émetteur Alignez les trois tiges de l émetteur avec les trous du dôme Glissez le dôme avec précaution sur les tiges en fixant le dispositif de protection en fil métallique Remarque Il sera peut être nécessaire de régler légèrement les broches du dispositif de protection afin de les fixer correctement Montez 3 écrous sur les tiges et serrez les à l aide d une c...

Страница 26: ... sur certaines bouteilles de 1 lb 453 g lorsqu elles sont presque vides Tournez le régulateur afin qu il soit orienté vers l ouverture du carénage Alignez le filetage de la bouteille avec celui du régulateur introduisez et tournez la bouteille dans le sens des aiguilles d une montre jusqu à ce qu ils s encastrent l un dans l autre SERREZ UNIQUEMENT À LA MAIN VEILLEZ À NE PAS FAUSSER LE FILETAGE LO...

Страница 27: ...e l objet auquel vous comptez l attacher Placez les deux moitiés de l étrier de fixation autour de l objet et introduisez les boulons de 5 cm dans les trous de l étrier et dans les trous filetés correspondant de l autre moitié de l étrier Placez l étrier à moins de 15 cm du centre de la bouteille de gaz Serrez les boulons à la main Glissez la bouteille de gaz de 9 kg dans la partie incurvée de l é...

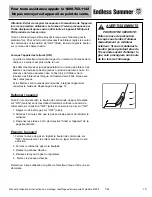
Страница 28: ...n que le gaz se dissipe Allumer l appareil 1 Fermez l arrivée de gaz en réglant le bouton de commande sur OFF 2 Poussez le bouton de commande et tournez le sur ON Vous allumerez ainsi le brûleur Si nécessaire continuez à maintenir le bouton de commande et à le tourner jusqu à ce que le brûleur s allume 3 Après avoir allumé le brûleur maintenez le bouton de commande enfoncé pendant au moins 30 seco...

Страница 29: ...s est bloqué La flamme devrait être bleue avec des crêtes jaunes Si les flammes sont excessivement jaunes éteignez l appareil et consultez le Guide de Dépannage de la page 12 Rallumer l appareil Note Pour votre sécurité le bouton de commande ne peut être placé sur ON marche sans tout d abord maintenir enfoncé le bouton de commande sur la position OFF arrêt et ensuite le tourner sur ON 1 Réglez le ...

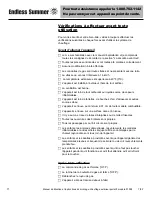
Страница 30: ...areil est loin de tout carburant ou liquide source de vapeurs inflammables L appareil est loin de fenêtres de bouches d air d arroseurs et autres sources d eau L appareil se trouve au minimum à 91 cm de toute matière combustible L appareil se trouve sur une surface dure et à niveau Il n y a aucune trace de toiles d araignées ou de nids d insectes Toutes les ouvertures des brûleurs sont propres Tou...

Страница 31: ...tact Contactez un réparateur agréé La flamme du brûleur est trop basse REMARQUE L appareil fonctionne à un rendement moindre en dessous de 40ºF 5ºC La pression de gaz est trop basse La température extérieure est inférieure à 40ºF 5ºC et le réservoir n est plein qu au 1 4 de sa capacité Le bouton de commande est complètement ouvert ON Réglez la commande sur OFF et remplacez la bombonne Utilisez une...

Страница 32: ...gaz et la crête de la flamme est extrêmement jaune L appareil n atteint PAS la température désirée La lueur de l appareil n est pas du tout uniforme L appareil émet des bruits Les araignées et les insectes peuvent s introduire dans le brûleur et les orifices de l appareil Ces obstacles risquent de provoquer des problèmes et de présenter un danger lors de l utilisation de l appareil Nettoyez les ou...

Страница 33: ...téger les surfaces extérieures Remarque Attendez que l appareil ait refroidi avant de le couvrir Ne laissez jamais une bouteille de propane en plein soleil ou en contact direct avec une chaleur excessive Entretien et réparation Pour toute assistance afin de vous procurer des pièces de rechange ou afin de pouvoir réparer des pièces endommagées ou défectueuses composez le 1 800 762 1142 ou contactez...

Страница 34: ...s aux toiles d araignées et nids d insectes Les dégâts résultant de conditions météorologiques Marche à suivre pour bénéficier de la garantie Pour toute maintenance ou pièce de rechange veuillez composer le 1 800 762 1142 pour obtenir le numéro d autorisation vous permettant de renvoyer la pièce et des instructions détaillées Toute pièce devant être renvoyée doit être postée port payé Droits jurid...

Страница 35: ...dian National Standard Puissance Maximum 14 000 BTU heure entrée Périmètre chauffé Jusqu à 6 mètres de diamètre Carburant Propane liquide gaz LP Type de bouteille 20 lbs 5 galons 9 kg 18 9 litres OU 14 1 oz 400 grammes 16 4 oz 465 grammes Pression du gaz d alimentation Maximum 150 PSI Minimum 5 PSI Pression collecteur et tubulure 11 po 27 9 cm CE Pression d alimentation 0 41 psig 11 00 po 27 9 cm ...

Страница 36: ...17 Manuel d utilisation et instructions de montage chauffage extérieur portatif modèle 91000 7 02 Pour toute assistance appeler le 1 800 762 1142 Ne pas renvoyer cet appareil au point de vente ...

Страница 37: ...18 Manuel d utilisation et instructions de montage chauffage extérieur portatif modèle 91000 7 02 Pour toute assistance appeler le 1 800 762 1142 Ne pas renvoyer cet appareil au point de vente ...

Страница 38: ...sociates All Rights Reserved ved Made in China Made in China UniFlame Corporation UniFlame Corporation Une filiale appar Une filiale appartenant en pr tenant en propriété exclusive à Blue Rhino Corporation opriété exclusive à Blue Rhino Corporation NASDAQ RINO NASDAQ RINO 1817 N Kenosha Road Zion IL 60099 ET 1817 N Kenosha Road Zion IL 60099 ETA ATS UNIS TS UNIS 1 800 762 1142 www 1 800 762 1142 w...

Отзывы: