


Page 11
Laser Blade™ G Manual - Rev. B
© 2020 Blizzard Lighting, LLC
Control Panel Menu Structure
DMX Mode
Allows the unit to be controlled by any universal DMX controller.
Set the Starting DMX Address
1.) Navigate the menu to reach
Address
, and press the
<ENTER>
button.
2.) Use the
<UP/DOWN>
buttons to select a channel from
001-512
, press
<ENTER>
.
Run Mode
1.) Navigate the menu to reach
Work Mode Set
, and press the
<ENTER>
button.
2.) Highlight
DMX
,
Auto
, or
Sound
and press the
<ENTER>
button.
Slave Mode
1.) Daisy chain the fixtures DMX in/out. The 1st fixture will be the master fixture.
2.) On slave fixtures, navigate to
Work Mode Set
, select
Slave,
and press
<ENTER>
.
Mirror Symmetry Mode
Reverse/flip the output of either X, Y, or both.
1.) Navigate the menu to reach
X Mirror Set
or
Y Mirror Set
, and press
<ENTER>
.
2.) Select
Yes
to enable, or
No
to disable. Press
<ENTER>
to confirm.
Running Mode Settings
Fine tune the position of either X, Y, or both.
1.) Navigate the menu to reach
X Run Set
or
Y Run Set
, and press
<ENTER>
.
2.) Highlight
Run
for default, or
Stop
for incremental positioning, and press
<ENTER>
.
Graphic Mode Settings
1.) Navigate the menu to reach
Graph Mode Set
, and press
<ENTER>
.
2.) Select
Beam Show
or
Animal Show,
incrementally adjust, then press
<ENTER>
.
Speed Settings
1.) Navigate the menu to reach
Speed Set
, and press
<ENTER>
.
2.) Use the
<UP/DOWN>
buttons to adjust the speed settings, then press
<ENTER>
.
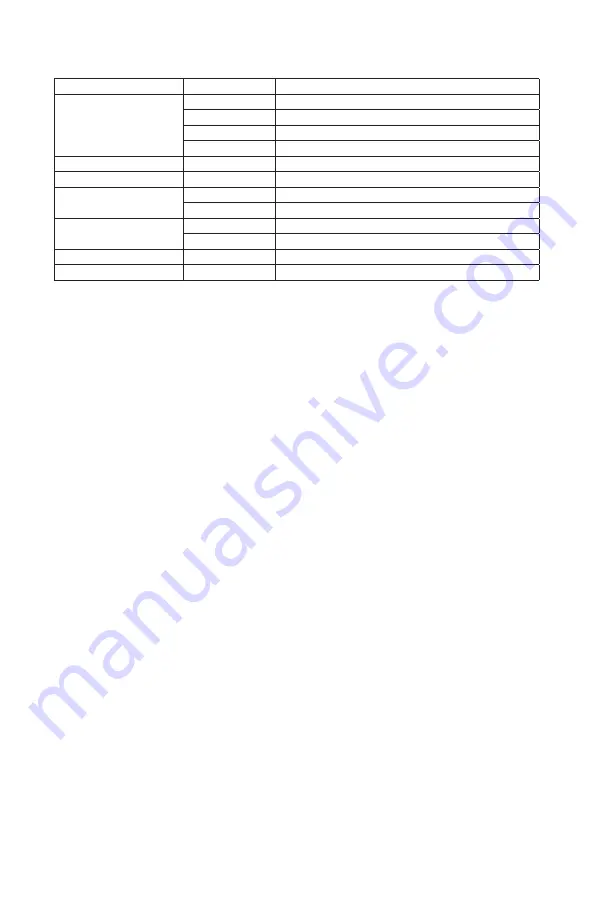
Address
<ENTER>
To choose a DMX address from 001-512
Work Mode Set
Auto
Auto run mode
Sound
Sound active mode
DMX
DMX mode
Slave
Slave mode
X Mirror Set
Yes/No
X mirror symmetry (reverse) on/off
Y Mirror Set
Yes/No
Y mirror symmetry (reverse) on/off
X Run Set
Run
<ENTER>
Stop
X Position (+/-) 1
<ENTER>
Y Run Set
Run
<ENTER>
Stop
X Position (+/-) 1
<ENTER>
Graph Mode Set
<ENTER>
<UP/DOWN>
to choose beams/animations
Speed Set
<ENTER>
<UP/DOWN>
to increase/decrease speed


