background image


2. Safe handling of PAD 

 
The PAD is a precision instrument. Improper use can result in equipment damage. 


2-1 Touchscreen 


The touch screen is the most sensitive component of the PADs and is made of 

glass. DO NOT scratch the screen of PAD, the scratches can´t be removed.


DO NOT cover the screen to / in order to avoid scratches or other damage.


Insert any objects on the unit to prevent damage to the screen and the device, 

even not to cover.


Do not carry your PAD in an appropriate carrying case to protect it from dirt, 

water, shock and scratches.


DO NOT drop place heavy objects on the screen and do not put anything on it.


Ensure scratch to the screen NOT use your fingernail or anything hard.


When cleaning your PAD a soft, fiber-free cloth and gently wipe over it, to 

prevent damage to the touch screen.


Power the PAD off when not using the unit for some time.


Do NOT use chemical cleaners to clean the touchscreen.


Make sure that the touchscreen NOT use hard objects such as buttons, rings or 

watches, etc. come in contact.


  Spilling NO liquids on the PAD, otherwise the device will be damaged. 


Clean the touchscreen NOT with caustic cleaners and spray cleaning 
spray NOT directly to the PAD.  


Содержание Endeavour

Страница 1: ...ood choice Of course we are also after the purchase for you For technical questions and or problems please contact us by phone under 49 0 511 270 496 90 or email at support first servicecenter de Manuals for other languages as well as detailed instructions are available for download also on www blaupunkt de ...

Страница 2: ...d trade names or refer to their products The manufacturer disclaims any ownership rights to third party trademarks and trade names The user manual can be changed without prior notice Any reproduction without written permission of the manufacturer is strictly prohibited Product illustrations contained in this manual are for guidance only Depending on your Tablet PC it may be that some functions are...

Страница 3: ...ion 11 5 2 Main screen 13 5 3 App menu 14 5 4 On Screen keyboard 15 6 System settings 16 6 1 Wireless and network 16 6 1 1 Flight mode 16 6 1 2 WiFi 16 6 1 3 Bluetooth 18 6 1 4 Tethering and portable hotspot 20 6 1 5 Mobile networks 21 6 1 6 Ethernet configuration 23 6 1 7 Data usage 24 6 1 8 HDMI 24 6 2 Sound 25 6 3 Display 25 6 4 Security 25 6 5 Apps 25 6 6 Accounts sync 25 6 7 Backup reset 25 6...

Страница 4: ...ge view of the files 30 7 5 The question mark Help 31 8 Communication 32 8 1 Google account 32 8 2 Browser 33 8 3 Contacts 33 8 4 E Mail 35 9 Fun 38 9 1 Camera 38 9 2 Gallery 39 9 3 Music 40 9 4 Connecting headphones 41 10 System connection 41 10 1 Connection to PC 41 11 Attachment 41 11 1 Troubleshooting 41 11 2 Specifications 43 ...

Страница 5: ...ar liquids rain or moisture 9 Take the PAD NOT in the trash Dispose of electronic products in accordance with local regulations 10 The PAD and the AC adapter may become warm during operation or charging Let the PAD NOT lie on your lap or other body parts in order to avoid any injury from heat 11 INPUT POWER Make taking into account the label on the PAD that the power supply to the power input matc...

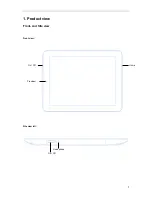
Страница 6: ...6 1 Product view Front and Site view Front view Site view left Home Headphone Frontcam On Off On Off ...

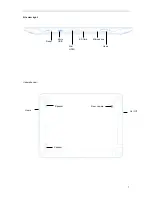
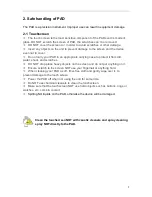
Страница 7: ...7 Site view right Undersite view Rear camera Home Speaker Speaker Mikrophone Micro USB Mini HDMI Home Reset SD Card On Off ...

Страница 8: ...e to protect it from dirt water shock and scratches DO NOT drop place heavy objects on the screen and do not put anything on it Ensure scratch to the screen NOT use your fingernail or anything hard When cleaning your PAD a soft fiber free cloth and gently wipe over it to prevent damage to the touch screen Power the PAD off when not using the unit for some time Do NOT use chemical cleaners to clean...

Страница 9: ...re regularly to keep your PAD compatible and up to date 4 To increase the life of the battery you should charge the PAD every three months even if you rarely use the device 3 Carriage of PAD Turn off the pad and remove before transporting all cables and external devices Consider the following steps when you want to travel with your PAD Attention 1 Turn off the pad and remove all connectors 2 Trans...

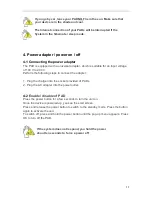
Страница 10: ...e following steps to connect the adapter 1 Plug the charger into the socket provided of PADs 2 Plug the AC adapter into the power outlet 4 2 Enable disable of PAD Press the power button for a few seconds to turn the unit on Once the device is powered up you see the start screen Press and release the power button to switch to the standby mode Press the button again to activate the unit To switch of...

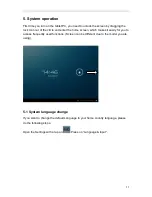
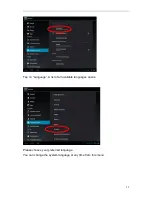
Страница 11: ... and enter the home screen which makes it easily for you to access frequently used functions Screen can be different due to the model you are using 5 1 System language change If you want to change the default Language to your home country language please do the following steps Open the Settings with a tap on Press on Language input ...

Страница 12: ...12 Tap on Language A list of all available languages opens Please choose your preferred language You can change the system language at any time from this menu ...

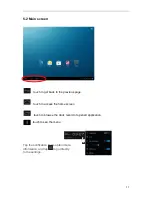
Страница 13: ...get back to the previous page touch to access the home screen touch to browse the track record of opened application touch to see the menu Tap the notification bar to obtain more information and tap to go directly to the settings ...

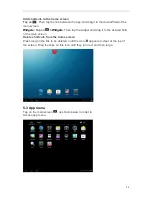
Страница 14: ...ets Then tap the widget and drag it to the desired field of the main screen Delete shortcuts from the home screen Press long on the link to be deleted until the icon appears to clear at the top of the screen Drag the links on this icon until they turn red and then let go 5 3 App menu Tap on the main screen as shown below in order to Access app menu ...

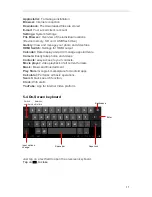
Страница 15: ...te display and add manage appointments Camera Easily take photos and videos Contacts easy access to your contacts Movie player video playback of all current formats Music Music and Entertainment Play Store Google s marketplace for Android apps Calculator Performs all basic operations Search Quick search function Clock With alarm YouTube App for Internet Video platform 5 4 On Screen keyboard Just t...

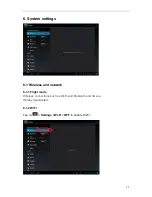
Страница 16: ...16 6 System settings 6 1 Wireless and network 6 1 1 Flight mode Wireless connections such as Wi Fi and Bluetooth and 3G are thereby deactivated 6 1 2 WiFi Tap on Settings Wi Fi OFF to enable Wi Fi ...

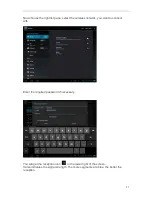
Страница 17: ... the wireless network you want to connect with Enter the required password if necessary You will get the reception icon in the lower right of the screen It also indicates the signal strength The more segments are blue the better the reception ...

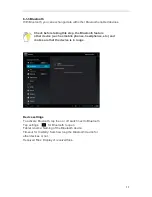
Страница 18: ...such as mobile phones headphones etc and make sure that the device is in range Device settings To activate Bluetooth tap the on off switch next to Bluetooth Tap settings for Bluetooth to open Tablet rename Naming of the Bluetooth device Timeout for Visibility Sets how long the Bluetooth device for other devices or not Received Files Display of received files ...

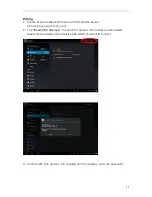
Страница 19: ... the device with which you want to connect 2 Tap Search for Devices to search for devices The results are then listed Select the desired Bluetooth device with which you want to connect 3 Confirm with both devices the coupling and if necessary enter the password ...

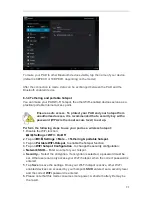
Страница 20: ...ollowing steps to use your pad as a wireless hotspot 1 Disable the WiFi function Settings WiFi On Off 2 Tap on Settings More Tethering portable hotspot 3 Tap on Portable WiFi Hotspot to enable the hotspot function 4 Tap on WiFi hotspot Configuration to change the security configuration Network SSID Enter a name for your hotspot Security Select the encryption If encryption is selected a password mu...

Страница 21: ...rnet The 3G connection is not included After connecting the external 3G stick go to Settings Select Wireless networks and then tap 3G Then click the Off next to 3G Now you have activated the 3G and the switch changes to ON Now press on the right side to mobile networks Now tap access points ...

Страница 22: ... APN Then enter the appropriate data for your ISP The credentials of the four major network operators Telecom Vodafone E Plus and O2 in Germany are already stored After entering the access points press Your entries are saved and the device is based on a 3G connection ...

Страница 23: ...23 6 1 6 Ethernet configuration Tap on Settings Ethernet OFF to configure Ethernet connection Now tap Ethernet configuration Here you can enter all the data required for your network configuration ...

Страница 24: ...24 6 1 7 Data usage Here you can see the data usage of your mobile data usage 6 1 8 HDMI You can make the settings for HD connection ...

Страница 25: ...allpaper This feature allows the background image to be changed Auto rotate screen Tap this selection to disable automatic screen rotation Sleep Here the time is set after which the machine should switch to idle 6 4 Security Set a screen lock and configure the use of passwords 6 5 Apps Functions relating to the application Here you can stop and delete applications and manage 6 6 Accounts sync Mana...

Страница 26: ...s the input method for the on screen keyboard You can also add or remove user dictionaries 6 10 Accessibility Universal Access can be set up here 6 11 Date time Here you can set or change the date time and time zone of the system 6 12 About tablet System information for PAD ...

Страница 27: ...ou will see the internal and external memory called Local Disk External TF card or USB sda1 Now select the location where you want to work Local disc Here are all in the machine stored data and system files Or external memory External TF card or USB sda1 Find all your files that are stored on your memory card or USB flash drive External TF card ...

Страница 28: ...ven all the files open that directory then click the 2nd set Button see top left circle and then select the appropriate file with a click so it is provided with a green check mark on the right side Once you have the 3rd Click on button opens the following editor context menu ...

Страница 29: ... a file from your memory card with Cut and then in the Local Disk want to insert click again on the 3rd also Button and in the local context menu Paste 7 2 Sort files Should be created in the directories simply too many files and the whole may be difficult to read you can choose according to the respective directory and click on the 4th Buttons to make in the local context menu to sort Here you ca...

Страница 30: ... back to a previous folder you can do so with With the lower curved arrow close the file browser and return to the main menu 7 4 Change view of the files With the 6th Button in the status bar you can change the view of the folder You can then choose from a list or tiled view Icons ...

Страница 31: ...stion mark you can open the help file where you can get each symbol once the declaration mentioned Home By tapping on this icon to return to the main view where you can choose between the device memory Local Disk and the external memory external TF card USB sda1 ...

Страница 32: ...y Store With other programs it is possible to connect it to a Google account eg Contacts If one of these programs are used for the first time you are prompted to create a Google account Here you have the option to sign in with an existing Google account or create a new account For programs that do not necessarily need a Google account you can skip the registration procedure with the item Not now Y...

Страница 33: ...lso click bookmark symbol to go directly to a website 8 3 Contacts To access the contacts Contacts If you do not have a Google account connected with the PAD now you will do it on demand See paragraph 8 1 Tab Open new Tab Here you enter the desired address Set Bookmark for actual Webpage Bookmarks Open Menu Back Forward Refresh ...

Страница 34: ...oogle Account or Exchange account Import export contacts Import vCard files from the internal User memory Adding a new contact Tap screen to enter the options for adding a new Contact Then tap Done to save the contact Menu for settings user accounts import export or delete pats Edit current contact Sorting options for Contacts Search for Contacts New Contact ...

Страница 35: ...ccess the e mail function E Mail Sign up Please make sure you have all the necessary information from your email provider 1 Use the onscreen keyboard to use the e mail address and the corresponding password and tap Next ...

Страница 36: ...36 2 Select the input server such as POP3 Then enter to the menu for the outgoing server Make sure that you have the correct names provided for input and output servers ...

Страница 37: ...ation and tap Next to the complete e mail account settings Then tap Next to go to the settings page shown below 4 Tap Next after you enter the account name to access your e mails Open email Write and send email Account settings Refresh ...

Страница 38: ...vel Camera Settings General settings such as image quality Camcorder White Balance Adjusts for conditions Effect Choose a cool background effect Video quality HD 720p or SD 480p Time Lapse selection of the interval for the time lapse Zoom in out Photo options change activator Front or rear camera use Selection camcorder photo mode or panorama Play show ...

Страница 39: ... the current file for example via Bluetooth Tap to delete the current image Tap the menu for functions such details rotate crop to open etc The touch screen supports finger gestures to functions such as zoom in out and leaves can be performed Display mode Slideshow Options ...

Страница 40: ...hasize to the left Previous picture 9 3 Music To access your music Music Select the title you want to play Pause the title by tapping and go on by tapping Tap on to play the previous next track Change sorting Music playing By long tapping the title can be added to the playlist etc Shuffle Select a repeat mode Playback control Playlist back ...

Страница 41: ...lled on your PC These are available on the Microsoft website 11 Attachment 11 1 Troubleshooting How do I stop the PAD when the system is not responding Hold down the power button for about eight seconds to force a power off How do I check the PAD if it does not turn on 1 Connect the device to a power source if the battery power is low 2 Make sure that the charge indicator lights up and the adapter...

Страница 42: ...es to the idle state What to do when the camera is out of focus Check that the lens is clean and clean it if necessary with a soft cloth What to do if the SIM card can not be read only for 3G models Please turn off the device and insert the card again What to do if an error message about the Bluetooth connection appears Make sure that the time for entering the password hasn t been exceeded What to...

Страница 43: ...3 Megapixel SXGA CMOS Fixed Focus Rear 2 Megapixel QSXGA CMOS Autofocus WiFi WiFi 802 11 b g n Bluetooth Specification V2 1 EDR Audio Video Audio Stereo Video HD Output supports 1080 P Max Environmental conditions Operating 5 35 C Operating Humidity 35 85 Storage temperature 20 55 C Humidity in storage 20 93 Power supply Adapter AC 100 240 V DC 5 V 2 A Output maximum 10 W Battery Type integrated L...

Страница 44: ...eight Apprx 430 g Dimensions 215 mm x 158 mm x 9 8 mm Design and specifications are subject to change without notice The symbol means that the feature is optional Hotline 49 0 5 11 270 496 90 Adresse und Kontaktdaten First Service Center Kleine Düwelstr 21 DE 30171 Hannover Fax 49 0 5 11 161 25 36 support first servicecenter de www blaupunkt de ...

Отзывы: