background image

26

General Information

USING YOUR TV WITH A SKY DIGITAL SET TOP BOX

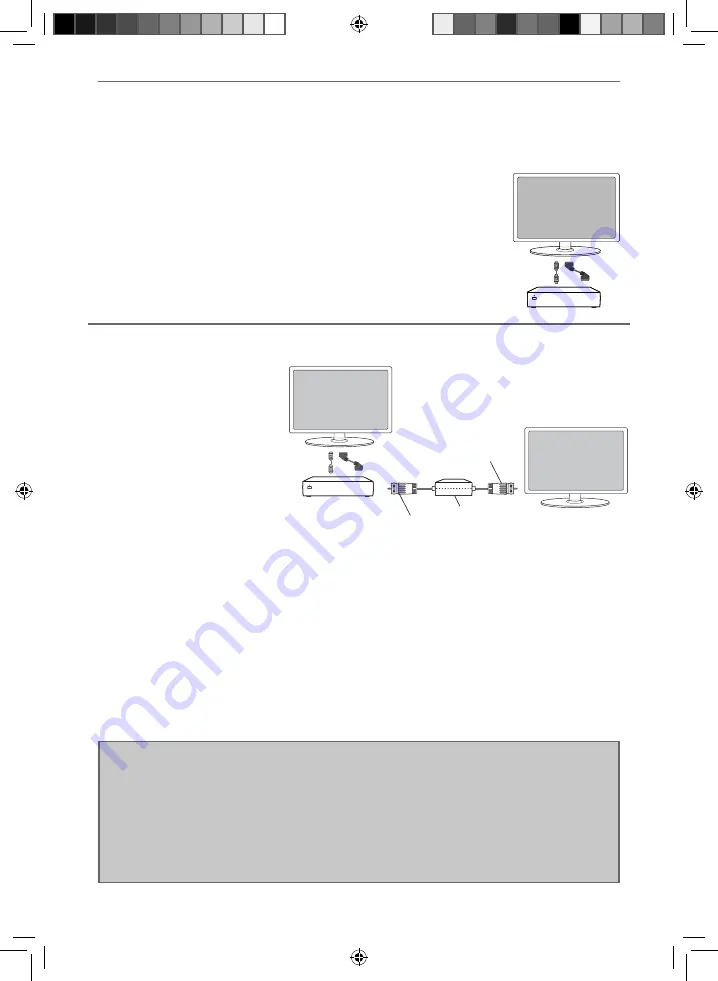
Option 1) Connecting your TV to your Sky box (when both the TV and Sky Box are located 
in the same room) 

Depending on your Sky Box & TV model, connect either by SCART or HDMI cables 
(available separately) 

If connecting by SCART, select the ‘Input source’ on the TV as SCART. 

If connecting by HDMI, select the ‘Input source’ on the TV as HDMI (if the TV has more 
than 1 HDMI port, ensure you select the input source to match the HDMI numbered port 
on the rear of the TV)

If you wish to use your Sky remote to operate the TV’s functions, you will need a Sky 
remote control (Revision 9 or later) and you will need to programme a 4 digit code into it.  
See bottom of this page. 

Option 2) Connecting your TV to your Sky box (when your Sky box is located in a different 
room to the TV) 

Please note, if you are adding a ‘Magic 
Eye/TV Link’ to your system so that 
you can use your Sky remote control 
to change the Sky channel in the room 
where the 2nd TV is located, please 
refer to the instructions included 
with the TV link/magic eye in order to 
ensure the RF or RF2 output on your 
Sky box is powered on. (The red LED 
light on the TV link/magic eye will light 
up if the RF / RF2 output is correctly set 
up)  If you do not have the instructions 
that came with the TV link/magic eye, 
instructions on how to do it can be 
found on our web site. 

1) To tune the TV to the Sky box, on the 2nd TV, select the ‘Analogue’ input source. 
2) Select the channel that you wish to store the Sky box/channel on. (If you do not use channels 1-5 because you 
no longer have analogue terrestrial channels after digital switchover, you may choose to select channel 1 to store 
the Sky box/channel, if you still have and use analogue channels 1-5, you may for example decide that channel 6 is 
the best option for you)  
3) Press the corresponding number on the remote control to select the desired analogue channel chosen as per 
point 2 above. 
4) On the TV remote control, press Menu. Now navigate through the menus to select Manual Tuning or Analogue 
Manual tuning (refer to the Tuning/Channel menu section of this user guide if necessary) 
5) Manually tune in the channel (usually, the Sky box is at a frequency between 800Mhz and 850Mhz) once the 
Sky box/channel is found, press ‘OK’ to store it. 

If you wish to use your Sky remote to operate the TV’s functions, you will need a Sky remote control (Revision 9 or 
later) and you will need to programme a 4 digit code into it.  See below. 

Sky Box

SCART 
or HDMI 
cable

RF/COAX cable from 
Sky Box to 2nd TV

Connect to RF 
or RF2 output 
on the Sky box

Connect to the 
Aerial/RF input 
on the 2nd TV

TV Link/Magic Eye 
(optional)

2nd TV in 
another room

Sky Box

SCART 
or HDMI 
cable

Using a Sky Remote or a Universal Remote to operate your TV 

Sky Remote Control

 - If you wish to use your Sky remote to operate the basic functions of your TV, you need to 

programme a 4 digit code into it. Please note - you will need the latest Sky Revision 9 remote control as this is 
the only version that includes the latest software/fi rmware necessary to operate this model of TV.


The code required for this television is 2134.

 If you wish to upgrade/replace your existing Sky remote control to 

the latest version, you can do so on our web site.  

Universal Remote Control

 - If you wish to use a Universal remote control to operate your TV, please refer to the 

website for a full list of codes.  (Please note we only have codes for One for All branded remote controls, if you 
have an alternative brand of Universal remote, please refer to the manufacturer for the code.)

User Guide -BLA-MAN-0172 215-189J-GB-EU-UK 236-189J-GB-EU-UK.indd   Sec1:26

User Guide -BLA-MAN-0172 215-189J-GB-EU-UK 236-189J-GB-EU-UK.indd   Sec1:26

11/21/2013   1:36:51 PM

11/21/2013   1:36:51 PM

Содержание 215/189J-GB-4B-FHKDUP-EU

Страница 1: ...215 189J GB 4B FHKDUP EU 236 189J GB 4B HKUP EU 236 189J GB 4B HKDUP EU 215 189J GB 4B FHKUP UK 215 189J GB 4B FHKDUP UK 236 189J GB 4B HKUP UK 236 189J GB 4B HKDUP UK LED TV with Freeview USB Media Player Model No User Guide ...

Страница 2: ...cause magnetic or radio interference with the television If interference is apparent move the device causing the interference away from the television To disconnect the apparatus from the mains please use the switch located on the underside rear of the TV The switch shall remain readily operable When installing on a wall ensure the TV is at least 5cm from the wall for ventilation Maintenance To cl...

Страница 3: ...cycle more co uk or in store for details ROI Waste electrical products should not be disposed of with household waste Separate disposal facilities exist Check with your Local Authority or retailer for recycling advice Batteries Do not expose batteries to high temperatures excessive heat prolonged sunshine or fire as this may cause leakage explosion or ignition Observe the correct polarity when inse...

Страница 4: ...5 Picture Menu 16 Sound Menu 17 Time Menu 18 Lock Menu 19 Setup Menu 20 21 DVD Menu 22 7 Day TV Guide 23 USB Record Digital Freeview 24 USB Mode Media Player 25 General Information 26 28 Using your TV with a Sky digital set top box 26 Frequently Asked Questions 27 Technical Specifications 28 User Guide BLA MAN 0172 215 189J GB EU UK 236 189J GB EU UK indd Sec1 7 User Guide BLA MAN 0172 215 189J GB ...

Страница 5: ...ty service repair is in it s original box packaging WHAT IS INCLUDED IN THE BOX 1 x User Guide 1 x Quick Start Guide 2 x AAA Batteries 1 x TV 1 x Remote Control User Guide Quick Start Guide 1 x RF Cable Accessories Included with this TV are the following accessories 1 x Stand plus screws User Guide BLA MAN 0172 215 189J GB EU UK 236 189J GB EU UK indd Sec1 8 User Guide BLA MAN 0172 215 189J GB EU ...

Страница 6: ...f the TV set a fig 2 Secure the neck to the TV by using the 4 x M4x10 M4x8 screws provided fig 3 Insert the TV into the stand at 45 degrees d Twist the TV into the CLOSE position until it clicks into place e fig 2 fig 1 fig 3 4 x M4x10 M4x8 User Guide BLA MAN 0172 215 189J GB EU UK 236 189J GB EU UK indd Sec1 9 User Guide BLA MAN 0172 215 189J GB EU UK 236 189J GB EU UK indd Sec1 9 11 21 2013 1 36 40 P...

Страница 7: ...TV s screen is face on See fig 1 and 2 Important If wall mounting this TV only use the screws already provided in the wall mounting holes Using other screws which are longer could cause irreparable damage to internal parts TV Viewing angle Viewing angle INCORRECT CORRECT Attaching Detaching the stand and wall mounting Detaching the stand Remove the screws highlighted then remove the stand base and ...

Страница 8: ...emote control 1 Press SOURCE The source menu will appear 2 Press or to select the input you require 3 Press OK B Using the buttons on the Television 1 Press SOURCE 2 Scroll up down using CH CH buttons to the input source you require 3 Press Vol to change input source to the one selected 1 2 3 4 5 6 7 Example of Source menu depending on the TV model User Guide BLA MAN 0172 215 189J GB EU UK 236 189...

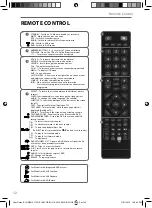
Страница 9: ...o change the audio language if available SUBTITLE To switch the dialogue at the bottom of the screen on off TEXT To enter exit Teletext Analogue TV TEXT HOLD Teletext mode Hold current page which is displayed Analogue TV DISPLAY To switch off the screen when listening to radio TEXT DVD ZOOM Zoom function for Teletext and DVD DVD MENU RECORD Access the DVD root menu and USB record function To resta...

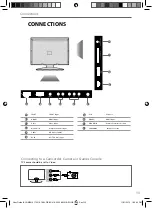
Страница 10: ...bPr HD input Ypbpr RF IN RF TV Aerial Input USB USB port HDMI 2 HDMI input CI CARD IN Common Interface module EARPHONE Earphone Socket A B C D E F G J H I I VIDE O R L Y P b P r US B C I C A R D IN E A R P HO NE A B C D E F G H I J User Guide BLA MAN 0172 215 189J GB EU UK 236 189J GB EU UK indd Sec1 13 User Guide BLA MAN 0172 215 189J GB EU UK 236 189J GB EU UK indd Sec1 13 11 21 2013 1 36 45 PM ...

Страница 11: ... picture and by phono cable for sound TV Source should be set to Component Connecting to a device with SCART output TV Source should be set to SCART Connecting to a device with HDMI output A HDMI cable can output both video and audio and enables you to enjoy digital quality video and audio with minimal loss of quality TV Source should be set to the corresponding HDMI port HDMI 1 HDMI 2 etc SCART O...

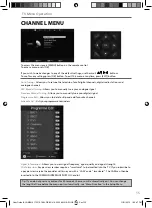
Страница 12: ...nders Signal Information Allows you to view signal frequency signal quality and signal strength CI Information Pay per view services require a smartcard to be inserted into the TV If you subscribe to a pay per view service the provider will issue you with a CAM and a smartcard The CAM can then be inserted into the COMMON INTERFACE PORT CI Card In To access this menu press MENU button on the remote...

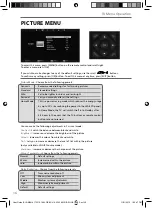
Страница 13: ... the level of tint within the picture only available in VGA PC source mode Sharpness Increase or decrease the sharpness of the picture Noise Reduction Choose from the following presets Off Turns noise reduction off Low Minor system adjustment Middle Medium system adjustments High Maximum system adjustments Default Default settings Colour Temperature Choose from the following presets Normal Default...

Страница 14: ...sonal is selected Off To turn off Digital Output Auto Selects the best settings automatically PCM Select this option if you are connecting to a Stereo Hi fi via coax cable Pulse code modulation PCM is a digital representation of an analogue signal AD Switch This allows the user to turn AD Audio Description on or off Audio Description is a service available on certain programmes It provides a descri...

Страница 15: ...10min 20min 30min 60min 90min 120min 180min 240min Auto standby Set Auto standby between 3 hours 4 hours and 5 hours to turn off this function you must exit eco home mode in the Picture Menu OSD Timer Lets you adjust the amount of time the On Screen Menu stays on the screen before disappearing To access this menu press MENU button on the remote control and scroll right To enter a menu press OK If ...

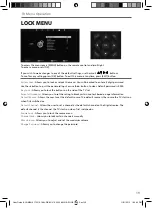
Страница 16: ...t channel on the Digital source The default channel is the channel the TV starts on when first switched on Source Lock Allows you to lock the source menu Channel Lock Allows you to lock certain channels manually Max Volume Allows you to adjust and set the maximum volume Change Password Allows you to change the password To access this menu press MENU button on the remote control and scroll right To ...

Страница 17: ...p bottom and or sides Zoom Original 16 9 The picture is the correct proportion but zoomed in to fill the screen Will display the picture from the broadcaster without any change Stretch 4 3 Displays the 14 9 picture in the correct proportion As a result side bars are shown on the screen Displays the 4 3 picture in its original size Side bars are shown to fill the 16 9 screen Fills the screen with a r...

Страница 18: ...peration of the television available to download This menu lets you install the new software firmware onto the television Further details of how to do this will be issued with the firmware Contact the helpline or refer to the product support section of the website To access this menu press MENU button on the remote control and scroll right To enter a menu press OK If you wish to make changes to any ...

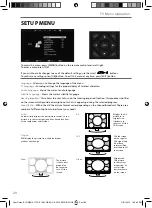
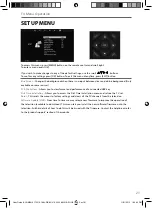
Страница 19: ...rence between the maximum and minimum volume Off Set dynamic range to off Dual Mono Choose from the following options Stereo Outputs 2 channels of sound both left and right Mono L Outputs left side sound Mono R Outputs right side sound Mix Mono Outputs a single channel of sound but mix between right and left Tip This TV DVD player is pre set to play Region 2 DVDs In the event you wish to use the T...

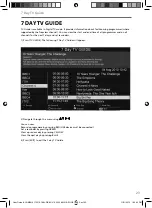
Страница 20: ...ng 7 Day TV Guide will appear 2 Navigate through the menu using You can now Record a programme by pressing RED USB device must be connected Set a reminder by pressing GREEN View a previous day by pressing YELLOW View the next day by pressing BLUE 3 Press EXIT to exit the 7 day TV Guide 7 Day TV Guide EXIT User Guide BLA MAN 0172 215 189J GB EU UK 236 189J GB EU UK indd Sec1 23 User Guide BLA MAN 0...

Страница 21: ...ish to use a USB portable hard drive larger than 32GB please refer to the FAQ section at the rear of this user guide Tip When you switch the TV to standby or change channel the Time Shift memory is wiped To restart time shift you must press play pause button Tip This television contains one TV tuner therefore it can only record the channel you are watching or record one channel while the televisio...

Страница 22: ...nt types of content that you have saved on your USB Memory Stick On switching to USB source the above menu screen will appear The content will be divided into Photo Music Movie and Text based on file type USB MODE MEDIA PLAYER Tip If you experience a playback issue please ensure the files being used are the correct format example the picture plays but no sound See technical specification page for com...

Страница 23: ... that channel 6 is the best option for you 3 Press the corresponding number on the remote control to select the desired analogue channel chosen as per point 2 above 4 On the TV remote control press Menu Now navigate through the menus to select Manual Tuning or Analogue Manual tuning refer to the Tuning Channel menu section of this user guide if necessary 5 Manually tune in the channel usually the ...

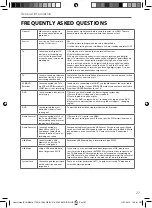
Страница 24: ... Ensure the disc is clean and is not scratched 3 Some copied discs will not play 4 Check the DVD is a region 2 disc to change the region of the DVD player refer to www umc uk co uk select product support changing region DVD I have pressed the eject button but the disc is not coming out To eject the disc hold the stop eject button for 4 seconds Game Consoles I have connected my PS3 to the TV via HD...

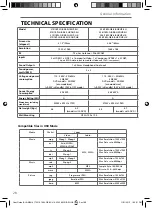
Страница 25: ...e diagonal 21 5 55cm 23 6 60cm Resolution 1920 x 1080 1366 x 768 RF 75 ohm Antenna PAL SECAM Inputs 2 x HDMI 1 x USB 1 x Composite Video 1 x Component YPbPr 1 x SCART 1 x pair RCA Audio input shared for Video and YPbPr component Sound Outputs 1 x 3 5mm Headphone Audio out Sound power watts RMS 2 x 3 Voltage and power consumption 110 240V 50 60Hz 20 40W DVD models 20 50W ecomode max 0 5W inStandBy ...

Страница 26: ...iczova 7104 14 811 07 Bratislava 1 Slovakia Assembled in Europe User Guide BLA MAN 0172 215 189J GB EU UK 236 189J GB EU UK indd Sec1 30 User Guide BLA MAN 0172 215 189J GB EU UK 236 189J GB EU UK indd Sec1 30 11 21 2013 1 36 51 PM 11 21 2013 1 36 51 PM ...

Отзывы: