background image

Page 8 


10.


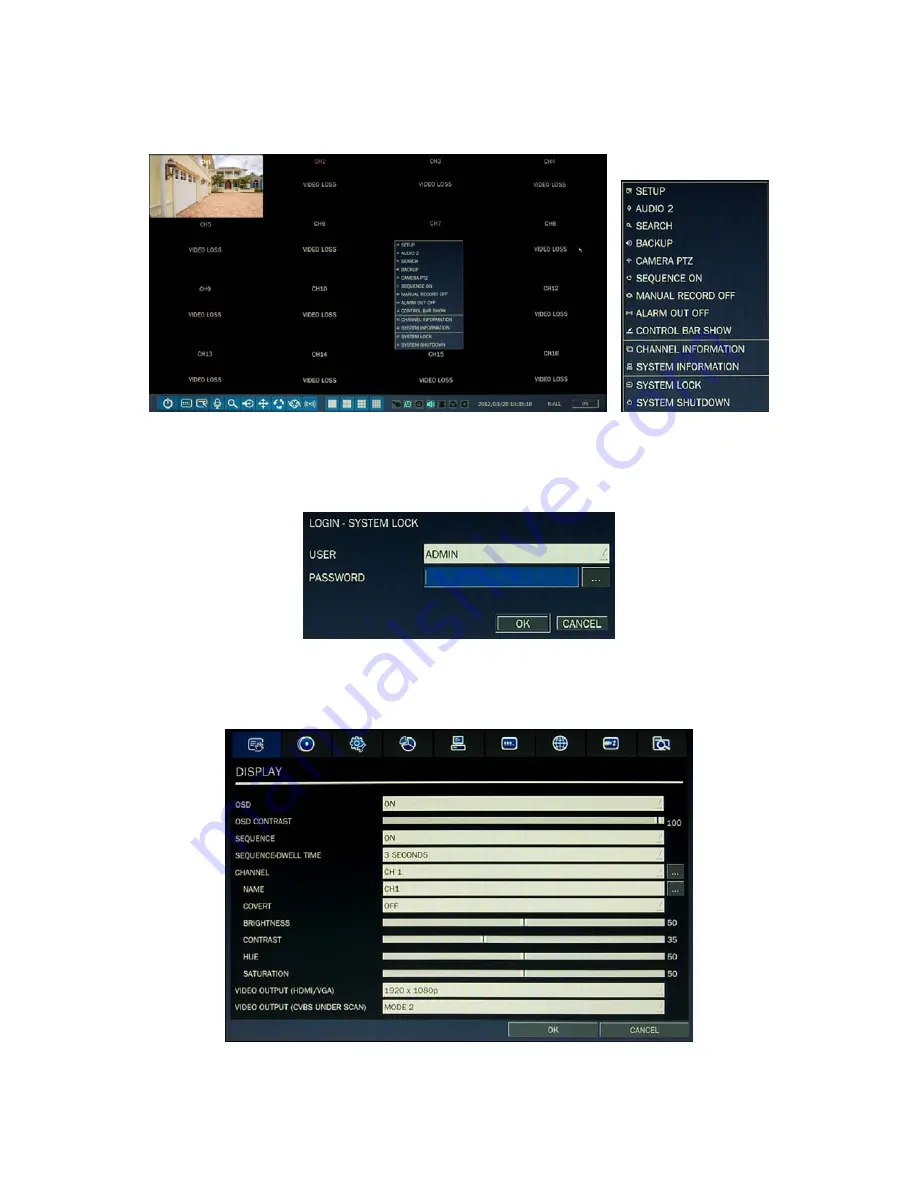
When the main screen opens, you should see a video image from each camera. Use this image to refine the manual 
settings of the camera. These settings include the camera direction, and may include focus, zoom, and other settings.   

11.


Right click the mouse anywhere on the DVR screen then click SETUP, or press the SETUP button on the front panel to 
access the SETUP menu.   


If a LOGIN window opens, click the virtual keyboard button (at the right of the password entry field) to open the 
keyboard window. Use the keyboard to click in the default 

ADMIN

 password, “

1111

”, then click 

OK

. In the LOGIN 

window, click 

OK

 again to open the DVR 

SETUP

 menus.   


12.


Configure the SETUP menus to customize the DVR settings for your system. Refer to the user manual included on the 
CD for more information about DVR Setup and system configuration settings.   


Содержание BLK-DH200400DHDVD

Страница 1: ...LK DH200400DHDVD BLK DH200800DHDVD BLK DH201600DHDVD PLEASE READ THIS GUIDE BEFORE USING YOUR RECORDER and always follow the instructions for safety and proper use Save this guide for future reference...

Страница 2: ...ed Single channel 2x 4x 8x 16x 32x Multiple channels 4 channels 4 channels 4 channels Search mode Timeline Event Archive Log Storage HDD Interface type Serial ATA I Capacity of 1 HDD 2TB Internal HDD...

Страница 3: ...g 6 2 kg Dimension w x h x d 15 0 x 13 4 x 2 83 380 mm x 340 mm x 72 mm Specifications and exterior design are subject to change without notice Product Components The package contains the DVR unit and...

Страница 4: ...l 4 channels SINGLE Highlighted channel only MIX Mix all 4 channels 4 Jump step backward In playback mode the playback position moves 60 seconds backward 5 In playback mode press to fast forward the r...

Страница 5: ...to ch ering password ove down the me assword ect desired menu mporary storage napshot image o rive first connec en or close the d eo insert a CD R number is set i ecording 6 or to enter DV e the playb...

Страница 6: ...10 RS 11 DC el DHDVD DVR DHDVD DVR DHDVD DVR Connectors m oling fan deo input vide dio Input DMI video outpu 232C terminal A output ATA port twork RS 45 Et B port 485 PTZ senso 12V Power Inp s eo out...

Страница 7: ...to the DVR at this time Plug the USB mouse to the USB port on the DVR Connect a monitor to the VGA connector on the back of the DVR 5 Connect the video extension cable from each camera to a video port...

Страница 8: ...SETUP button on the front panel to access the SETUP menu If a LOGIN window opens click the virtual keyboard button at the right of the password entry field to open the keyboard window Use the keyboar...

Страница 9: ...le 10BASE T 100BASE TX CAT 5 LAN cable Smartphone Access When your DVR is configured for access across the Internet you can remotely monitor and control you video security using the free smartphone ap...

Отзывы: