background image

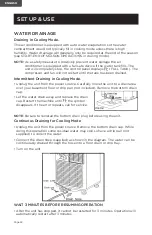
WATER DRAINAGE 

Draining in Cooling Mode.

This air conditioner is equipped with auto water evaporation so the water 

compartment would not typically fill in cooling mode unless there is high 

humidity. Water drainage will generally only be required at the end of the season 

(see START-END OF SEASON OPERATIONS in cooling mode.)

NOTE:

  As a safety measure to positively prevent water spillage the air 

conditioner is equipped with a fail safe device if the water tank fills. The 

unit will completely stop, the control panel displays 

 (FULL TANK). The 

compressor and fan will not restart until the tank has been drained.

Intermittent Draining in Cooling Mode.

•  Unplug the unit from the power source. Carefully move the unit to a drain area 

over your basement floor or drip pan (not included). Remove the bottom drain 

cap. 

•  Let the water drain away and replace the drain 

cap. Restart the machine until 

 the symbol 

disappears. If the error repeats, call for service.

NOTE

: Be sure to reinstall the bottom drain plug before using the unit.

Continuous Draining for Cooling Mode

•  Unplug the unit from the power source. Remove the bottom drain cap. While 

doing this operation some residual water may spill so have a drip pan (not 
supplied) to collect the water. 

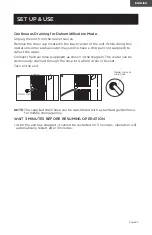
•  Connect the drain hose (supplied) as shown in the diagram. The water can be 

continuously drained through the hose into a floor drain or drip tray.

• Turn on the unit.

WAIT 3 MINUTES BEFORE RESUMING OPERATION

•  After the unit has stopped, it cannot be restarted for 3 minutes. Operation will 

automatically restart after 3 minutes. 

SET UP & USE

Page 22

ENGLISH

Содержание BPT05WTB

Страница 1: ...experience a problem with your BLACK DECKER purchase go to www blackanddecker com instantanswers If you can t find the answer or do not have access to the Internet call 844 299 0879 from 10 30 a m to...

Страница 2: ...e PRODUCT REGISTRATION CONTENTS SAFETY INFORMATION Important Safety Instructions 3 4 Grounding Instructions 5 LCDI Power Cord and Plug 6 Safety Guidelines 8 SET UP USE Parts Features 9 Specifications...

Страница 3: ...ere the atmosphere contains combustible gases or where the atmosphere is oily or sulphurous Avoid any chemical coming in contact with your air conditioner 9 Do not place any object on the top of the u...

Страница 4: ...battery to short leak fluid overheat or explode 10 Do not drop throw or expose the battery to extreme impact Doing so may cause the battery to leak fluid overheat or explode 11 Do not alter the shape...

Страница 5: ...ithout yellow stripes is the equipment grounding conductor If repair or replacement of the cord or plug is necessary do not connect the equipment grounding conductor to a live terminal Check with a qu...

Страница 6: ...power to the air conditioner on some units green light may turn off 4 Press the RESET button for use You will hear a click and the A C is ready for use 5 The power supply cord must be replaced if it f...

Страница 7: ...ll around the unit from walls furniture and curtains If the air conditioner is knocked over during use turn off the unit and unplug from the power supply immediately Do not operate your air conditione...

Страница 8: ...64 F 18 C 95 F 35 C DEHUMIDIFY 64 F 18 C 95 F 35 C OPERATING CONDITION The air conditioner must be operated within the temperature range indicated below NOTE Unit performance may be affected when in...

Страница 9: ...am Seal SET UP USE Locking Screw Drain Hose 3 3 feet long 0 5 inch diameter 2 pcs 1 pc Air Exhaust Hose Hose Outlet Hose Inlet Air Outlet Grill Handles Castors 4 Filter Air Exhaust Hose Housing Conden...

Страница 10: ...lled on smooth flat surfaces Use caution when rolling on carpet surfaces Do not attempt to roll the unit over objects The unit must be placed within reach of a properly rated grounded socket Never pla...

Страница 11: ...SEMENT WINDOW INSTALLATION 1 Cut the foam seal adhesive type to the proper length and attach it to the window sash 2 Attach the window slider kit to the window sash Adjust the length of the window sli...

Страница 12: ...hose Turn either clockwise or counterclockwise to secure Fig 1 2 Align arrow of hose outlet and hose Turn either clockwise or counterclockwise to secure Fig 2 3 Attach the hose inlet onto the back of...

Страница 13: ...off will appear Never turn the air conditioner off by unplugging from the outlet Always press the button then wait for a few minutes before unplugging This allows the appliance to perform a cycle of...

Страница 14: ...be indicated on the display The unit will have to be drained NOTE Refer to Water Drainage section FAN MODE Adjust fan speed by pressing the Fan Speed button as described for the cool mode The fan spee...

Страница 15: ...nger Do not attempt to recharge the batteries Both batteries should be replaced at the same time Do not dispose of the batteries in a fire as they man explode Point the remote control at the receiver...

Страница 16: ...r LOW fan speed FUNCTION BUTTON Access FOLLOW ME or TURBO functions TIMER BUTTON Used to set a delay start or shut down time SLEEP BUTTON Gradually increase the temperature in COOL mode C F SELECTOR B...

Страница 17: ...ng symbol will illuminate on the LED display to indicate which mode is selected COOL Select the target temperature 64 F 90 F 18 C 32 C by pressing the or buttons until the desired temperature is displ...

Страница 18: ...to Water Drainage section page 22 In this mode fan speed is selected automatically by the appliance and can not be set manually FAN Press the Fan Speed Button to select Low or High Speed FUNCTION BUTT...

Страница 19: ...er the remote is located This function can be activated from the remote control ONLY The remote control serves as a thermostat allowing for the precise temperature control at its location To activate...

Страница 20: ...LED screen To cancel the programmed start up press the button again or the button The symbol will not be illuminated on the LED screen PROGRAMMING SHUT DOWN With the appliance ON Press the button twic...

Страница 21: ...then you can select the unit of temperature from Fahrenheit or Celsius NOTE This will indicate an E momentarily when battery is installed It will automatically change to F and display Fahrenheit CHIL...

Страница 22: ...efully move the unit to a drain area over your basement floor or drip pan not included Remove the bottom drain cap Let the water drain away and replace the drain cap Restart the machine until the symb...

Страница 23: ...Connect the drain hose supplied as shown in the diagram The water can be continuously drained through the hose into a floor drain or bucket Turn on the unit NOTE The supplied drain hose can be substi...

Страница 24: ...nditioner working efficiently you should clean the evaporator filter every week of operation The filter is housed in the intake grill Use a vacuum cleaner to remove dust accumulations from the filter...

Страница 25: ...igerants safely in accordance with an industry recognized assessment specification WARNING Do not use means to accelerate the defrosting process or to clean other than those recommended by the manufac...

Страница 26: ...crease the set temperature E Clean the air filter F A mircoprocessor control delays the compressor from operating until 3 mins have passed Noisy or vibration A The surface is not level or not flat eno...

Страница 27: ...o repair or replace the house fuse reset the circuit breaker or correct the wiring in the house REPAIR OR REPLACEMENT AS PROVIDED UNDER THIS WARRANTY IS THE EXCLUSIVE REMEDY OF THE CUSTOMER BLACK DECK...

Страница 28: ...ts for a Class B digital device pursuant to Part 15 of the FCC rules These limits are designed to provide reasonable protection against harmful interference in a residential installation This equipmen...

Страница 29: ...un probl me avec votre achat BLACK DECKER allez sur www blackanddecker com instantanswers Si vous ne trouvez pas la r ponse ou n avez pas acc s l internet appelez au 844 299 0879 de 10 h 30 18 h 30 H...

Страница 30: ...I RES INFORMATION SUR LA S CURIT Consignes De S curit Importantes 31 32 Instructions De Mise La Terre 33 Cordon d Alimentation Et Prise DICF 34 Directives De S curit 35 CONFIGURATION ET UTILISATION Pi...

Страница 31: ...l atmosph re contient des gaz combustibles ou est huileux ou sulfureux vitez tout contact chimique avec votre climatiseur 9 Ne placez aucun objet sur le dessus de l unit 10 Ne jamais faire fonctionner...

Страница 32: ...ircuit une fuite de liquide une surchauffe ou une explosion de la pile 10 N chappez pas ne jetez pas et n exposez pas la pile des chocs extr mes Ceci pourrait provoquer une fuite de liquide une surcha...

Страница 33: ...s est le conducteur de mise la terre de l quipement Si la r paration ou le remplacement du cordon ou de la fiche est n cessaire ne connectez pas le conducteur de mise la terre de l quipement une borne...

Страница 34: ...n au climatiseur sur certaines unit s le voyant vert peut s teindre 4 Appuyez sur la touche RESET pour l utiliser Vous entendrez un clic et le climatiseur est pr t pour utilisation 5 Le cordon d alime...

Страница 35: ...le climatiseur est renvers pendant l utilisation teignez l appareil et d branchez de l alimentation imm diatement Ne faites pas fonctionner votre climatiseur dans une pi ce humide comme une salle de b...

Страница 36: ...Le climatiseur doit fonctionner dans la gamme de temp ratures indiqu e ci dessous REMARQUE Les performances de l unit peuvent tre affect es lorsqu elle est utilis e en dehors de ces temp ratures de f...

Страница 37: ...Drainer SET UP USE Page 37 FRAN AIS PI CES ET CARACT RISTIQUES Tuyau d chappement d Air T l commande Support de fen tre 2 vis de verrouillage Roulettes 4 Fiche Drain De Condensation Sortie De Tuyau En...

Страница 38: ...surfaces lisses et planes Soyez prudent quand vous roulez sur des surfaces de tapis N essayez pas de rouler l unit par dessus des objets L appareil doit tre plac port e d une prise de courant correcte...

Страница 39: ...OULISSANT INSTALLATION DE LA FEN TRE 1 Coupez le joint en mousse type adh sif la bonne longueur et attachez le au ch ssis de la fen tre 2 Fixez le kit de glissi re de fen tre au ch ssis de fen tre Aju...

Страница 40: ...le sens horaire ou antihoraire pour s curiser Fig 1 2 Alignez la fl che du tuyau de sortie et du tuyau Tournez dans le sens horaire ou antihoraire pour s curiser Fig 2 3 Fixez l entr e du tuyau l arr...

Страница 41: ...la prise lectrique d di e Deux lignes apparaissent sur l cran indiquant que l appareil est en veille Fig 6 Appuyez sur la touche jusqu ce que l appareil s allume La derni re fonction active quand il...

Страница 42: ...ARQUE Reportez vous la section Vidange de l Eau MODE VENTILATEUR R glez la vitesse du ventilateur en appuyant sur la touche Vitesse Du Ventilateur comme d crit pour le mode cool Dans ce mode le ventil...

Страница 43: ...utilis e pendant un mois ou plus N essayez pas de rechargez les piles Les deux piles doivent tre remplac es en m me temps Ne jetez pas les piles au feu car elles peuvent exploser Pointez la t l comma...

Страница 44: ...N Acc dez aux fonctions SUIVEZ MOI ou TURBO BOUTON MINUTERIE Utilis pour r gler un d lai de d marrage ou d arr t BOUTON VEILLE Augmentez progressivement la temp rature en mode COOL BOUTON S LECTION C...

Страница 45: ...ffichage DEL pour indiquer quel mode est s lectionn COOL S lectionnez la temp rature cible 64 F 90 F 18 C 32 C en appuyant sur ou jusqu ce que la temp rature souhait e s affiche sur l cran DEL Appuyez...

Страница 46: ...au d eau atteint un niveau pr d termin sera indiqu sur l cran L unit devra tre vidang e REMARQUE Reportez vous la section Vidange de l Eau la 22 Dans ce mode la vitesse du ventilateur est s lectionn e...

Страница 47: ...nde La t l commande contr le sert de thermostat permettant le contr le pr cis de la temp rature son emplacement Pour activer la fonction Follow Me pointez la t l commande vers l appareil et appuyez su...

Страница 48: ...tant sera affich sur l cran DEL Pour annuler le d marrage programm appuyez sur la touche nouveau ou la touche Le symbole ne sera pas allum sur l cran DEL PROGRAMMATION ARR T L appareil tant allum appu...

Страница 49: ...s lectionnez l unit de temp rature entre Fahrenheit ou Celsius REMARQUE Cela indiquera un E momentan ment quand la pile est install e Ce sera changer automatiquement en F et afficher Fahrenheit S CUR...

Страница 50: ...du plancher de votre sous sol ou un bac de vidange non inclus Retirez le bouchon de vidange inf rieur Laissez l eau s couler et remplacez le bouchon de vidange Red marrez la machine jusqu ce que le sy...

Страница 51: ...e vidange fourni comme indiqu sur le sch ma L eau peut tre continuellement vidang par le tuyau dans un drain de plancher ou seau Allumez l appareil REMARQUE Le tuyau de vidange fourni peut tre remplac...

Страница 52: ...ment vous devez nettoyer lle filtre de l vaporateur chaque semaine de fonctionnement Le filtre est log dans la grille d admission Utilisez un aspirateur pour liminer les accumulations de poussi re du...

Страница 53: ...ation d valuation reconnue par l industrie AVERTISSEMENT N utilisez pas de moyens pour acc l rer le processus de d givrage ou pour nettoyer autrement que ceux recommand s par le fabricant AVERTISSEMEN...

Страница 54: ...tement D Diminuez la temp rature r gl e E Nettoyez le filtre air F Une commande par microprocesseur retarde le fonctionnement du compresseur jusqu ce que 3 minutes se soient coul es Bruyant ou vibrati...

Страница 55: ...r parer ou remplacer le fusible de la maison r initialiser le disjoncteur ou corriger le c blage dans la maison LA R PARATION OU LE REMPLACEMENT TELS QUE PR VUS DANS LA PR SENTE GARANTIE SONT LE RECO...

Страница 56: ...ans une installation r sidentielle Cet quipement g n re utilise et peut mettre de l nergie radiofr quence et s il n est pas install et utilis conform ment aux instructions peut provoquer des interf re...

Страница 57: ...alg n problema con su producto de BLACK DECKER vaya a www blackanddecker com instantanswers Si no puede encontrar la respuesta a su pregunta o no tiene acceso a Internet llame al 844 299 0879 de 10 3...

Страница 58: ...N DE SEGURIDAD Instrucciones importantes de seguridad 59 60 Instrucciones de conexi n a tierra 61 Cable de alimentaci n y enchufe LCDI 62 Pautas de seguridad 63 CONFIGURACI N Y USO Partes y caracter...

Страница 59: ...acondicionado en cualquier zona donde la atm sfera contenga gases combustibles o donde la atm sfera sea oleosa o sulfurosa Evite que su aire acondicionado entre en contacto con cualquier qu mico 9 No...

Страница 60: ...r que la bater a pierda l quido se sobrecaliente o explote 10 No deje caer tire o exponga la pila a impactos extremos Hacerlo puede causar que la bater a pierda l quido se sobrecaliente o explote 11 N...

Страница 61: ...de puesta a tierra del equipo Si es necesario reparar o reemplazar el cable el ctrico o el enchufe no conecte el conductor de conexi n a tierra del equipo a un terminal activo Consulte con un electri...

Страница 62: ...a al aire acondicionado en algunas unidades la luz verde puede apagarse 4 Presione el bot n RESET para poder usar el aparato nuevamente Oir un clic y el aire acondicionado estar listo para usarse nuev...

Страница 63: ...do es derribado durante el uso ap guelo y desench felo de la alimentaci n el ctrica inmediatamente No opere su aire acondicionado en una habitaci n h meda como un ba o o un cuarto de lavado No toque l...

Страница 64: ...ionado debe ser operado dentro del rango de temperatura indicado a continuaci n NOTA El desempe o de la unidad puede verse afectado cuando se utilice fuera del rango de temperaturas de operaci n MODO...

Страница 65: ...renaje de humedad Carcasa de la manguera de evacuaci n de aire Drenaje de condensaci n Enchufe Panel de control Manquera de evacuaci n de aire Salida de la manguera Entrada de la manguera Control remo...

Страница 66: ...planas Tenga precauci n al moverlo sobre superficies alfombradas No intente mover la unidad sobre objetos La unidad debe ser colocada dentro del alcance de una toma de corriente debidamente conectada...

Страница 67: ...NSTALACI N EN VENTANA 1 Corte el sello de espuma tipo adhesivo a la longitud correcta y adj ntelo a la hoja de la ventana 2 Fije el kit de ventana a la hoja de la ventana Ajuste la longitud del kit de...

Страница 68: ...e la entrada de la manguera y la manguera Gire en sentido horario o antihorario para fijarlas Fig 1 2 Alinee la flecha de la salida de la manguera y la manguera Gire en sentido horario o antihorario p...

Страница 69: ...ENCENDER EL APARATO Ench felo en una toma de corriente dedicada Aparecer n dos l neas en la pantalla que indican que el aparato est en espera Fig 6 Presione el bot n hasta que el aparato se encienda...

Страница 70: ...eber ser drenada NOTA Consulte la secci n Drenaje de Agua MODO VENTILADOR Ajuste la velocidad del ventilador presionando el bot n Fan Speed como se describe para el Modo Enfriar En este modo no se pue...

Страница 71: ...e las pilas si el control remoto no ser usado durante un mes o m s No intente recargar las bater as Ambas bater as deben ser remplazadas a la misma vez No arroje las bater as al fuego ya que podr an e...

Страница 72: ...as funciones S GUEME o TURBO BOT N TIMER Se utiliza para establecer una hora de inicio o apagado diferido BOT N SLEEP Aumenta gradualmente la temperatura en el modo ENFRIAR BOT N SELECTOR DE C F Selec...

Страница 73: ...se iluminar en la pantalla LED para indicar qu modo est seleccionado ENFRIAR Seleccione la temperatura objetivo 64 F a 90 F 18 C a 32 C presionando los botones o hasta que se muestre la temperatura d...

Страница 74: ...el nivel del agua alcance un nivel predeterminado se indicar en la pantalla La unidad deber ser drenada NOTA Consulte la secci n Drenaje de Agua en la p gina 22 En este modo el aparato selecciona aut...

Страница 75: ...El control remoto sirve como un termostato que permite el control preciso de la temperatura en su ubicaci n Para activar la funci n S gueme apunte el control remoto hacia el aparato y presione e bot n...

Страница 76: ...la pantalla LED Para cancelar la puesta en marcha programada vuelva a pulsar el bot n o el bot n El s mbolo no se iluminar en la pantalla LED PROGRAMACI N DEL APAGADO Con el aparato ENCENDIDO presione...

Страница 77: ...dr escoger la unidad de temperatura entre Fahrenheit o Celsius NOTA Esto indicar una E moment neamente mientras la bater a se est instalando Cambiar autom ticamente a F y mostrar Fahrenheit BLOQUEO IN...

Страница 78: ...a de goteo no incluida Retire la tapa inferior del desag e Deje que el agua se drene y vuelva a colocar la tapa del desag e Reinicie el aparato hasta que el s mbolo desaparezca Si el error persiste ll...

Страница 79: ...a como se muestra en el diagrama El agua puede ser drenada de forma continua a trav s de la manguera a un desag e en el piso o un cubo Encienda la unidad NOTA La manguera de drenaje proporcionada se p...

Страница 80: ...ar el filtro del evaporador cada semana mientras est en uso El filtro est alojado en la rejilla de entrada Utilice una aspiradora para eliminar la acumulaci n de polvo del filtro Si est muy sucio sum...

Страница 81: ...a de acuerdo con una evaluaci n reconocida por la industria ADVERTENCIA No utilice medios para acelerar el proceso de descongelaci n o para la limpieza que no sean los recomendados por el fabricante A...

Страница 82: ...sminuya la temperatura configurada E Limpie el filtro de aire F Un control del microprocesador retrasa al compresor para que no funcione hasta que hayan pasado 3 minutos Ruido o vibraci n A La superfi...

Страница 83: ...u producto 13 Llamadas de servicio para reparar o reemplazar el fusible de la casa reiniciar el disyuntor o corregir el cableado de la casa LA REPARACI N O EL REMPLAZO COMO SE ESTABLECE EN ESTA GARANT...

Страница 84: ...ble contra interferencias perjudiciales en una instalaci n residencial Este equipo genera usa y puede irradiar energ a de radiofrecuencia y si no se instala y usa de acuerdo con las instrucciones pued...

Отзывы: