background image

BEFORE USE

1.  Remove all the packaging; take out the ice scoop and silicon plug.
2.    Place the appliance on a stable and flat surface. Keep the appliance away from 

heat sources and direct sunlight; keep it in a well-ventilated place and leave at 

least 20cm/8” space near the air inlet and outlet.

3.   Clean the appliance and its components (See “CLEANING AND MAINTENANCE”)

CAUTION:

  Do not use outdoors. Do not use the appliance in a too cold or too hot an 

environment. When the environment temperature is lower than 5˚C/41˚F 

or higher than 43˚C/109˚F, the appliance will have problems in making ice.

HOW TO USE

Do not use the appliance within 30 minutes after transportation. Switching on the 

power too early might cause damage to your ice maker.
1.   Take out the ice cube bucket. Pour potable water (only water conforming to 

drinking standards) into the water tank. Pay attention that the water line should 

never be beneath the “H-MIN” mark nor exceed the “H-MAX” mark. Place back the 

ice cube bucket once water has been poured.

2.   Put the plug into the power outlet. There is a beeping sound and the LCD display 

will light up. Now the appliance is ready for use.

3.   Press the “SELECT” button to choose the size of ice cube. Different sizes will take 

different amounts of time. The default size is Medium. 

S = Small (this will take approximately 9 minutes) 

M = Medium (this will take approximately 11 minutes) 

L = Large (this will take approximately 13 minutes)

4.   Press  the 

 button to start making ice. The LCD display will have the snow flake 

icon flashing to indicate the ice making process is on-going. You can press   at 

any time to stop the ice-making. The program will stop at once and you may find 

some incomplete ice cubes.

5.  After about 9-13 minutes (depending on the cube size), the first batch of 9 

ice cubes will drop into the ice cube bucket. You can also check through the 

transparent window on the top.

NOTE:

  The produced ice cubes in the bucket will  

melt gradually so please use the scoop to  

take out the ice cubes in timely fashion.  

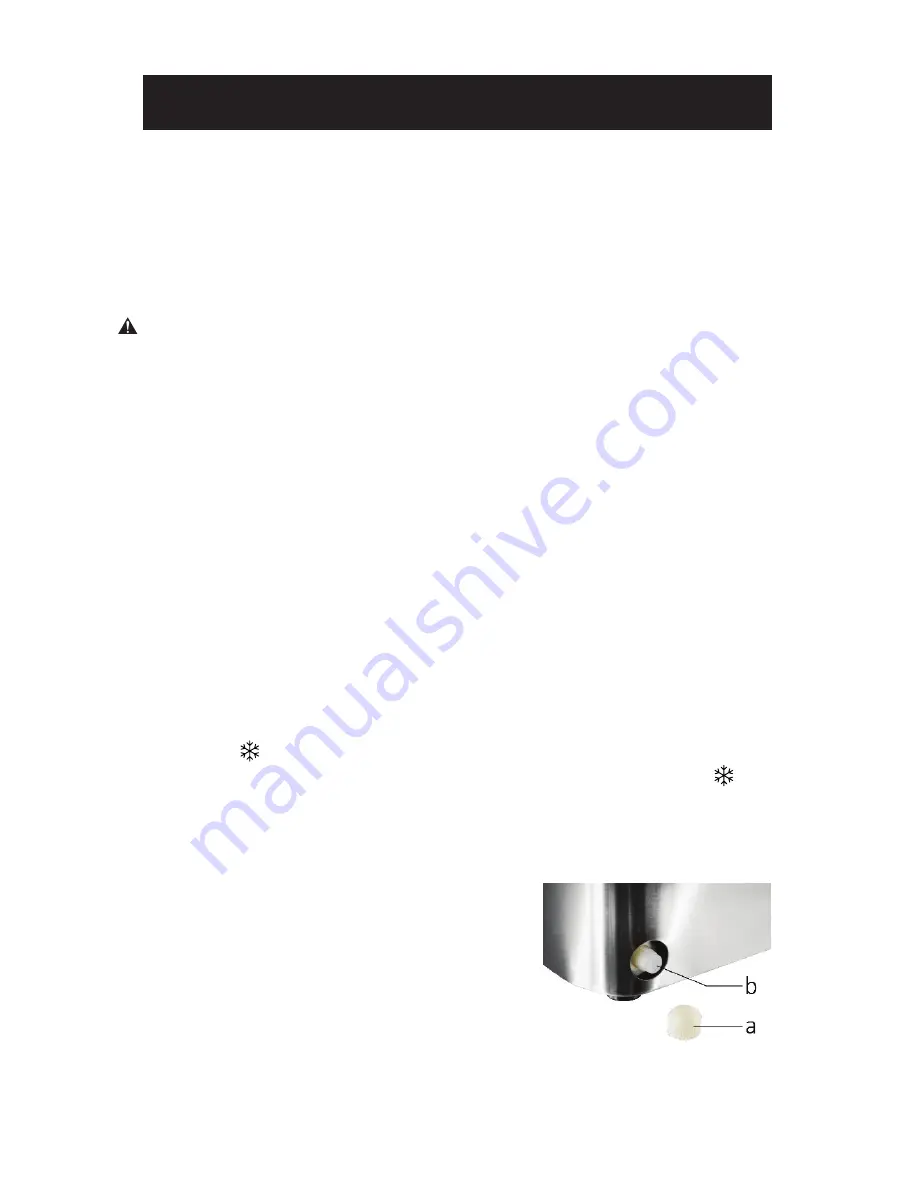
The melted water will be collected into the  

water tank. If you want to remove the leftover  

water in water tank, screw off the little cap  

(a) counterclockwise at the back of appliance  

and take out the silicon plug (b) replace cap when done.

Page 9

SET UP & USE

Содержание BIMY126S

Страница 1: ...experience a problem with your BLACK DECKER purchase go to www blackanddecker com instantanswers If you can t find the answer or do not have access to the Internet call 844 299 0879 from 10 30 a m to...

Страница 2: ...Page 2...

Страница 3: ...e your receipt to your manual You will need it to obtain warranty service Model number Serial number Date of purchase PRODUCT REGISTRATION CONTENTS SAFETY INFORMATION Important Safety Instructions 4 6...

Страница 4: ...ver carpeting or other heat insulators Do not cover the cord 6 Never turn the unit upside down or tilt more than 45 degrees If the unit has been resting on its side for a long period of time you must...

Страница 5: ...ppliance must be grounded In the event of an electrical short circuit grounding reduces risk of electric shock by providing an escape wire for the electric current The cord provided with this applianc...

Страница 6: ...exercised a The marked electrical rating of the cord set or extension cord must equal to or be greater than the electrical rating of the appliance The longer cord should be arranged so that it will no...

Страница 7: ...PARTS FEATURES SET UP USE 1 Transparent window 2 Lid 3 Operation panel 4 Air outlet 5 Air inlet 6 Power cord 7 Water drain outlet 8 Ice cube bucket 9 Evaporator 10 Ice making box 11 Water tank 12 Ice...

Страница 8: ...e cube size L M S 5 Malfunction indication 6 Large size ice cube 7 Medium size ice cube 8 Small size ice cube 9 Ice full indication 10 Low water indication 11 Ice making status indication flashing whe...

Страница 9: ...the power outlet There is a beeping sound and the LCD display will light up Now the appliance is ready for use 3 Press the SELECT button to choose the size of ice cube Different sizes will take differ...

Страница 10: ...s p when time numerals are still the presses will lead to the timer function selection NOTE This is a 24 hour type clock For example 8PM will show 20 00 Please keep this in mind when setting real time...

Страница 11: ...e appliance automatically changes to standby mode Step 2 1 Remove the little cap and silicon plug at back and drain off the water Then reinsert the plug and screw on the cap 2 Add fresh potable water...

Страница 12: ...Appliance Co Customer Satisfaction Center at 844 299 0879 or service appliance com DATED PROOF OF PURCHASE MODEL AND SERIAL REQUIRED FOR WARRANTY SERVICE CLEANING AND MAINTENANCE 1 Before cleaning and...

Страница 13: ...ing box is in an incorrect position 1 Check whether any foreign objects are stuck in the ice making box 2 Internal components may be damaged Professional maintenance is required Not making ice or not...

Страница 14: ...to repair or replace the house fuse reset the circuit breaker or correct the wiring in the house REPAIR OR REPLACEMENT AS PROVIDED UNDER THIS WARRANTY IS THE EXCLUSIVE REMEDY OF THE CUSTOMER W Applia...

Страница 15: ...Page 15...

Страница 16: ...are trademarks of The Black Decker Corporation used under license All rights reserved Product in this box may differ slightly from that pictured Does not affect function Not all accessories shown in...

Отзывы: