background image

3

• Includes non-spillable, maintenance-free, heavy-duty, sealed battery
• Rechargeable with either supplied 12 Volt DC Charging Adapter or built-in 120

Volt AC Charger

• Heavy duty, industrial grade copper clamps, and #6AWG jumper cables with

exclusive recessed cable holsters

• Requires no maintenance (other than recharging) for optimum operation
• Molded high-impact case is tough and durable

FRONT VIEW

BACK VIEW

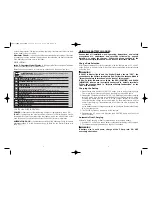
Controls and Indicators

FUNCTION BUTTONS (FROM LEFT TO RIGHT):

Battery Voltage — 

Displays the battery’s current voltage.

2/6/10 AMP (Charge Rate Selector)

— allows the user to select the charge rate

based on battery size. This selection and the actual battery charge rate are monitored

DIGITAL READOUT

CIRCULATING PATTERN

FAULT LED

INDICATOR

ALTERNATOR GOOD

LED INDICATOR

BATTERY VOLTAGE

LED INDICATOR

BATTERY

VOLTAGE

BUTTON

ALTERNATOR

CHECK BUTTON

POWER BUTTON

DIGITAL DISPLAY

2/6/10 AMP

BUTTON

GOOD/BAD POLARITY

CONNECTION INDICATORS

12 VOLT DC

OUTLET

BATTERY CHARGE

LEVEL BUTTON

BATTERY CHARGER

PANEL (BACK OF UNIT)

(SEE BELOW FOR DETAILS)

LED BATTERY STATUS

INDICATORS

AREA LIGHT

POWER

SLIDE

SWITCH

LED EMERGENCY

AREA LIGHT

120 VOLT AC

CHARGER

POSITIVE (+)

RED CLAMP

NEGATIVE (–)

RED CLAMP

2

Smart

Battery Charger

Smart

Battery Chargers feature 3-stage, high-efficiency charging technology, built-in

microprocessor control that ensures fast, safe and complete charging of serviceable
batteries.

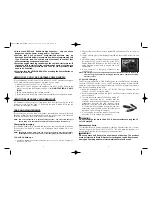
Stage One —

Rapid Start Charge at 10 amps delivers maximum charging

amperage to “wake up” any serviceable 12 volt battery and allows for quick engine
starting in just 8 minutes (based on a midsize vehicle battery at 50% charge level).
When battery reaches a maximum safe predetermined voltage, the charger will
automatically signal a "beep" and move into Stage 2 of the charging process.

Stage Two —

Absorption Charge maintains the maximum possible charge at a

constant, safe, predetermined voltage. During the phase, voltage absorption regulation
charge, the charging voltage remains constant, while the actual charging current is
reduced to allow for the maximum proper internal chemical energy transfer. At the end
of Stage 2, the charger will automatically move into Stage 3 charge mode.

Stage Three —

Top-Off Charge voltage is automatically maintained and reduced

to a predetermined level while current is adjusted for a safe, effective battery charge.
At the conclusion of Stage 3, the unit will BEEP signaling the completion of the
charging cycle.
The Automatic Float Charge feature is ideal for maintaining a battery. It automatically
“tops off” a battery as needed, to keep it fully charged all the time.

FEATURES

• Smart

Battery Charger with three charge rate settings, accessed by the Charge

Rate Selector 2A/6A/10A button:
a) 2 amps: smaller batteries, as in lawn mowers, snowmobiles, motorcycles, etc.
b) 6 amps: mid-sized batteries, as in small cars
c) 10 amps: automobile batteries and light trucks

• Digital Display shows charge rate, operating mode, fault codes and FUL when charged
• Alternator Check
• Automatic Float Charge
• Jump-Starts without the need of another vehicle
• Reverse polarity connection warning
• Easy-to-Read LED Battery Charge Level Indicators
• 12 Volt DC Outlet for powering and recharging accessories and appliances
• Ultra bright, long-life LED emergency area light

BEEP

BEEP

OFF BEEP

STAGE THREE

CHARGING

COMPLETE

STAGE ONE

STAGE TWO

VEC012BBD_ManualEN_020106  2/1/06  3:13 PM  Page 2

Содержание Start-It Jump 'n Charge VEC012BBD

Страница 1: ...comparable design The repaired or replaced unit will then be warranted under the terms of the remainder of the warranty period The customer is responsible for the shipping charges on all returned items During the warranty period manufacturer will be responsible for the return shipping charges to the customer in the United States LIMITATIONS This warranty does not cover accessories such as charging...

Страница 2: ...t clip to carburetor fuel lines or sheet metal body parts Connect to a heavy gauge metal part of the frame or engine block ii IMPORTANT SAFETY INSTRUCTIONS WARNINGS 1 RISK OF EXPLOSIVE GAS MIXTURES WORKING IN THE VICINITY OF A LEAD ACID BATTERY IS DANGEROUS BATTERIES GENERATE EXPLOSIVE GASES DURING NORMAL BATTERY OPERATION FOR THIS REASON IT IS OF UTMOST IMPORTANCE THAT EACH TIME BEFORE USING THIS...

Страница 3: ...ators 3 Using the Battery Charger 2 Charge Rate Selection 5 Charging the Battery 5 Automatic Float Charging 5 Alternator Check 5 Approximate Charging Times 6 Using the Jump Starter 7 Using the 12 Volt DC Power Supply 8 Estimated 12 Volt DC Operation Time 8 Using the Emergency LED Area Light 8 Care and Maintenance 8 Charging Recharging 8 Replacement Parts 9 Fuse Replacement 10 Battery Disposal 10 T...

Страница 4: ... vehicle battery at 50 charge level When battery reaches a maximum safe predetermined voltage the charger will automatically signal a beep and move into Stage 2 of the charging process Stage Two Absorption Charge maintains the maximum possible charge at a constant safe predetermined voltage During the phase voltage absorption regulation charge the charging voltage remains constant while the actual...

Страница 5: ...he charger will stop charging if the rate is too fast or too slow for the battery size or condition Alternator Check is a quick check that measures the battery voltage This check is repeated at various electrical load levels and the tests allow the user to determine if the alternator can keep up with the loads DIGITAL DISPLAY Large 3 Character Digital Display in the upper left of the control panel...

Страница 6: ...cedure This power system is to be used ONLY on vehicles or boats with 12 volt DC battery systems 6 Alternator Check Part 1 No Load Turn OFF all vehicle s accessories The battery must be fully charged before testing the alternator Run the engine long enough to achieve normal idle speed and verify there is a no load voltage 1 Press Alternator Check to start the check 2 Alternator Good LED will light...

Страница 7: ... before further use 8 Never touch RED and BLACK clamps together this can cause dangerous sparks power arcing and or explosion Vehicles that have on board computerized systems may be damaged if vehicle battery is jump started Before jump starting this type of vehicle read the vehicle owner s manual to confirm that external starting assistance is advised Excessive engine cranking can damage the vehi...

Страница 8: ...se with a same type and size fuse 8 amp 4 Replace the center pin and spring inside the plug 5 Replace the gold cap by turning clockwise onto the plug Battery Replacement It is recommended that the unit be returned to manufacturer for battery replacement Contact Customer Service toll free at 800 618 5178 Battery Disposal Contains a maintenance free sealed non spillable lead acid battery which must ...

Отзывы: