background image

8

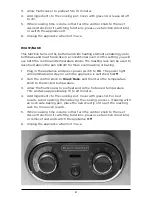
3.   Allow Multicooker to preheat 5 to 10 minutes. 

4.   Add ingredients to the cooking pot. Cover with glass lid or leave lid off 

to stir. 

5.   When cooking time is done, either turn the control knob to the next 

desired function (if switching functions, please see function directions), 
or switch the appliance off.

6.  Unplug the appliance when not in use. 

ROAST/BAKE

This function turns on the bottom and side heating elements, enabling you to 
both bake and roast foods like in a conventional oven. On this setting, you will 
use both the control and temperature knobs. The roasting rack can be used to 
raise food above the pan bottom for more even roasting or baking. 

1.   Plug in the appliance and press power switch to 

On

. The power light 

will illuminate and stay on until the appliance is switched to 

Off

2.   Turn the control knob to 

Roast

/

Bake

, and then turn the temperature 

knob to the desired temperature.

3.   Allow the Multicooker to preheat and come to desired temperature. 

This will take approximately 15 to 20 minutes. 

4.   Add ingredients to the cooking pot. Cover with glass lid. For best 

results, avoid opening the lid during the cooking process. If baking with 
an oven safe baking pan, place the pan directly on top of the roasting 
rack for more even results. 

5.   When cooking time is done, either turn the control knob to the next 

desired function (if switching functions, please see function directions), 
or remove food and switch the appliance 

Off

.

6.  Unplug the appliance when not in use. 

Содержание MC1100R

Страница 1: ...TM MULTICOOKER use and care manual MC1100S MC1100R ...

Страница 2: ... llame a nuestra línea de servicio al cliente una atención inmediata 1 800 231 9786 EE UU Canadá 01 800 714 2503 México No devuela a la tienda Si vous avez des questions ou des préoccupations à propos de votre nouveau produit veuillez communiquer avec notre Service à la clientèle au 1 800 231 9786 États Unis et Canada Veuillez ne pas rapporter le produit au magasin Thank you for your purchase Grac...

Страница 3: ... Cleaning 9 Helpful Hints and Tips 10 Troubleshooting 13 Recipes 14 Warranty and Customer Service Information 18 WELCOME Congratulations on your purchase of the Black Decker Multicooker We have developed this use and care guide to ensure optimal performance and your satisfaction Save this use and care book and register your appliance online at www prodprotect com applica ...

Страница 4: ...f the appliance is covered or touching flammable materials including curtains draperies walls and the like when in operation Do not store any item on top of the appliance while in operation Do not store any materials other than the manufacturer s recommended accessories in this appliance when not in use Do not place any of the following materials in the appliance paper cardboard plastic and other ...

Страница 5: ...t to modify the plug in any way TAMPER RESISTANT SCREW Warning This appliance is equipped with a tamper resistant screw to prevent removal of the outer cover To reduce the risk of fire or electric shock do not attempt to remove the outer cover There are no user serviceable parts inside Repair should be done only by authorized service personnel ELECTRICAL CORD Note If the power cord is damaged plea...

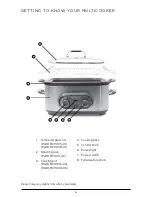
Страница 6: ...ETTING TO KNOW YOUR MULTICOOKER 1 Tempered glass lid Part MC1100S 01 Part MC1100R 01 2 Roasting rack Part MC1100 02 3 Cooking pot Part MC1100S 03 Part MC1100R 03 4 Cooking base 5 Control knob 6 Power light 7 Power switch 8 Temperature knob 1 2 3 4 5 8 7 6 ...

Страница 7: ...ong the Multicooker has been off discard the food During first few minutes of use you may notice smoke and a slight odor This is caused by oil that may have been used during manufacturing of the unit and will not impact the performance Do not cut foods directly in the cooking pot and do not use metal utensils in this appliance both actions could scratch the ceramic coating OPERATING YOUR MULTICOOK...

Страница 8: ... roasting or baking 1 Plug in the appliance and press power switch to On The power light will illuminate and stay on until the appliance is switched to Off 2 Turn the control knob to Roast Bake and then turn the temperature knob to the desired temperature 3 Allow the Multicooker to preheat and come to desired temperature This will take approximately 15 to 20 minutes 4 Add ingredients to the cookin...

Страница 9: ...ns NOTE Do not hold foods on Warm for more than 4 hours 6 When ready to serve press the power switch to Off The power light will turn off 7 Unplug the appliance when not in use WARM This function turns on only the side heating elements enabling you to use the appliance like a traditional slow cooker Please reference the Slow Cook section for additional instructions On this setting you will only ne...

Страница 10: ...gravy can also add a bolder flavor Always roast with lid on Open the lid as little as possible to ensure even cooking and to keep heat from escaping Foil roasting bags can be used but plastic roasting bags are not recommended Using a meat thermometer can help significantly improve results you will want to remove the meat or poultry from the roaster when the reading is 5 to 10 degrees Fahrenheit be...

Страница 11: ...n Low Warm Only used for keeping cooked foods at a food safe serving temperature 135 F and should not be used to cook foods It is not recommended to use warm for more than 4 hours Always hold foods at this setting with the lid on To save time fill the cooking pot the night before Cover and refrigerate You may need to add some extra cooking time because the food and cooking pot will be cold To save...

Страница 12: ...r fattier meat to keep the meat above the drippings Browning before cooking on the slow cooker settings is not necessary However lightly coating meat with flour and browning it gives more body and flavor to sauces This works for ground meat as well Make sure the top of the meat does not touch the lid Cooking times will vary depending upon the size and cut of the meat Meat with bone in will take lo...

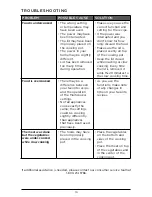
Страница 13: ... time the lid is removed it adds 15 20 minutes to the slow cooking time Food is overcooked There may be a difference between your favorite recipe and the operation of the Multicooker settings Not all appliances cook exactly the same the settings could be cooking slightly differently than appliances that have been used previously As you use the functions make note of any changes in time on your fav...

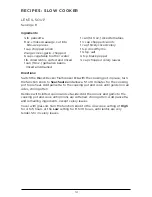
Страница 14: ...rections Switch the Black Decker Multicooker On with the cooking pot in place turn the function knob to Sear Sauté and allow a 5 to 10 minutes for the cooking pot to preheat Add pancetta to the cooking pot and cook until golden on all sides stirring often Remove with slotted spoon and set aside Add the onions and garlic to the cooking pot and cook until onions are softened stirring often Add pance...

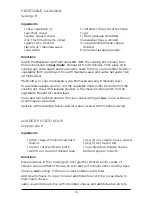
Страница 15: ...f the vegetable mixture into the bottom of the cooking pot Top with 4 lasagna noodles the cheese mixture and 1 3 of the vegetables Repeat for second layer Cover and turn function knob to the slow cooker setting of Low Cook 4 6 hours or until liquid is absorbed Sprinkle with remaining cheeses and let stand covered 10 min before serving LOADED POTATO SOUP Servings 6 to 8 Ingredients 1 30oz bag of fr...

Страница 16: ...ooker setting of Low and cook for 8 hours or until beef is tender SHREDDED PORK SANDWICHES Servings 12 Ingredients 2 large Vidalia onions sliced 3 lb fresh pork butt or loin tsp salt tsp coarse black pepper 1 cup barbecue sauce 1 cup beef broth cup honey cup fresh lime juice cup spicy brown mustard 2 Tbsp tomato paste Hamburger buns Cole slaw Directions Place onions in bottom of the Multicooker co...

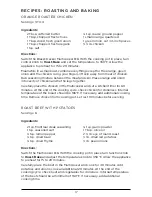
Страница 17: ...e Multicooker and set a kitchen timer for 60 minutes At the end of the cooking cycle check chicken for doneness Internal temperature of the breast should be 165 F If necessary add additional cooking time Remove chicken from cooking pot Let rest 10 minutes before serving ROAST BEEF WITH POTATOES Servings 6 Ingredients 2 tsp Montreal steak seasoning 1 tsp seasoned salt tsp lemon pepper tsp dried bas...

Страница 18: ...ow do you get service Save your receipt as proof of date of sale Visit the online service website at www prodprotect com applica or call toll free 1 800 231 9786 for general warranty service If you need parts or accessories please call 1 800 738 0245 What does your warranty not cover Damage from commercial use Damage from misuse abuse or neglect Products that have been modified in any way Products...

Страница 19: ... Made and printed in People s Republic of China T22 5001927 BLACK DECKER and the BLACK DECKER Logo are registered trademarks of The Black Decker Corporation or one of its affiliates and used under license ...

Страница 20: ...20 www BlackAndDeckerAppliances com 2015 The Black Decker Corporation and Spectrum Brands Inc Middleton WI 53562 12262 00 ...

Отзывы: