Page 8
SET UP & USE
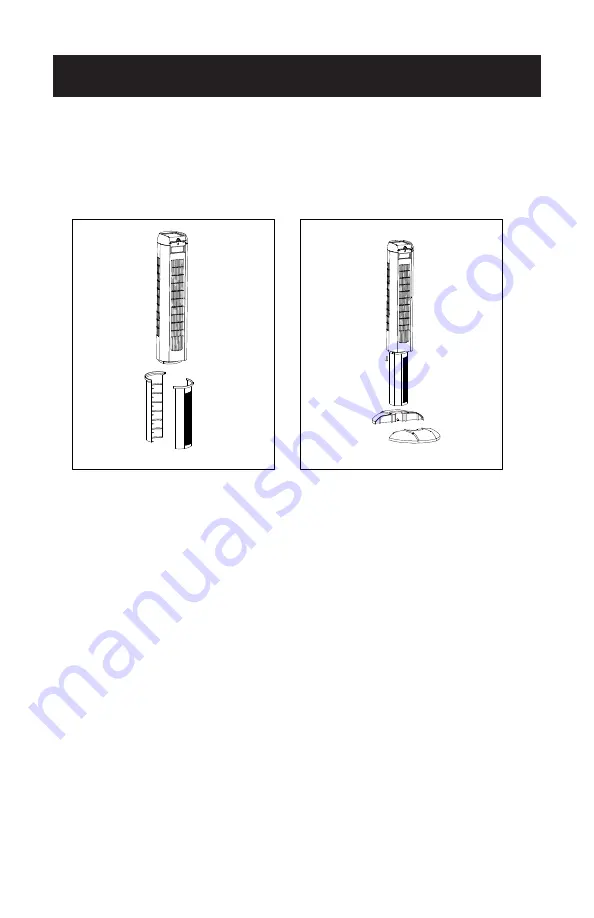
ASSEMBLY INSTRUCTIONS
1. Pass the power cord through the channel of pillar and firmly clasp pillar sections
together.
2. Attach the pillars to the fan body, tightening the 6 round head screws provided
with the L shaped tool.
3. Pass the power cord through the central gate and snap wire casing of the base
together.
4. Firmly clamp the front and rear base section together.
5. Align the front of the fan with front base and secure using the 4 thumbscrews.
6. Using the L shaped tool, insert six screws on back side of unit (see illustration in
parts and features section) to secure the front and rear pillars to one another.
7. Make sure the power cord is going through the arch shaped cut out at both the
center of the base and the outer rim of the base. The cord should also be behind
the black plastic barriers located near the rim of the base. (see fig. 3)
NOTE:
For additional cord maintenance, remove the two silver screws from the
cord clamp (see fig. 3). Completely lift off the black bar that the screws are
threaded into. In the area of the cord clamp, take the cord and push it in
toward the fan base, making sure it is laying perfectly flat. Place the black bar
back in place over the cord and thread the two silver screws into the holes
molded in the base.
Fig. 1
Fig. 2
Содержание BFTR48W
Страница 2: ...Page 2 ...


