background image

Need Help?

Q11:
When I make dough, it is very sticky and difficult to
work with.  How can I handle it more easily?

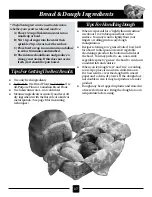
Dough may be somewhat sticky at the end of the dough cycle. This
is normal. For best results, turn it out of the Baking Pan onto a
floured surface, cover it and let it rest for 10 minutes. Lightly flour
the board and your hands when handling the dough. This will
make it easier to shape and divide. Once shaped, the dough must
then be baked in a conventional oven.

Q12:  
Can I bake products formed from doughs in my
microwave oven?

No, once shaped, the dough must be baked in a conventional oven.

Q13:  
How do I know when dough is ready to bake?

Dough should have doubled in size.

Q14:  
What is gluten?

Gluten is the protein in flour that makes dough elastic and allows it
to stretch and expand. It gives your bread structure. The amount
of gluten varies from one flour to another. See the “Flours” section.

Q15:  
Why do the loaves vary in height and weight? The
whole wheat and multi-grain breads are frequently
shorter. Am I doing something wrong?

No, it is normal for whole wheat and multi-grain breads to be
shorter and denser than basic white breads.Whole wheat and rye
flours are heavier than white flour, therefore, they don’t rise as
much during the bread making process. They also typically have
added ingredients, such as oats, bran, nuts and raisins, which con-
tribute to the shorter height and denser texture.

Q16:  
Why is my bread lopsided?

Sometimes when mixing stops, the ball of dough ends up at one
extreme side of the Baking Pan. That’s because in a horizontal
Baking Pan, the Mixing Paddle may bat the dough off to one side.
During the rising cycle, the dough may not have time to spread
evenly throughout the Pan. Though the results may look a little
odd, and you’ll have slices of different sizes, the bread will be just as
delicious as an evenly shaped loaf.

Q17: 
Can I use my favorite bread recipes in my bread
machine?

Yes, but you will need to experiment to get the right proportion of
ingredients. Become familiar with the unit and make several
loaves of bread before you begin experimenting. Never exceed a
total amount of 4-1/4 cups of dry ingredients (that includes flours,
oats, cornmeal, bran cereal, cracked wheat, etc.). Use the recipes in
this book to help determine the ratio of dry ingredients to liquid
and amounts of yeast, sugar, salt, and butter/margarine to use.

Q18:  
Why does some flour occasionally stick to the side of
the bread?

There are many factors that may affect whether a dough mixes
completely or ingredients stick to the sides:

Dough may be too dry (ingredients may have been 
measured incorrectly).

Mixing Paddle was not placed correctly in the Baking 
Pan. Be sure it is pushed securely onto the shaft.

Baking Pan is not placed in the unit correctly.
Be sure to “lock” the Pan into place.

Ingredients were not added in the recommended order.

Sometimes during the initial mixing period, small amounts of flour
and dry ingredients may get stuck to the sides of the Baking Pan.
When the loaf rises and bakes, the dry ingredients may stick to the
bread. Once the loaf is removed from the Baking Pan and has
cooled 10-15 minutes, the dry ingredients may be scraped off the
loaf easily with a knife.

Q19:  
Can I make cakes and quick breads (breads that do not
use yeast) in my breadmaker?

Yes, using the “Bake” cycle. Mix the cakes/quick breads in a bowl
and follow manufacturer’s instructions on packaged mixes (except
for baking time and temperature). Remove the Mixing Paddle and
transfer your batter to the Baking Pan. Use the “Bake” setting. The
time and temperature will have to be adjusted. Start with 300°F
(154°C) for 1:30 hrs. check periodically. When done, allow to cool in
the Pan for approximately 30 minutes before removing.

Q20:  
Why does my bread rise and then collapse or form
craters?

Your bread may be rising too fast. To decrease the rate of rising, try
reducing the amount of sugar, increasing the amount of salt slight-
ly, or reducing the amount of yeast. Refer to the “Trouble Shooting
Guide” on pg. 12 for correct adjustments.

Q21: 
Is it important for ingredients to be at room 
temperature before adding them to the Baking Pan?

No, as long as ingredients are not extremely cold or hot. Milk, eggs,
butter/margarine, and yeast can be added directly from the refrig-
erator with good results. When a recipe calls for water, use luke-
warm water since it’s easy to get from the tap.

Q22:  
Which kind of yeast is the best to use?

Yeast specially packaged for Bread Machines and Traditional  Dry
Yeasts can all be used with good results. The most important thing
is to be sure the expiration date is not up. All the recipes in this
cookbook were developed using Traditional Dry Yeast.

31

Содержание All-In-One Horizontal B2000

Страница 1: ...All In One Horizontal Automatic Breadmaker Operating Instructions Cookbook Delicious Home Baked Bread At A Press of A Button B2000 Questions Please call us Toll Free 1 800 231 9786 ...

Страница 2: ...ds To turn off disconnect from outlet by grasping the plug Do not yank on cord Do not use Breadmaker for other than intended use Do not use Breadmaker for storage purposes nor insert any utensils as they may create a risk of fire or electric shock Avoid contact with moving parts Do not remove the Baking Pan during operation Press START RESET and hold until you hear a beep if you need to stop opera...

Страница 3: ...on CSA listing depending on the country When using a longer cord be sure it does not drape over a working area or dangle where it could be pulled on or tripped over Handle cord carefully for longer life avoid jerking or straining it at outlet and appliance connections Product may vary slightly from what is illustrated BEFORE FIRST USE There s nothing like the aroma of fresh baked bread With the Bl...

Страница 4: ...6 How to UseYour Breadmaker 7 Using the Add Ingredient Function 10 Setting theTimer 10 Troubleshooting 11 Troubleshooting Guide 12 Slicing Storing Bread 13 Care Cleaning 13 Storing the Unit 13 Service or Repair 14 Full One YearWarranty 14 COOKBOOK SECTION Bread and Dough Ingredients 16 Tips for Getting the Best Results 17 Tips for Handling Dough 17 Recipe Index 18 Recipes 19 Need Help Questions an...

Страница 5: ...s with beeps when it s time to add ingredients such as fruits or nuts to recipes used with any setting except SUPER RAPID bake A beep signals beforekneading is completed to let you know when to add ingredients This feature helps keep fruit or nuts whole See Add Ingredient Function pg 10 for more details If you use theTIMER to delay baking you may add all ingredients at once and bypass this functio...

Страница 6: ...our program 5 Indicator Lights The red operation light indicates that the breadmaking operation has started When the cycle is complete the red light will flash for 60 minutes in its KeepWarm cycle If you do not remove the bread after 60 minutes it will simply remain on to show you that the unit is still plugged in The green timer light indicates that the timer function is on When the actual breadm...

Страница 7: ...ecommended temperature setting by 50 F 10 C and increasing the time Some experimentation may be nesessary Temperature ranges between 300 F 420 F 154 C 216 C You don t need to use the paddle This setting is good for frozen and thawed doughs Bread Type Setting Descriptions How To Use Your Breadmaker T he bread making settings in this unit will combine ingredients knead and bake bread from start to f...

Страница 8: ...recipe from the Cookbook section of this booklet When follow ing the recipe Always add ingredients into the Baking Pan in the order they are listed Measure ingredients carefully accurately To measure liquids use a see through measuring cup and check the measurement at eye level When measuring dry ingredients use standard dry measuring cups or measuring spoons and level off the ingredients with the...

Страница 9: ...minutes after baking is com plete and will keep bread warm during that time At the end of the hour the KeepWarm cycle will end and the light will remain on constantly indicating the unit is still plugged in The bread should then be removed as soon as possible to avoid getting soggy You may remove the Baking Pan any time during the KeepWarm cycle To turn off the KeepWarm feature before the 60 minut...

Страница 10: ... m the following morning NOTE The TIMER cannot be used with the Super Rapid Bake setting TosettheTIMER followtheseinstructions NOTE Be sure you have followed the How to Use Your Breadmaker steps1 6 in preparing the ingredients in the Baking Pan and selected a MENU It is not recommended that you use the Delayed Completion function and TIMER with recipes that call for fresh ingredients that might sp...

Страница 11: ...actual breadmaking operation begins the green timer light will go out the red opera tion light will come on and total bake time 3 50 for SWEET bread will appear on the display The bake time will count down in one minute intervals When the end of the countdown is reached a beeping sig nal will sound and your bread is complete The red light will now begin flashing to show the Breadmaker has automati...

Страница 12: ...p 2Tbsp 1 4 tsp 1 4 tsp 1 4 tsp 1 tsp 1 tsp 1 tsp 1 tsp 2Tbsp 2Tbsp 2Tbsp 2Tbsp 2Tbsp 2Tbsp 1 4 tsp 1 4 tsp 1 4 tsp 1 4 tsp 1 4 tsp See Page 17 See Page 16 See Page 16 See Page 16 See Page 16 See Page 16 See Page 16 See Pages 16 17 See Pages 16 17 See Pages 16 17 See Pages 16 17 RESULTS POSSIBLE SOLUTIONS Increase Amount Decrease Amount NOTE The number one cause for poor results is improper measur...

Страница 13: ...CAUTION DO NOT clean window with a commercial glass cleaner When reinstalling the lid be sure the posts on the lid are fully inserted into the slots on the hinge of the Breadmaker This will prevent damage when closing the lid If you feel resistance when you try to close the lid stop immediately and reposition it The lid should close easily without any force being applied Baking Pan and Mixing Padd...

Страница 14: ... defective within the warranty period or you have questions regarding warranty or service call Consumer Assistance and Information toll free at 1 800 231 9786 This warranty gives you specific legal rights and you may also have other rights which vary from state to state or province to province Answers to any questions regarding warranty or service locations may be obtained by calling or by writing...

Страница 15: ...15 For Black Decker Breadmaker Model B2000 ...

Страница 16: ...ten interchangeable in most bread recipes Vegetable oil should not be substituted for shortening butter or margarine fat adds flavor and tenderness to the dough Low fat diet margarines are high in water content but may be substituted with acceptable results for people on a low fat diet Salt In very small amounts salt adds flavor and controls the rising action of the yeast allowing the dough to ris...

Страница 17: ...to cut down on added fats and calories When you let dough rest and rise according to a recipe place it in a warm draft free area For best results cover the dough with waxed paper and a clean dry towel If the dough does not double in size it may not produce a tender product Dough may be wrapped in plastic and stored in a freezer for later use Bring the dough to room temperature before using Bread D...

Страница 18: ...oppy Seed 21 Super Rapid Italian Herb 22 Sweet Tangy Ginger Bread 22 Raisin Cinnamon Bread 23 Cheesy Cheese Bread 23 Aloha Bread 23 Chocolate Bread 23 Grain 100 WholeWheat Bread 24 CrackedWheat Bread 24 Oatmeal Nut Bread 24 Caraway Rye Bread 25 Hearty Pumpernickel Bread 25 Dough Foccacia Italian Flat Bread 26 Baked Pretzels 26 Pizza Dough 27 Sweet Dough 27 Traditional Sour Dough 28 Bake Banana Nut...

Страница 19: ...White Bread recipe and use Dough setting Divide dough into 24 equal pieces Shape each piece into a narrow 8 inch 20 cm long rope Place on greased baking sheets Brush with milk and sprinkle with dried onion flakes or garlic powder Cover and let rise 40 50 minutes or until doubled in size Place a pan of hot water on lower rack of oven Bake in preheated 375 F 191 C oven for about 20 minutes ForCrusty...

Страница 20: ...Pan 2 Insert Baking Pan securely into unit close lid 3 Select BASIC setting and REGULAR or DARK crust 4 Push Start button There will be a 15 minute preheat delay before mixing begins 5 At Add Ingredient beep add frozen corn 6 The Complete Signal will sound when bread is done 7 Using pot holders remove Baking Pan from the unit and care fully turn bread out of Baking Pan Mixing paddle may remain in ...

Страница 21: ...espoons powdered milk 1 2 teaspoon salt 3 tablespoons sugar 3 tablespoons butter or margarine 3 1 4 cups white flour 4 teaspoons yeast 1 Measure ingredients in the order listed into Baking Pan 2 Insert Baking Pan securely into unit close lid 3 Select RAPID setting and REGULAR or DARK crust 4 Push Start button Mixing begins immediately 5 The Complete Signal will sound when bread is done 6 Using pot...

Страница 22: ...e 4 teaspoons yeast TANGY GINGER BREAD 1 cup lukewarm water 1 large egg slightly beaten 1 4 cup packed brown sugar 2 tablespoons powdered milk 2 tablespoons butter or margarine 1 1 2 tablespoons molasses 3 teaspoons grated orange rind 1 1 2 teaspoons ground ginger 1 teaspoon cinnamon 1 teaspoon salt 3 1 4 cups white flour 3 4 teaspoon yeast 1 Measure ingredients in the order listed into Baking Pan...

Страница 23: ...t of Baking Pan Mixing paddle may remain in bread Remove paddle when loaf is cool 7 Allow to cool before slicing Time 3 50 hours CHOCOLATE BREAD 1 cup milk 1 large egg beaten 2 tablespoons butter or margarine 2 tablespoons sugar 1 tablespoon cocoa powder 1 teaspoon salt 3 1 3 cups white flour 1 2 cup chocolate chips 2 teaspoons yeast 1 Measure ingredients in the order listed into Baking Pan 2 Inse...

Страница 24: ...e order listed into Baking Pan 2 Insert Baking Pan securely into unit close lid 3 Select GRAIN setting 4 Push Start button There will be a 25 minute preheat delay before mixing begins 5 The Complete signal will sound when the dough is done 6 Using pot holders remove Baking Pan from the unit and carefully turn bread out of Baking Pan Mixing paddle may remain in bread Remove paddle when loaf is cool...

Страница 25: ...margarine 3 4 cup whole wheat flour 1 3 4 cups white flour 3 4 cup rye flour 1 tablespoon caraway seeds 1 3 4 teaspoons yeast HEARTY PUMPERNICKEL 1 Measure ingredients in the order listed into Baking Pan 2 Insert Baking Pan securely into unit close lid 3 Select GRAIN setting and 1 5 lb loaf setting 4 Push Start button There will be a 25 minute preheat delay before mixing begins 5 The Complete Sign...

Страница 26: ... 20 minutes or until lightly browned 10 Allow to cool for 10 minutes and cut into squares Time 2 hours for dough ServingSuggestion Great for hors d oeuvres or with dinner BAKED PRETZELS 1 cup beer or water 1 tablespoon butter 2 tablespoons sugar 1 teaspoon salt 2 3 4 cups white flour 3 4 teaspoon yeast 1 egg lightly beaten 1 tablespoon water coarse salt or sesame seeds 1 Measure first 6 ingredient...

Страница 27: ...ransfer to greased baking sheets Top as desired and bake as above PIZZA DOUGH 1 1 2 cups beer or water 1 1 2 teaspoons salt 1 tablespoon sugar 2 tablespoons butter or margarine 4 1 4 cups white flour 2 teaspoons yeast PizzaTopping Ingredients 1 Measure all ingredients in the order listed into Baking Pan 2 Insert Baking Pan securely into unit close lid 3 Select DOUGH setting and push start button T...

Страница 28: ...and carefully remove dough from Baking Pan onto a floured surface 7 Shape into a large oval 8 Place loaf on an ungreased baking sheet sprinkle with cornmeal and cover with a clean towel 9 Allow to rise in a warm place for about 45 minutes or until doubled in size 10 Preheat oven to 400 F 204 C Fill a 9x13 inch 23 x 33 cm baking pan with 1 4 inch 64 cm hot water and place on bottom oven rack 11 In ...

Страница 29: ...arine 2 medium ripe bananas each cut into 1 inch 2 54 cm pieces 2 cups all purpose flour 1 teaspoon baking powder 1 2 teaspoon baking soda 1 2 teaspoon salt 1 2 cup chopped walnuts 1 In medium mixing bowl combine walnuts or pecans butter sugar and cinnamon Stir to blend 2 Rolls biscuit quarters into small balls and drop into butter mixture about 15 20 at a time 3 Stir to coat and transfer to Bakin...

Страница 30: ...ce the baking cycle starts so you should be able to get a clear view of your rising loaf Q5 Where is the OFF button Since the breadmaker shuts off its processing automatically once the bread or dough cycle is complete and the KeepWarm cycle ends there is no OFF button However the power light will remain on until the unit is unplugged or the Start Reset button is pressed and held Q6 If the power go...

Страница 31: ...ipes in this book to help determine the ratio of dry ingredients to liquid and amounts of yeast sugar salt and butter margarine to use Q18 Why does some flour occasionally stick to the side of the bread There are many factors that may affect whether a dough mixes completely or ingredients stick to the sides Dough may be too dry ingredients may have been measured incorrectly Mixing Paddle was not p...

Страница 32: ...he bread in the Baking Pan after baking This unit has a 60 minute KeepWarm cycle that lets you leave the bread in the pan for up to an hour after baking is completed Once that warming cycle is over it s best to remove the bread immediate ly or the bottom of your loaf will absorb moisture and become soggy The soggy part of the bread will not be as tasty when it dries out and it will go stale quickl...

Отзывы: