background image

2

Additional Safety Instructions for Hammers

WEAR SAFETY GOGGLES or other eye protection.

WEAR EAR PROTECTORS when hammering for extended periods.

ALWAYS USE THE SIDE HANDLE supplied with the tool. Keep a firm grip on
the hammer when it is operating.

DON’T OVERREACH. Maintain a firm, balanced working stance. When neces-
sary, use only properly positioned, safe platforms, ladders and scaffolds, to
do the job safely.

Hammer bits and tools get hot in operation. Wear gloves when touching
them.

CAUTION: When drilling or driving into walls, floors or wherever “live” electri-
cal wires may be encountered, DO NOT TOUCH ANY FRONT METAL PARTS
OF THE TOOL! Hold the tool only by the plastic handle to prevent shock if you
drill or drive into a “live” wire.

SAVE THESE INSTRUCTIONS

Motor

Your tool is powered by a B&D built motor. Be sure your power supply
agrees with nameplate marking. 

Voltage decrease of more than 10% will cause loss of power and overheat-
ing. All B&D tools are factory tested; if this tool does not operate, check the
power supply.

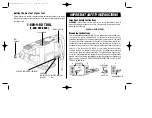
Side Handle (Fig. 1)

ALWAYS OPERATE THE TOOL WITH THE SIDE HANDLE PROPERLY
ASSEMBLED.

1. Snap the steel ring over the collar behind the tool holder. Squeeze both

ends together, mount the bush and insert the pin.

2. Place the side handle, with the narrow end toward the front of the tool,

over the bush and pin.

3. Place the washer over the hole in the side handle,and insert the clamp

knob. Screw in the clamp knob, but do not tighten.

6. Rotate the side handle mounting assembly to the desired position. For

drilling horizontally with a heavy drill bit, place the side handle assembly
at an angle of approximately 20˚ for optimum control.

7. Lock the side handle in place by fully tightening the clamp knob.

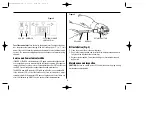
Electronic Impact Control (Fig. 2)

The electronic impact control allows you to adjust the impact energy of the
hammer. For optimal control and precise chiseling of light and brittle materi-
als, use a lower setting. A higher setting provides power for harder materials.

Figure 1

STEEL RING

BUSH

PIN

CLAMP KNOB

WASHER

5019k/154669/im  5/17/02  2:16 PM  Page 2

Содержание 5019K

Страница 1: ...Black Decker U S Inc 701 East Joppa Road Towson Maryland 21286 Printed in Italy AUG95 1 Form No 154669 Copyright 1995 5019k 154669 im 5 17 02 2 16 PM Page 2 ...

Страница 2: ...Instruction Manual 5019K Chipping Hammer 5019k 154669 im 5 17 02 2 16 PM Page 3 ...

Страница 3: ...ductor in the cord is the grounding wire Never connect the green or green and yellow wire to a live terminal If your unit is intended for use on less than 150 V it has a plug that looks like that shown in sketch A If it is for use on 150 to 250 V it has a plug that looks like that shown in sketch D An adapter sketches B and C is available for connecting sketch A type plugs to 2 prong receptacles T...

Страница 4: ...clean and free from oil and grease DISCONNECT OR LOCK OFF TOOLS when not in use before servicing and when changing accessories such as blades bits cutters REMOVE ADJUSTING KEYS AND WRENCHES Form habit of checking to see that keys and adjusting wrenches are removed from tool before turning it on AVOID UNINTENTIONAL STARTING Don t carry tool with finger on switch Be sure switch is off when plugging ...

Страница 5: ...at ing All B D tools are factory tested if this tool does not operate check the power supply Side Handle Fig 1 ALWAYS OPERATE THE TOOL WITH THE SIDE HANDLE PROPERLY ASSEMBLED 1 Snap the steel ring over the collar behind the tool holder Squeeze both ends together mount the bush and insert the pin 2 Place the side handle with the narrow end toward the front of the tool over the bush and pin 3 Place ...

Страница 6: ...ce The GREEN power ON indicator LED lights up when the tool is switched ON If the indicator LED is lit but the tool does not start this indicates a motor related problem If the indicator LED does not light up and the tool does not start this indicates an ON OFF switch cord or outlet related problem Bit Installation Fig 3 1 Clean then smear the bit shank with grease 2 Push in the retainer button an...

Страница 7: ...ccessories please call 1 800 9 BD TOOL 1 800 923 8665 WARNING The use of any accessory not recommended for use with this tool could be hazardous One Year Free MaIntenance All B D tools for Industry and Construction are covered under a one year free maintenance program where B D will inspect your tool for safety and provide necessary maintenance or repairs including normal wear and tear parts for o...

Отзывы: