


◈
Information
This Installation Guide includes a brief outline of information necessary
for product installation. For more detailed installation information,
please refer to the user manual in the enclosed CD. The contents of the
CD include the following.
1. Manual: User Manual, Code Chart, Control Commands
2. Drivers: Windows Drivers, OPOS Drivers
3. Utilities: a logo download tool
We at BIXOLON maintain ongoing efforts to enhance and upgrade the
functions and quality of all our products. In following, product
specifications and/or user manual content may be changed without prior
notice.
◈
Components
Cable
Paper Roll
Procuct Installation CD
Procuct Installation CD
Procuct Installation CD
CD
STP-103II
AC/DC Adaptor
Power cord
Installation
Guide
◈
Connecting the cables
1. Turn off the printer and the host ECR (host computer).
2. Plug the power cord into the Adaptor, and then plug the Adaptor into
the power connector of the printer.
3. Plug the cable into the interface connector. (USB/Serial/
Parallel)
※
Note:
Use the STP-103II exclusive interface cable only.
(Serial/
Parallel)
◈
Using the Operation Panel
POWER ERROR
FEED
ON LINE
•
POWER (LED, GREEN)
When turning on the power, a green LED will be lit.
•
ERROR (LED, RED)
When the paper is running low, a red LED blinks.
•
FEED (Button)
Press the FEED button once to discharge extra paper. Holding down the
FEED button will discharge paper continuously until the button is
released. The FEED button can be used when the ON-LINE button is
turned off.
•
ON LINE (Button)
To use the FEED button, first press the ON-LINE button once.
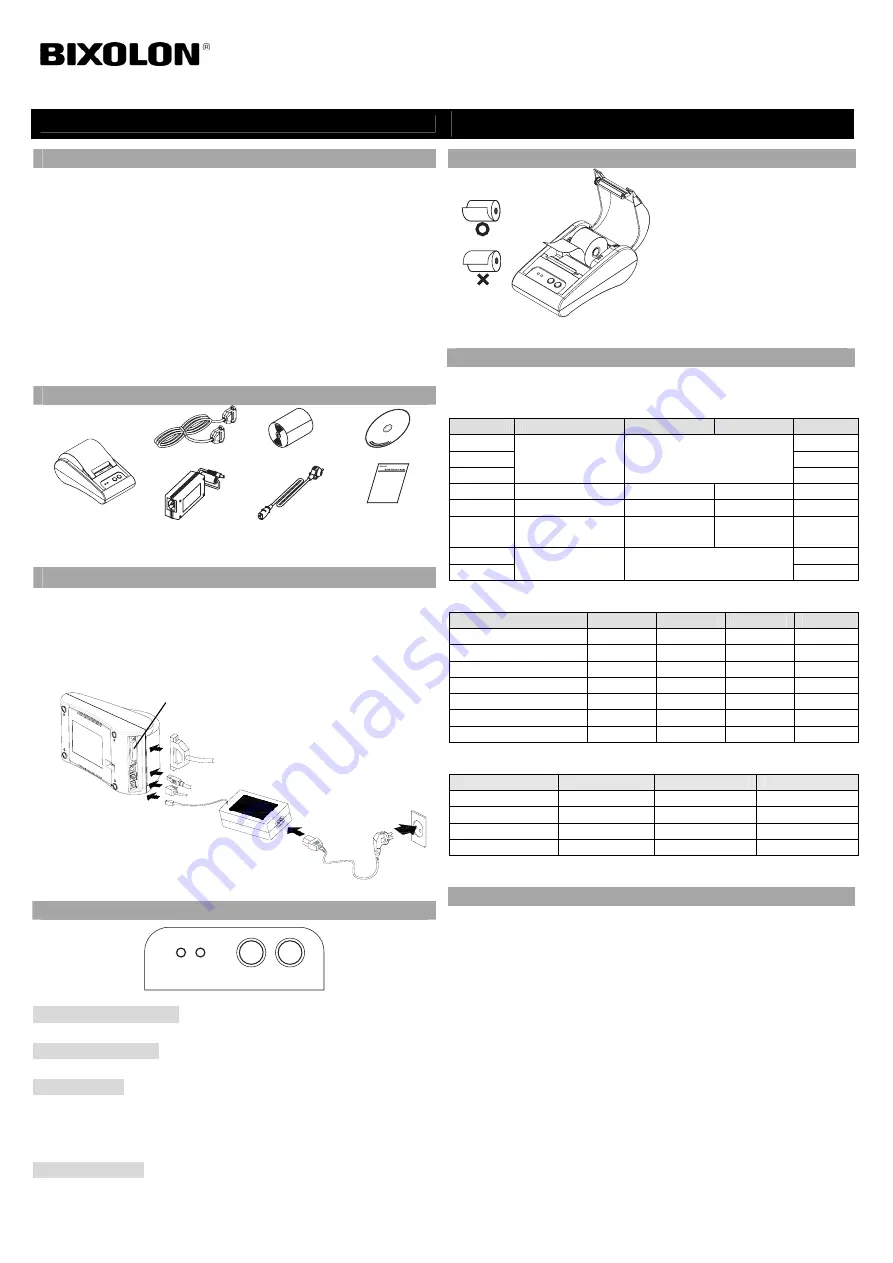
◈
Installing the Paper Roll
1. Insert a new paper roll, making
sure to align it properly.
2. Pull out a small amount of
paper, and close the cover.
◈
Setting the DIP switches
Changing Dip Switch settings must be done when the printer is off.
Any changes done while the printer is on will not be processed.
Setting the DIP switch
SW
Function
ON
OFF
Default
SW 1-1
OFF
SW 1-2
OFF
SW 1-3
Baud Rate
Selection
* Refer to the Following
Table 1
ON
SW 1-4
Density
Dark
Normal
OFF
SW 1-5
Handshaking
Xon / Xoff
DTR/DSR
OFF
SW 1-6
Character per
Line (Font A)
24 CPL
32 CPL
OFF
SW 1-7
OFF
SW 1-8
Font Select
* Refer to the Following
Table 2
OFF
[Table 1]
Baud Rate Selection
Transmission Speed
SW 1-1
SW 1-2
SW 1-3
Remark
2400 Baud
ON
OFF
OFF
4800
Baud OFF ON OFF
9600 Baud
OFF
OFF
ON
Default
19200
Baud ON OFF ON
38400 Baud
ON
ON
OFF
57600 Baud
OFF
ON
ON
115200
Baud ON ON ON
[Table 2] Font Select
Font size
SW 1-7
SW 1-8
Remark
Font A (12x24)
OFF
OFF
Default
Font B (9x17)
ON
OFF
Font C (9x24)
OFF
ON
Reserved ON ON
◈
Self-Test
1. Make sure the paper roll has been installed properly.
2. Turn on the power while holding down the FEED button. The self-
test begins.
3. The self-test prints the current printer status, providing the control
ROM version and the DIP switch setting.
4. After printing the current printer status, self-test printing will print the
following, and pause. (The Error LED light blinks.)
SELF-TEST PRINTING.
PLEASE PRESS THE FEED BUTTON
5. Press the FEED button to continue printing. The printer prints a
pattern using the built-in character set.
6. The self-test automatically ends and cuts the paper after printing the
following.
*** COMPLETED ***
7. After the self-test is complete, the printer returns to normal on-line
status.
※
Note
The self-test lets you know if your printer is operating properly. It
checks the print quality, ROM version, and DIP switch settings.
Printer Installation Guide
KN04-00032A (Rev.1.0)
THERMAL PRINTER STP-103II
Power cord
Interface cable
(Serial/Parallel)
AC Adaptor
Interface connector
USB Cable
DK Port


