BIXOLON DX420E Скачать руководство пользователя страница 4

Label Printer 


Rev.  1.00 

- 4 - 

2. Usage Preparation 

 
1) Printer and PC Connection. 
 
      Connect the printer and PC via the interface cable. 
      (The interfaces available for usage are Serial, Parallel, USB and Ethernet.) 
 
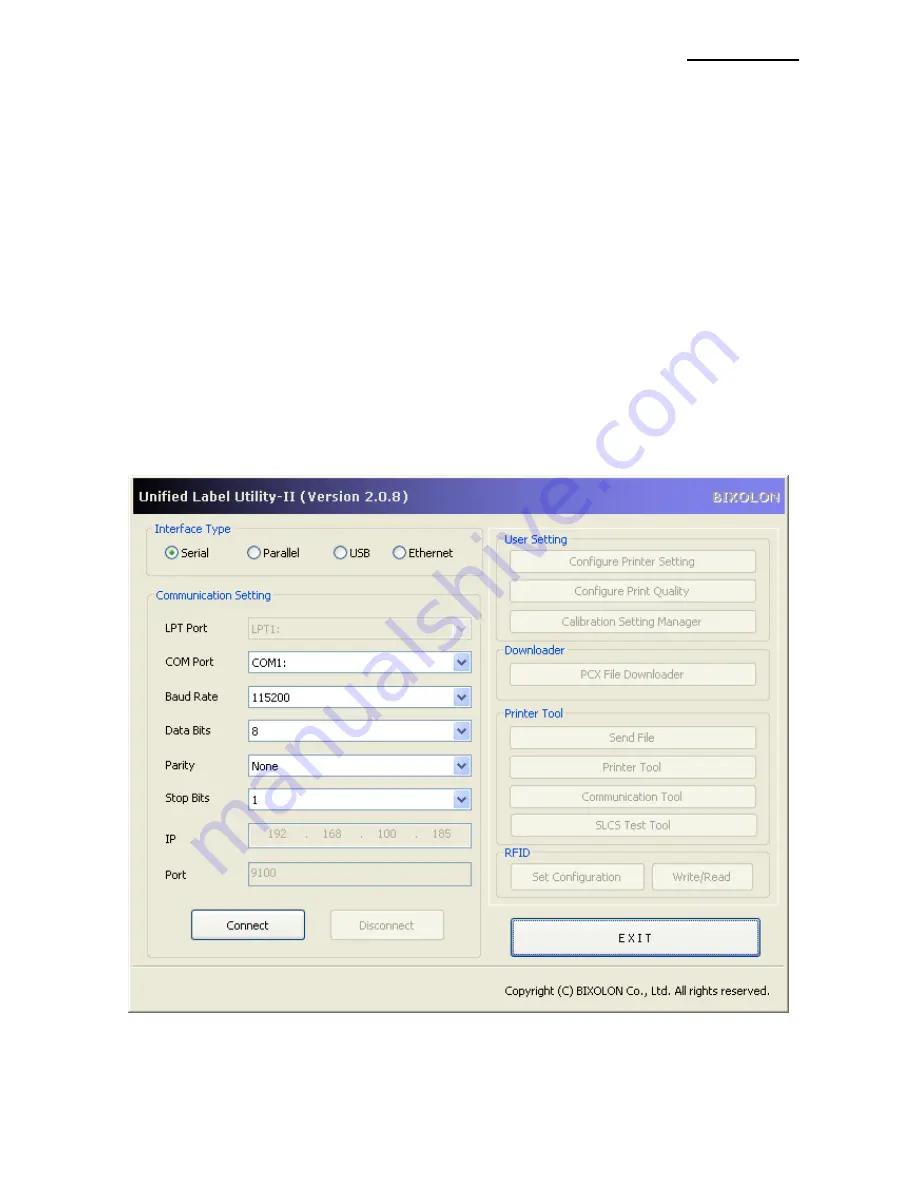
2) Unified Label Utility-II Program Execution. 
   

The program can be installed from the accompanying CD, and Latest file versions can   
be downloaded from the BIXOLON website. 

(http://www.bixolon.com) 

 
The file name is as follows

: “Unified Label Utility-II.exe”. 

 
3) Select the interface type and communication conditions. 
 
4) Click 

on the “Connect Button”, If the conection is successful, The inactive buttons   

becaom active with the message “Success open port”. If the connection fails, the   
following error message appears. “Cannot open port! Please check printer and cable”. 


Содержание DX420E

Страница 1: ...Unified Utility II Manual Label Printer Rev 1 00 SLP TX400 TX400E SLP TX403 TX403E SLP DX420 DX420E SLP DX423 DX423E http www bixolon com...

Страница 2: ...Usage Preparation 4 3 Unified Label Utility II Usage 5 3 1 User Setting Manager 5 3 2 Configure Print Quality 11 3 3 Manual Calibration 12 3 4 PCX File Downloader 13 3 5 File Transfer 15 3 6 Printer T...

Страница 3: ...en saving a black and white PCX format image to flash memory 5 File transfer This function is used when sending test files such as command scripts to the printer 6 Printer Tools This function is used...

Страница 4: ...d from the accompanying CD and Latest file versions can be downloaded from the BIXOLON website http www bixolon com The file name is as follows Unified Label Utility II exe 3 Select the interface type...

Страница 5: ...ze and print density to values suited to the user environment Click the Configure Printer Setting 3 1 1 Serial Communication Setting 1 Click the Serial 2 Click the Get button to read the printer setti...

Страница 6: ...asic Tab to configure speed darkness and Media options 2 Click the Get button to read the printer setting value 3 Modify each value 4 If you want to lock the setting value check the lock checkbox 5 Cl...

Страница 7: ...3 Advanced Settings 1 Click the Advanced tab to configure Meida handling process options 2 Click the Get button to read the printer setting value 3 Modify each value 4 Click the Set to Printer to app...

Страница 8: ...Label Printer Rev 1 00 8 3 1 4 Real time Clock 1 Click the Real time Clock tab to set Real Time Clock 2 Configure the clocks and click the Set to Printer to apply to printer...

Страница 9: ...Language 1 Click the Language tab to set Default Codepage Default International Character set 2 Click the Get button to read the printer setting value 3 Modify each value 4 Click the Set button to ap...

Страница 10: ...n initialize Motor TPH Cutter statistic and set USB serial number 2 Click the Get button to read the printer information value 3 Click the Init Motor Stat Init TPH Stat Init Cutter Stat to initialize...

Страница 11: ...ith different settings 2 Click the Print Sample label s button to start printing refenece labels which have specific identitier 3 Choose Label identifier of the label with best printng quality among t...

Страница 12: ...on after setting the interface type 1 Select the sensing type and input the label length by millimeter and click on Check Sensing Value tap Then printer starts to calibrate 2 After scanning the paper...

Страница 13: ...PCX file pcx 2 Enter the image name and click the Download button The image name is used to recall or delete images 3 4 2 Image Delete ID 1 Check the list of stored images by clicking the Image Inform...

Страница 14: ...Label Printer Rev 1 00 14...

Страница 15: ...le Transfer This function is used when sending test files such as command scripts to the printer 1 Click Send File button on the main window 2 Select the file to be sent and click the Download button...

Страница 16: ...ons Calibration media To execute auto calibration to calibrate media sensor Load factory defaults To set printer s default configuration as factory s initial setting Reset printer Reboot printer Enter...

Страница 17: ...Communication Tool on the main window to start this function 2 Type the command lines direclty or open the save command script file 3 Click the Send to Printer button to send data to printer 4 If the...

Страница 18: ...create a brief label sample for test printing 1 Click the SLCS Tester button 2 Click the Multi Send button to send data to printer 3 If the command which request response from printer to host is used...

Страница 19: ...Direction creates a command for speed print density and print direction setting i Margin Width Length creates a command for margin and width and length of print paper setting j Check Printer Status c...

Отзывы: