50
select 31H means display the message saved on layer 1.
select 32H means display the message saved on layer 2.
select 33H means display the message saved on layer 1+ layer2.
select 34H means display the message saved on layer 3.
select 35H means display the two messages saved on layer 1 + layer 3.
select 36H means display the two messages saved on layer 2 +layer 3.
select 37H means display all the messages saved on layer 1 +layer 2 + layer 3.
d) For display modes,
select 31H means display the message with Mode 1.
select 32H means display the message with Mode 2.
select 33H means display the message with Mode 1+Mode 2.
For this Demo display function, you must have saved the message by COMMAND "S" previously, For example, select
37H for displaying layers and select 33H for displaying modes, DSP would display all the three messages saved on
layer 1+ layer 2 + layer 3 with both Mode 1 + Mode 2 displaying modes.
e) Any new message from the computer would stop this Demo
display function and DSP would display that new message from the computer.
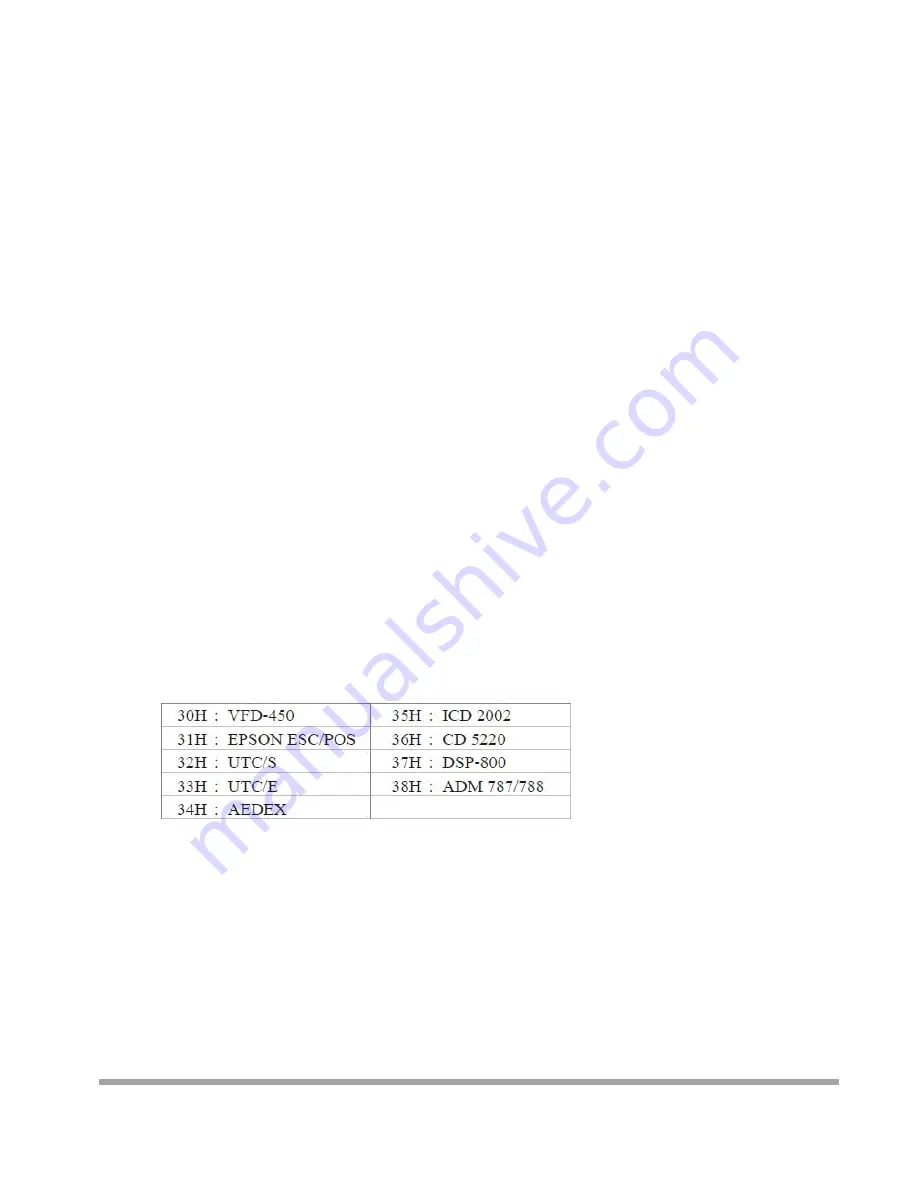
G. Select the Command Mode
COMMAND: M
COMPUTER: EOT SOH 'M' 'Mode' ETB
ASCII (04H) (01H) (4DH)(30H~38H) (17H)
Byte 1 1 1 1 1
DISPLAY: ACK
(or NACK if failed)
ASCII (06H) (15H)
Byte 1
1
Note:
Command Modes Selection
H. Set all default
COMMAND: X
COMPUTER: EOT SOH 'X' ETB
ASCII (04H) (01H) (58H) (17H)
Byte 1 1 1 1
Содержание Carisma IT7000III
Страница 15: ...14 Installing Customer Display 1 Release Four screw on the back of VFD module 2 Release Two screw...
Страница 19: ...18 17 Lock the VFD module with hinge mount...
Страница 22: ...21 3 After changing RAM module please lock the four screws for front housing...
Страница 27: ...26 VGA Driver Installation Select the CD directory to VGA...
Страница 29: ...28 LAN Driver Installation Select the CD directory to LAN A Click the Next button on the Welcome window...
Страница 30: ...29 B Click the Finish button...
Страница 31: ...30 Audio Driver Installation Select the CD directory to Step 4 Install Realtek AC97 codec Driver A Click NEXT...
Страница 32: ...31 B Click the Finish button...
Страница 36: ...35 DirectX 9 Installation...
Страница 38: ...37 Solder side...
Страница 43: ...42 Character Font Table A Control code set B U S A font set 8...
Страница 44: ...43 C International character selection ASCII CODE 3DH Standard Europe international font set...
Страница 45: ...44 3EH Multingual international font set 3FH Portuguese international font set...
Страница 46: ...45 40H Canadian French international font set 41H NORDIC internatinal font set...
Страница 47: ...46 42H RUSSIA font set 43H SLAVONIC Font set...
Страница 53: ...52 Mode 1 EPSON Esc POS mode...
Страница 54: ...53 Mode 2 UTC Standard mode Mode 3 UTC enhanced mode Mode 4 AEDEX mode...
Страница 56: ...55 Mode 6 CD 5220 standard mode...
Страница 57: ...56 Mode 7 DSP 800 mode Mode 8 ADM 787 788 mode...


