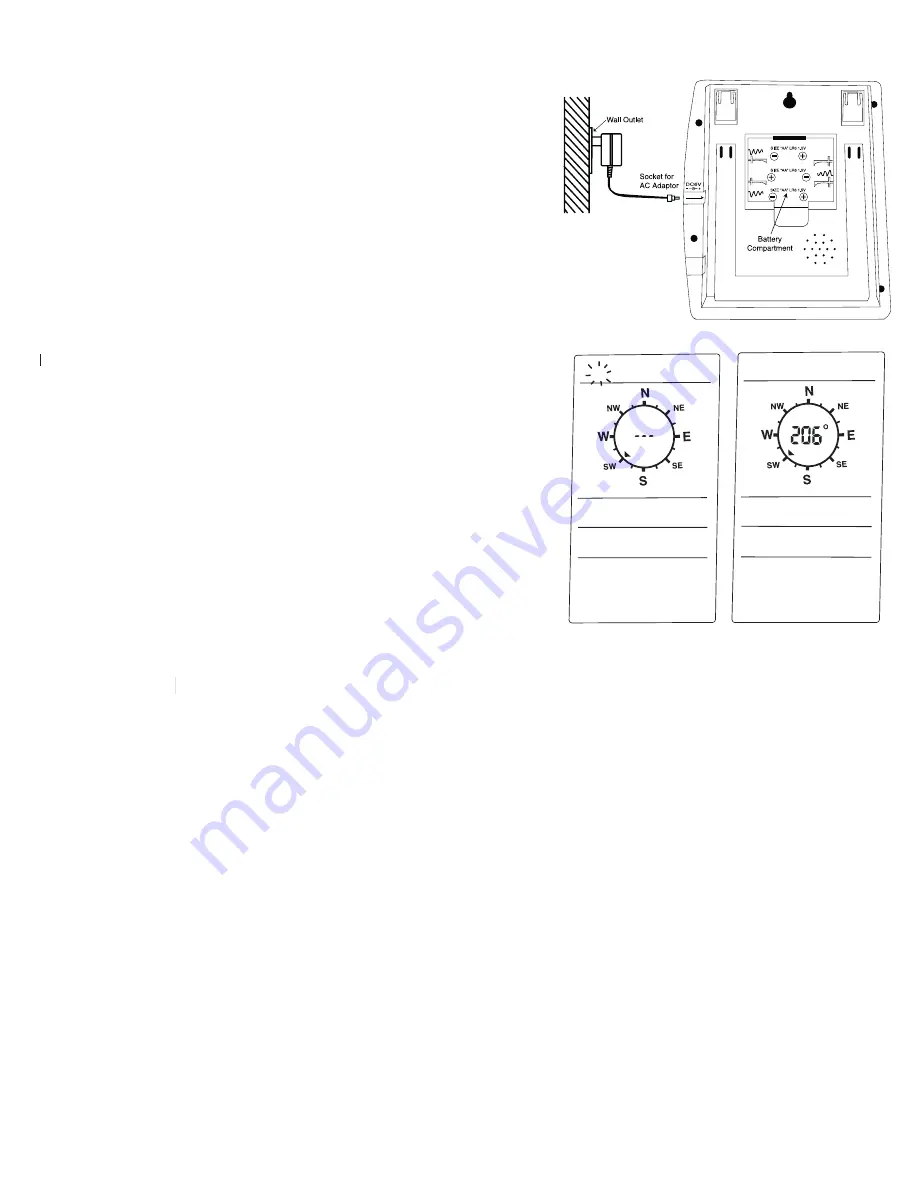
1. Plug in the AC/DC adaptor (for the home monitor)
to the power outlet in your wall.
2. Insert the adaptor into the DC socket located on the
right side of the home monitor.
3. Once the adaptor has been plugged in, "IO" will flash on the top left
side of the LCD and "---" will appear in the center of the compass
rose. See diagram A.
4. Remove the battery cover on the thermometer-transmitter sensor.
5. Insert 4 x "AA" batteries according to the correct polarity.
6. If the home monitor is receiving transmissions properly from the
thermometer-transmitter sensor, a transmission ID number will
appear in the center of the compass rose on the home monitor
(e.g. 104, 241, etc.), see diagram B.
7. Wait until the transmission ID number and the "IO" stop flashing on
the LCD.
8. Press the SET button on the monitor to store the transmission
8.
8.
ID number.
9. Replace the battery cover on the thermometer-transmitter sensor.
10. After the set up is complete you can now insert 3 x "AA" batteries
into the home monitor for back up purposes only.
11. If using wired transmission (Section 12: Wired Transmission) insert
one end of the wired phone cord into the socket located on the
right side of the monitor and the other end of the wired phone
cord into the center socket on the thermometer-transmitter sensor.
NOTE
: If using the wired transmission remove all batteries in the
thermometer-transmitter sensor.
IMPORTANT
: It is very important that the steps in "Powering Up Your
HWS with PC Interface" are followed precisely. Missing a step or not
performing the steps in order will result in the HWS not functioning
properly and therefore show in incorrect readings.
properly and theref
properly and theref
8. POWERING UP THE MODEMS
NOTE
: It does not matter which modem is used to connect to the HWS or the PC, they are both the same.
A. HWS Modem
1. Plug in the AC/DC adaptor (for the HWS modem) to the power outlet in your wall.
2. Insert the adaptor into the DC socket located on the left side of the HWS modem. A blue light should turn on,
on the modem.
NOTE:
If no blue light turns on there is no power being supplied to the HWS modem.
Check the AC/DC adaptor and the outlet to make sure everything is inserted correctly.
3. Insert one end of the Comm wire into the HWS modem and the other end to the home monitor.
4. Take your phone connection and insert it into the socket located on the left side of the modem.
5. Your Home Weather Station and the HWS modem are now ready for connection.
IMPORTANT
: If you have an answering machine or voice mail it is very important to have the rings set to a higher
number than the HWS modem, otherwise the answering machine or voice mail will pick up first and there will be
no connection between the two modems. It is recommended to set the answering machine or voice mail to 5 rings
or higher.
10
Diagram A
Diagram B
IO
IO


