background image


13


/


19


4.


Pull


the


device


control


cap


until


it


clicks.


If


not


clicks,


check


the


needle


is


installed


appropriately.


5.


Aiming


at


the


sterilized


part


for


blood

taking,


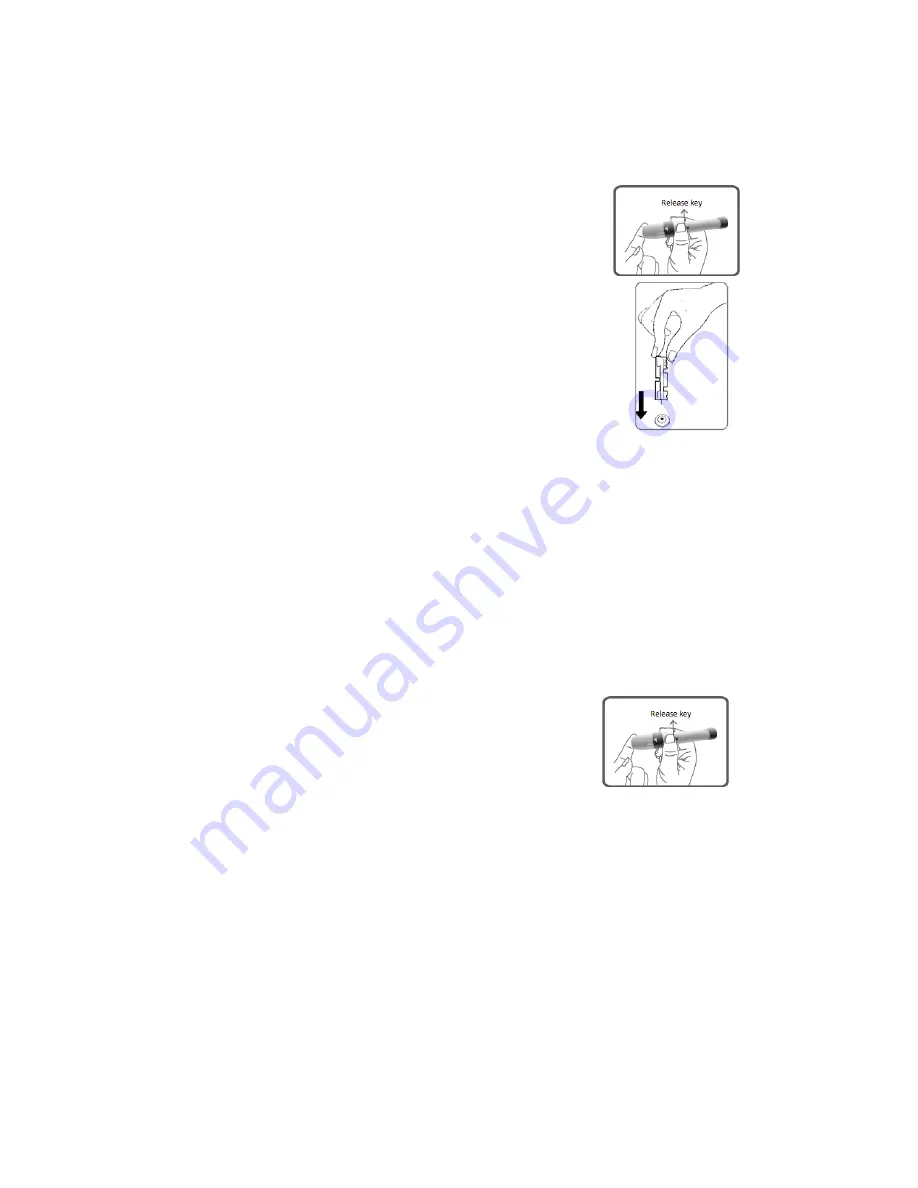
press


the


release


key


to


finish


blood

taking.


6.


Screw


the


device


cap.


Push


the


exposed


needle


into


the


needle


cap,


and


then


push


the


ejection


button


to


discard


the


used


needle


in


appropriate


container.


Cover


the


device


cap


at


last.


Preparing


the


puncture


site


Stimulating


blood


perfusion


by


rubbing


the


puncture


site


prior


to


blood


extraction


has


a


significant


influence


on


the


glucose


value


obtained.


Blood


from


a


site


that


has


not


been


rubbed


exhibits


a


measurably


different


glucose


concentration


than


blood


from


the


finger.


When


the


puncture


site


was


rubbed


prior


to


blood


extraction,


the


difference


was


significantly


reduced.


Please


follow


the


suggestions


below


before


obtaining


a


drop


of


blood:


Rub


the


puncture


site


for


about


20


seconds


before


penetration.


Select


the


puncture


site


either


at


the


fingertips


or


another


body


part


(please


see


section


“Alternative


Site


Testing”


(AST)


on


how


to


select


the


appropriate


sites).


Clean


the


puncture


site


using


cotton


moistened


with


70%


alcohol


and


let


it


air


dry.


Fingertip


testing


Hold


the


lancing


device


firmly


against


the


side


of


your


finger.


Press


the


release


key.


You


will


hear


a


click,


indicating


that


the


puncture


is


complete.


NOTE


Choose


a


different


spot


each


time


you


test.


Repeated


punctures


at


the


same


spot


may


cause


soreness


and


calluses.


Please


consult


your


health


care


professional


before


you


begin


AST.


It


is


recommended


to


discard


the


first


drop


of


blood


as


it


might


contain


tissue


fluid,


which


may


affect


the


test


result.


Performing


a


Blood


Glucose


Test


Step


1.


Wash


hands


with


soap


and


warm


water.


Содержание G-427B

Страница 1: ...Bioland Blood Glucose Monitor Model G 427B OWNER S MANUAL ...

Страница 2: ...ipment has been tested and found to comply with the limits for a Class B digital device pursuant to Part 15 of the FCC Rules These limits are designed to provide reasonable protection against harmful interference in a residential installation This equipment generates uses and can radiate radio frequency energy and if not installed and used in accordance with the instructions may cause harmful inte...

Страница 3: ...al 4 Do not use adjunct which are not supplied by the producer 5 Do not make the device come into contact with surfaces which are too hot to touch 6 Do not use the device where aerosol sprays are being used 7 Do not use the device if it is not working properly or if it has been damaged 8 Read all the manual and practice the test and then use the product to test your blood glucose Do all quality co...

Страница 4: ...G THE MEMORY 8 THE TWO MEASURING MODES 11 TESTING WITH BLOOD SAMPLE 11 Overview of the Lancing Device 12 Setting Up the Lancing Device 12 Preparing the puncture site 13 Performing a Blood Glucose Test 13 Comparing Meter and Laboratory Results 15 CONTROL SOLUTION TEST 15 VIEWING RESULTS ON THE METER 16 CARE AND STORAGE FOR YOUR SYSTEM 17 Cleaning and Disinfection 17 METER SPECIFICATION 18 Limitatio...

Страница 5: ... intended for self testing outside the body in vitro diagnostic use by people with diabetes at home as an aid to monitor the effectiveness of diabetes control The Blood Glucose Monitoring System is not to be used for the diagnosis of or screening of diabetes or for neonatal use The Test Strips are for use with the Blood Glucose Meter to quantitatively measure glucose drawn from the fingertips Caut...

Страница 6: ... lead to transmission of Human Immunodeficiency Virus HIV Hepatitis C Virus HCV Hepatitis B Virus HBV or other bloodborne pathogens AST in this system can be used only during steady state blood glucose conditions described in the section of About AST Test principle The test is based on the measurement of electrical current generated by the reaction of glucose with the reagent of the strip The mete...

Страница 7: ... not be used in insulin doses calculations Do NOT use AST if You think your blood glucose is low You are unaware of hypoglycemia You are testing for hyperglycemia Your AST results do not match the way you feel Your routine glucose results are often fluctuating CONTENTS OF THE KITS A Meter Carry Case Owner s Manual Two AAA Alkaline Batteries Test Strips Optional Lancing Device Sterile Lancet Option...

Страница 8: ...ppears when the meter is turned on 3 LOW BATTERY SYMBOL Appears when the battery power is low 4 MEASUREMENT UNIT Appears with the test result in mg Ml or mmol L 5 CTL SYMBOL Appears when doing a Control test and indicates That the result won t be Stored in the memory 6 MEMORY SYMBOL Appears when you review the memory 7 TEST RESULT AREA Displays glucose results 8 KETONE WARNING Appears when your re...

Страница 9: ...G THE METER AND DELETING THE MEMORY 1 Setting the language and voice volume 1 1 Setting the language Press and Hold S button for 3 seconds until the ENG or ESP is flashing Press M button to select a language you desire Press S 1 2 Setting the Volume With the Volume level number flashing Press M button to select level between 0 7 set 0 to turned off voice Press S 2 Setting the date and time 2 1 Set...

Страница 10: ...ete the memory press the S button to skip this step The meter will automatically turn OFF and the set up will be completed NOTE The date time unit and memory deletion can ONLY be set in the setting mode When the meter is in setting mode if no button is pressed within 3 minutes the meter will turn off No set up necessary meter is pre set Meter is pre set for Eastern Standard Time Please refer to pa...

Страница 11: ...is applied onto the test strip Beep When the test is completed result appears on display Your blood glucose is number milligrams per deciliter When the test result is 20mg dL Your blood glucose is less than 20 milligrams per deciliter When the test result is 600mg dL Your blood glucose is over 600 milligrams per deciliter When selected CTL for control solution testing Control solution mode Recall ...

Страница 12: ...ch mode by 1 Start with the meter turned off Insert a test strip to turn on the meter the screen will display a flashing blood drop 2 Press M to select General or CTL mode TESTING WITH BLOOD SAMPLE CAUTION To reduce the chances of infection Choose a clean dry work surface Never share a lancing device and lancet with another person Always use a new and sterile lancet Lancets are for single use only...

Страница 13: ... are for single use only Avoid ge ng hand lo on oils dirt or debris when handling the lancets Setting Up the Lancing Device 1 Screw the lancing device cap off Insert a needle into the lancet holder and push down firmly until it is fully in place 2 Screw the needle cap and place it in appropriate location to use again after finish blood taking 3 Replace the lancing device cap Turn the cap until it ...

Страница 14: ...fference was significantly reduced Please follow the suggestions below before obtaining a drop of blood Rub the puncture site for about 20 seconds before penetration Select the puncture site either at the fingertips or another body part please see section Alternative Site Testing AST on how to select the appropriate sites Clean the puncture site using cotton moistened with 70 alcohol and let it ai...

Страница 15: ... soon as enough blood has filled the confirmation window of the test strip you will hear a beep letting you know the test has begun A countdown of 5 seconds starts Note make sure the confirmation window of the Test Strip is completely filled with your blood sample Step 7 Your blood glucose level along date and time appears on the display Blood glucose results are automatically stored in the memory...

Страница 16: ... you obtain from your meter may differ somewhat from your laboratory result due to normal variation Meter results can be affected by factors and conditions that do not affect laboratory results in the same way To make an accurate comparison between meter and laboratory results follow the guidelines below Before going to the lab Do a control solu on test to make sure that the meter is working prope...

Страница 17: ...t directly apply control solution onto a strip Step 4 The result of the control solutions test appears on the display The result will not be stored under CTL mode The result of the control solutions test should be within the range printed on the test strip vial label If the test results falls outside the specified range printed on test strip vial label repeat the test Results falling outside the s...

Страница 18: ...he Blood Glucose Monitoring System Test strip and Control Solution to extreme conditions such as high humidity heat freezing cold or dust The storage conditions for the test strips are 39 86 Humidity 80 RH Storage conditions for the meter are 40 131 Humidity 80 RH Always wash your hands with soap and water and rinse and dry completely before handling the Blood Glucose Monitoring system and Test st...

Страница 19: ... is being operated by a second person who is providing testing assistance to the user the meter and lancing device shall be cleaned and disinfected first 3 The users should wash hands thoroughly with soap and water after handling the meter lancing device or test strips METER SPECIFICATION Model G 427B with Bioland test strip and control solution Machine size 90mm L 54mm W 13mm H Weight 50g excludi...

Страница 20: ...mg dL Bilirubin 15mg dL Dopamine 0 03mg dL L dopa 0 45mg dL Methyldopa 0 75mg dL Tolbutamide 24mg dL Triglycerides 2000mg dL Hemoglobin 250mg dL Pa ents undergoing oxygen therapy may yield falsely lower results Not for use for pa ents in a hyperglycemic hyperosmolar state with or without ketosis Not for use on critically ill patients Not to be used for pa ents who are dehydrated hypertensive hypot...

Страница 21: ...be installed improperly 2 Battery power is too low for use 3 Too much time has passed between inserting the Test Strip and perfor ming the test 44 Test Strip has not been fully inserted into the Meter 1 Install the Battery correctly 2 Replace with new Battery 3 Reinsert the Test Strip into the Meter 4 Reinsert the Test Strip into the Meter Test results are incon sistent or Control Solution test re...

Страница 22: ...eter co untdown did not start Test Strip has not been inserted correctly Use a new Test Strip and redo the test Bioland Technology LTD No A6B7 Block G ShangRong Industrial Zone No 5 Baolong Road Baolong Community Longgang District 518116 Shenzhen Guangdong PEOPLE S REPUBLIC OF CHINA Version V1 0 2016 01 by Bioland Technology LTD ...

Отзывы: