EN
SBBI-21-044-T (10/2015)
6 / 8
PREVENTIVE MAINTENANCE
To Clean Equipment:
1. If tank is equipped with agitator, turn
off air to agitator first. This will prevent
the possibility of paint contamination
of the agitator air motor.
2. Turn off the main air supply to the tank.
3. Turn T-handle adjusting screw on tank
regulator counterclockwise until no
spring tension is felt.
4. Turn thumbscrew on air relief valve.
Wait until pressure bleeds down.
5. Loosen thumb screws, tip clamps back
and tip tank lid to one side.
6. Loosen spray gun air cap retaining ring
about three turns.
7. Turn on the air supply to spray gun.
8. Place cloth over air cap on the gun and
pull trigger. This will force material back
through the hose, into the tank. Binks
Solvent Saver 83GZ-5200 can be used
to clean hoses and gun fluid passage.
9. Empty and clean tank and parts which
come in contact with material. Use a
suitable cleaning material.
10. Pour cleaning material into the tank.
11. Replace lid and tighten thumb screws
and clamps.
12. Spray until clean solution appears.
13. Repeat steps 5 through 8.
Keep the safety valve clean at all times.
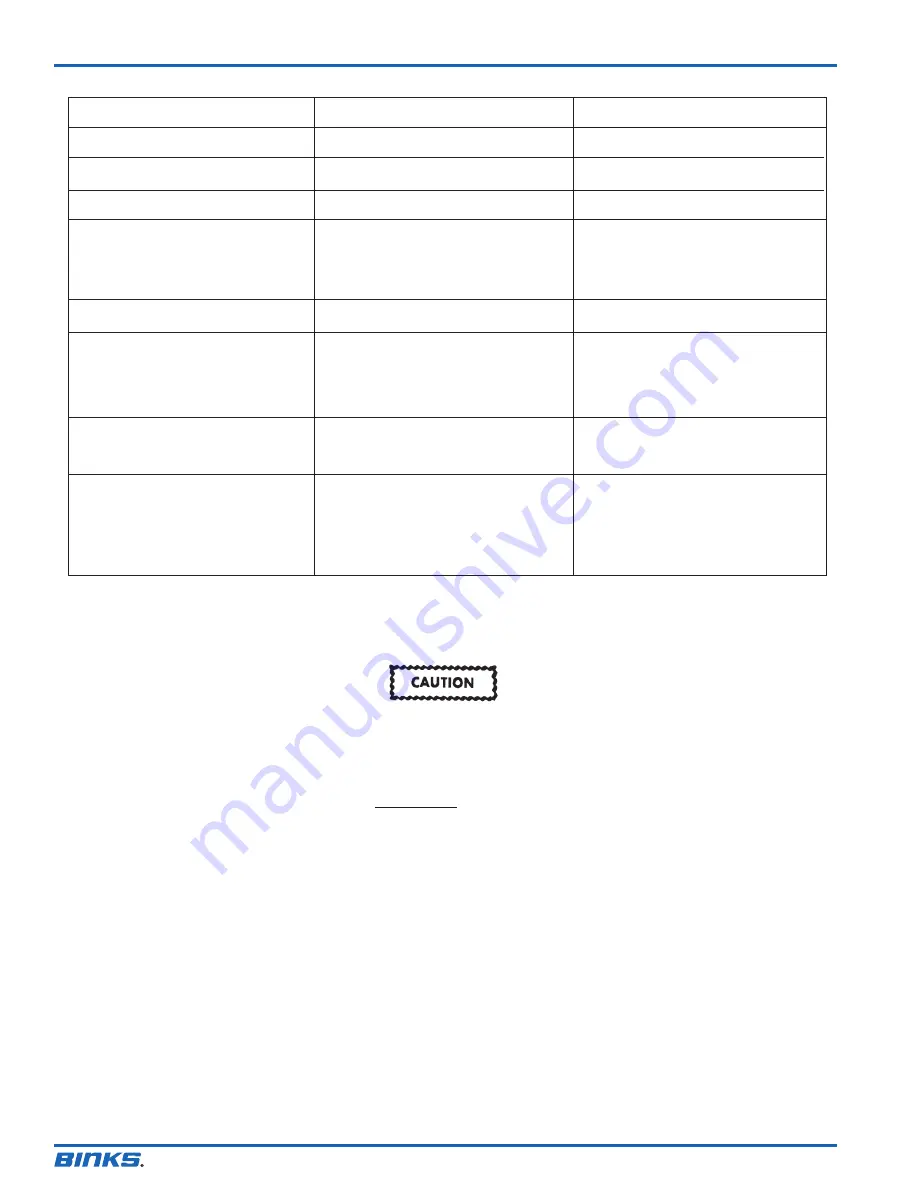
SERVICE CHECKS
Condition
Cause
Correction
Air escaping from port on regulator cap.
Pressure creepage registered on gauge.
Material tends to settle out rapidly.
Air bubbles form in material.
Air leakage at agitator seal assembly.
Paint getting into bearing assembly of
agitator.
Fluid or air leak at lid gasket.
Air motor siezed.
A. If agitator shaft does not turn by hand.
B. If agitator shaft turns freely, check
air motor.
Broken or damaged diaphragm.
Dirty or worn valve seat in regulator.
Not enough agitation of material.
Material being over-agitated.
Defective seal assembly (50).
Paint level in tank too high.
Paint being over-agitated.
Defective seal assembly (50).
Defective lid gasket
Thumb screws not tight.
Damaged seal assembly (50).
Vanes (44) blackened/chipped at outer
edges due to lack of oil.
Replace diaphragm.
Clean or replace valve seat.
Increase agitation.
Slow down agitator speed.
Optional QMS-79 propeller (see Accessories)
can be used to reduce the amount of
agitation.
Replace (50).
Fill tank 2-3" below rim.
Slow down agitator speed.
Replace (50).
Replace.
Tighten.
Replace (50).
Replace with Repair Kit KK-5001-1 and
refer to air motor agitator lubrication
instructions.
Note: Occasionally check gauge (9). The needle should return to zero with no pressure on the gauge.
Air Motor Assembly
Failure to properly lubricate the air
motor will result in premature mo-
tor failure and will void warranty.
Lubricate air motor daily by adding
4 or 5 drops of SAE 10 weight oil
into air inlet fitting.
CIean the agitator shaft (54, Pg. 5) and the
propeller (56) at the end of each day. Oc-
casionally remove and clean the muffler
strainer felt (60) or replace, if necessary.


