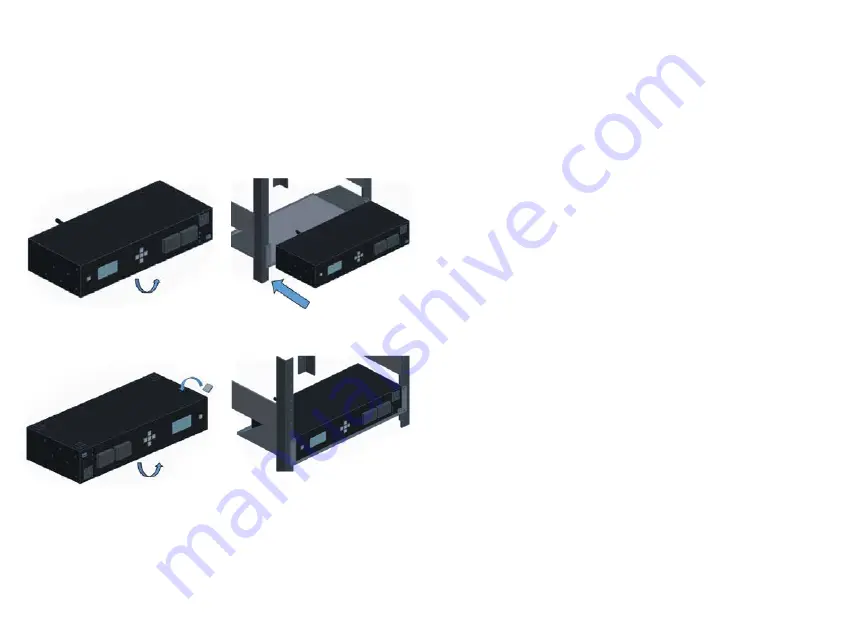
Big Dog PR-R13PI Скачать руководство пользователя страница 10

10

Installation

Shelf Mount

1. 

Remove the protective film over the adhesive on the included Rubber Feet

2. 

Apply the Rubber feet to the bottom of the PDU

3. 

Slide the PDU onto shelf

4. 

Place PDU on Shelf

Connections and Use 

Physical Connections

1. 

Screw in the Wi-Fi Antenna

2. 

Plug in all to be used connections Including:  
Ethernet LAN (Skip the Ethernet cable if you will be using Wi-Fi)  
Connected equipment power cables

3. 

Insert the female end of the included 6ft power cord into the PR-R13PI

4. 

Plug in the Male end of the included 6ft power cord into the main outlet  
on your wall

Wi-Fi Setup 

If using the Wi-Fi connection, follow these 
instructions

1. 

Plug in the included power cable to the PDU and to the 
AC main outlet on the wall. Wait approximately 15-30 seconds,  
the power button will begin to flash

2. 

Scan for Wi-Fi on your Wi-Fi enabled device with a web browser

3. 

Connect to the Wi-Fi SSID of the PDU 

The SSID of the PDU will be “Metra-xxxxxxxxxxxx” where the “x” are the MAC 
address or device ID of the PDU. Verify the code of the SSID matches the MAC 
address of the PDU with the sticker that is attached to the bottom of the PDU

4. 

In a web browser go to “192.168.4.1”

5. 

Go to “Network”

6. 

Click “SCAN NETWORKS” 

The network mode can also be changed before scanning. For ease of setup 
we’ll use the default DHCP settings. 

7. 

Select the desired network SSID


NOTE: the PDU requires a 2.4Ghz Wi-Fi connection. 

Step 1

Step 3

Step 2

Step 4

Содержание PR-R13PI

Страница 1: ...1 PR R13PI 12 1 OUTLET INTELLIGENT RACK MOUNT POWER DISTRIBUTION UNIT...

Страница 2: ...equipment 12 individually controlled outlets provide up to 5100 Joules of surge Protection Wi Fi and Wired LAN connections allow for flexibility with placement and network connectivity The built in Se...

Страница 3: ...ge protection Temperature monitoring with 4 thermostats Web and Mobile app for remote management and notification I O for additional integrations RS 232 Serial and IP automation integration Grounding...

Страница 4: ...OF GROSS NEGLIGENCE Valid in the United States and Canada THIS WARRANTY DEFINES ETHEREAL HOME THEATRE LLC S LIABILITY FOR ANY AND ALL DAMAGES RESULTING FROM THE OPERATION OR FAILURE OF THE PRODUCT THE...

Страница 5: ...chase at the time a claim is made Conditions and Limitations Proof of purchase is required Damage caused by accidents abuse misuse or modification of the surge suppressor will render this warranty nul...

Страница 6: ...fair market value of repair or replace any home entertainment equipment which is damaged by a transient surge while properly connected through the Ethereal Home Theatre LLC surge suppressor to a prope...

Страница 7: ...for more information G Always On Service Outlet H 12 Individually controlled Outlets I Grounding pin J 15 amp Circuit Breaker K Ethernet Port L Wi Fi Antenna M Outlet Status LEDs See LED functions for...

Страница 8: ...work BLINKING RED No Network Connection SOLID BLUE Good Network Connection RAPID BLINKING RED PDU failure requires reboot or reset Outlet Status ON Outlet is On OFF Outlet is Off Voltage SOLID BLUE No...

Страница 9: ...PDU using the appropriate screws for your rack Installation Surface Mount 1 Use the included screws to attach the included Rack Mount ears to PDU at the secondary location You can find the secondary m...

Страница 10: ...nection follow these instructions 1 Plug in the included power cable to the PDU and to the AC main outlet on the wall Wait approximately 15 30 seconds the power button will begin to flash 2 Scan for W...

Страница 11: ...a click DO NOT Smack the surge module into the slot Cloud setup 1 Log in to your MAVbase com account 2 Click the Add New button 3 Click ADD PDU 4 Add the PR R13PI to your account using the MAC address...

Страница 12: ...ight fall and cause injuries This equipment is not suitable for use in locations where children are likely to be present Do not cover this device with a cloth Do not install it on a carpet or rug Caut...

Страница 13: ...ding disconnect it from the power source and replace the power cord immediately See the warranty section of the owner s manual for details No User Serviceable Parts Inside If the PDU is not operating...

Страница 14: ...E THE EQUIPMENT The Class B digital apparatus meets all requirements of the Canadian Interference Causing Equipment Regulation Cet appareil numerique de la class B respecte toutes les exigencies du Re...

Страница 15: ...spositif doit tre pr t accepter tout brouillage radio lectrique re u m me si ce brouillage est susceptible de compromettre le fonctionnement du dispositif Cet quipement est conforme aux limites d expo...

Страница 16: ...ows direct access for programming and setup without an Internet connection Specifications OPERATING TEMPERATURE 14 F 104 F 10 C 40 C SURGE PROTECTION 5100 Joule Replaceable EXTERNAL ANTENNA Yes OUTLET...

Отзывы: