Set up
Note:
The
MPD-12-Zoom can display images of any size,
but the ideal size is 1280 x 800 pixels.
2. Use as a photo frame
Press the play button on the remote control once to go to
the photo frame. Wait a few seconds.
Some default images will be displayed until you plug in
the supplied USB drive, which contains more images.
To display your own photo’s, copy them to the USB drive
using a computer or other image writing device. Photo’s
will be displayed continuously one by one.
Note:
The MPD-12-Zoom will turn on automatically when
first connected to a power source. The screen will be blank
until you press the large blue button on the camera.
3. Use as a digital clock
Set Date / Time
Press the Menu button (see below) to go to set up.
Press the Advance button to advance the date / time,
or press the Go Back button to turn back the date / time.
Press the Menu button again to confirm the changes.
Press the play button until the digital clock appears.
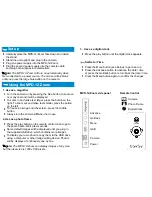
MPD-12-Zoom side panel
Go Back
Advance
Menu
USB
Camera
Power
Remote Control
Camera
Photo Frame
Digital Clock
1. Use as a magnifier
Carefully place the MPD-12-Zoom face down and install
the stand.
Stand the unit upright and plug in the camera.
Plug one power supply into the MPD-12-Zoom.
Plug the second power supply into the camera cable
and plug both supplies into wall outlets.
Using the MPD-12-Zoom
Turn the camera on by pressing the blue button, then move
over any text and it will be displayed.
To zoom in and make text larger, press the button on the
right. To zoom out and make text smaller, press the button
on the left.
To freeze an image onto the screen, press the middle
button
Always turn the camera
off
when not in use.


