10
5
6
7
5
6
7
A
B
B
D
Instructivo de ensamble
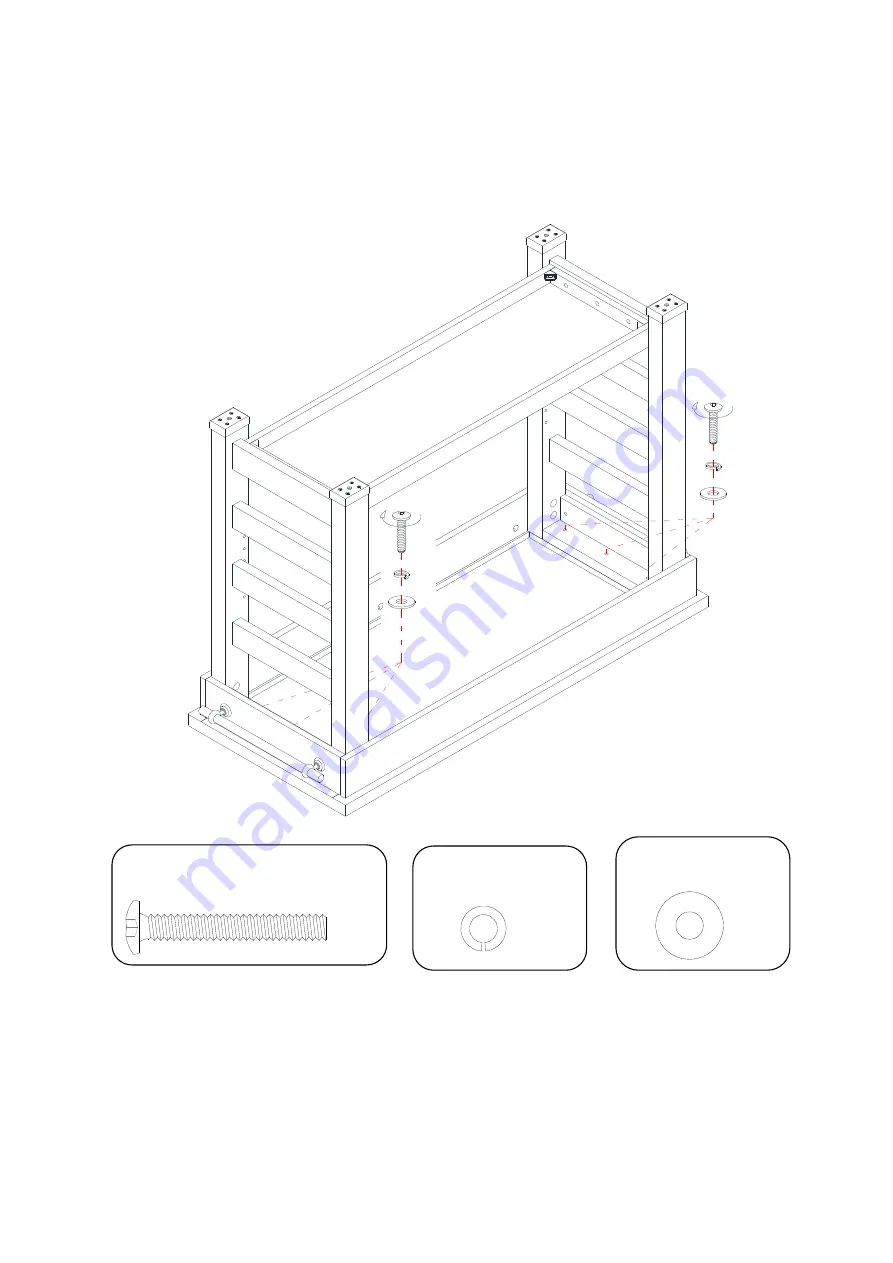
12.
Asegurar los marcos laterales (B) al panel superior (A) con 6 tornillos de 1-3/4" (5) y 6 arandelas (6 y
7).
Arandela de presión
(6 usados en este paso)
⑥
Arandela plana
(6 usados en este paso)
⑦
Tornillo de 1-3/4”
(6 usados en este paso)
⑤


