


Service and Maintenance for Mortise Locks
W Series Service Manual
4–49
A
DDING
THE
RQE
SWITCH
TO
ELECTRIFIED
MORTISE
LOCKS
To add an RQE switch to your mortise lock, perform the following
steps.
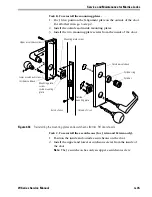
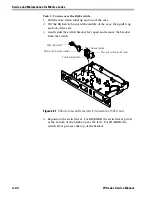
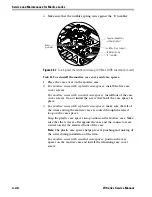
1. Remove the mortise case. See
Removing components for electrified
.
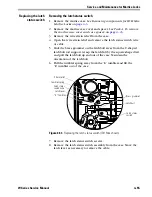
2. Remove the mortise case cover and spacer. See
the mortise case cover and case spacer:
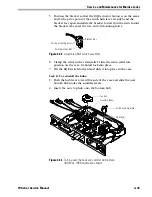
3. Remove the hubs from the case. Maintain the orientation of the
hubs.
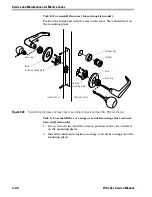
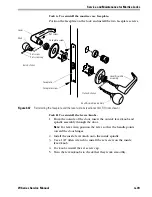
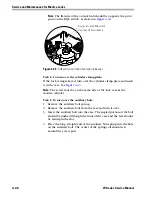
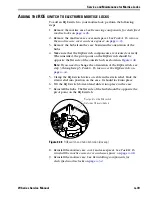
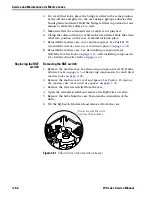
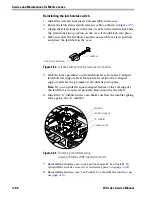
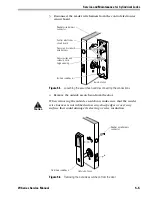
4. Make sure that the RQE switch components are oriented correctly.
When installed, the pivot point on the RQE switch should be
opposite the flat side of the outside hub, as shown in
Note:
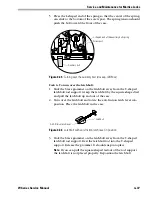
If you need to change the orientation of the RQE switch, see
step 3 through step 5,
Task C. To turn over the RQE switch:
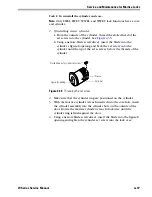
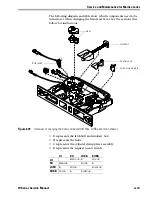
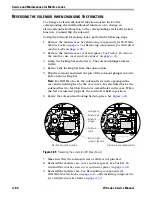
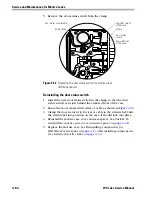
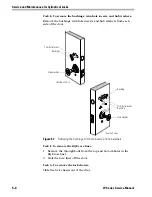
5. Clamp the RQE switch wires or cable in the strain relief. Slide the
strain relief into position on the case. It should lock into place.
6. Tilt the RQE switch forward and slide it into place in the case.
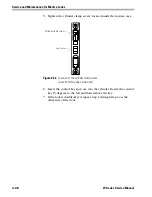
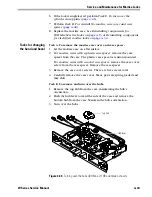
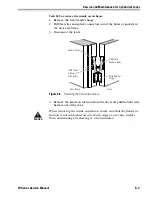
7. Reinstall the hubs. The flat side of the hub should be opposite the
pivot point on the RQE switch.
8. Reinstall the mortise case cover and case spacer. See
reinstall the mortise case cover and case spacer:
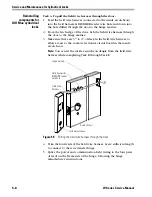
9. Reinstall the mortise case. See
.
Figure 4.48
RQE switch and hub orientation (closeup)
Pivot point on the RQE switch
Flat side of the outside hub
Содержание 34HW
Страница 1: ......
Страница 6: ...Contents vi W Series Service Manual...
Страница 38: ...IDH Max Locks Functions and Parts 2 24 W Series Service Manual...
Страница 54: ...Electrified Locks Functions and Parts 3 16 W Series Service Manual...
Страница 140: ...Service and Maintenance for Cylindrical Locks 5 30 W Series Service Manual...
Страница 158: ...Additional Service and Maintenance for IDH Max Locks 6 18 W Series Service Manual...
Страница 162: ...Glossary A 4 W Series Service Manual...
Страница 164: ...Installation Instructions B 2 W Series Service Manual...