


9
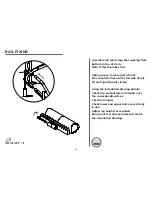
MOUNTING THE CHARGER
Find a suitable power supply as close as
possible to either the top or bottom of the
stairs.
Mount the charger in a suitable position
near the power supply using the screws
supplied. Please ensure the charger is
mounted level and secure.
Leave sufficient length on the power
output to enable easy connection to the
rail charge points.
Do not connect or switch on the power
supply until the rail charge points have
been connected. (See Page 31)
Power Supply
Charging Unit
Power Output
Cable
Содержание Infinity
Страница 1: ...1 INSTALLATION MANUAL Infinity Stairlift Rail Carriage Seat Huddersfield England ...
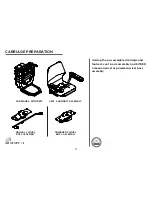
Страница 10: ...10 CARRIAGE PREPARATION ...
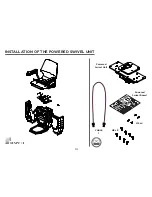
Страница 14: ...14 M8 x8 M5 x4 CABLE 1 Powered Swivel Unit Powered Swivel Board INSTALLATION OF THE POWERED SWIVEL UNIT ...
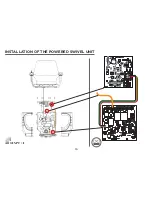
Страница 15: ...15 C OFF INSTALLATION OF THE POWERED SWIVEL UNIT Powered Swivel Board Powered Swivel Unit ...
Страница 16: ...16 INSTALLATION OF THE POWERED SWIVEL UNIT ...
Страница 17: ...17 INSTALLATION OF THE POWERED SWIVEL UNIT 2a 2b 3 1 1 2 4 3 RH 1 2 4 3 LH ON ...
Страница 18: ...18 INSTALLATION OF THE MANUAL SWIVEL LEVER In the Box ...
Страница 19: ...19 INSTALLATION OF THE MANUAL SWIVEL LEVER 1 2 ...
Страница 20: ...20 INSTALLATION OF THE MANUAL SWIVEL LEVER 3 ...
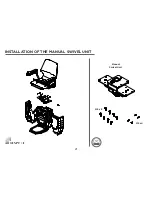
Страница 21: ...21 M8 x8 M5 x4 Manual Swivel Unit INSTALLATION OF THE MANUAL SWIVEL UNIT ...
Страница 22: ...22 C OFF INSTALLATION OF THE MANUAL SWIVEL UNIT ...
Страница 23: ...23 INSTALLATION OF THE MANUAL SWIVEL UNIT Connect the Swivel Micro switch as shown in the detail below ...
Страница 24: ...24 INSTALLATION OF THE MANUAL SWIVEL UNIT 2a 2b 3 1 1 2 4 3 1 2 4 3 RH LH ON ...
Страница 36: ...36 TROUBLESHOOTING ...
Страница 44: ...44 Infinity Stairlift Rail Carriage Seat Huddersfield England ...


