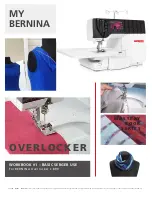
Bernina L 890 Скачать руководство пользователя страница 2

My 

BERNINA

2

B E R N I N A   O V E R L O C K E R   W O R K B O O K 

TABLE OF CONTENTS

INTRODUCTION �������������������������������������������������������������������������

4

PREPARING TO STITCH ��������������������������������������������������������������

5

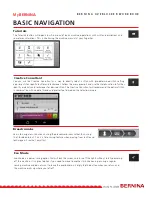
BASIC NAVIGATION �������������������������������������������������������������������

6

PERSONALIZE THE MACHINE ����������������������������������������������������

8

SELECTING A STITCH (DIRECT STITCH SELECTION) ������������������

9

MANUAL SETTINGS �����������������������������������������������������������������

10

STITCH VIEW ����������������������������������������������������������������������������

11

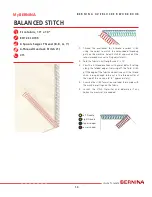
BALANCED STITCH ������������������������������������������������������������������

14

TENSION SETTINGS: UPPER LOOPER THREAD TENSIONS ������

15

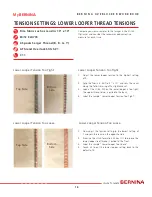
TENSION SETTINGS: LOWER LOOPER THREAD TENSIONS ����

16

TENSION SETTINGS: RIGHT NEEDLE THREAD TENSIONS �������

17

TENSION SETTINGS: LEFT NEEDLE THREAD TENSIONS ����������

18

STITCH LENGTH �����������������������������������������������������������������������

19

CUTTING WIDTH ����������������������������������������������������������������������

20

UNDERSTANDING DIFFERENTIAL FEED ����������������������������������

21

DIFFERENTIAL FEED: STRETCHY FABRICS �������������������������������

22

PERSONAL MEMORY ���������������������������������������������������������������

23

3-THREAD OVERLOCK STITCH-WIDE ��������������������������������������

24

3-THREAD FLATLOCK - WIDE ��������������������������������������������������

25

3-THREAD OVERLOCK STITCH NARROW �������������������������������

26

3-THREAD FLATLOCK - NARROW �������������������������������������������

27

3-THREAD ROLLED HEM ���������������������������������������������������������

28

2-THREAD ROLLED HEM ���������������������������������������������������������

29

2-THREAD FLATLOCK - NARROW �������������������������������������������

30

2-THREAD BLANKET STITCH NARROW ����������������������������������

31

OVERLOCKER TECHNIQUES: SECURING SEAMS ���������������������

32

OVERLOCKER TECHNIQUES: INSIDE CORNER ������������������������

33

L 890

Содержание L 890

Страница 1: ...anted to copy and distribute in original form only Content may not be altered or used in any other form or under any other branding For BERNINA Overlocker L 890 WORKBOOK 1 BASIC SERGER USE OVERLOCKER...

Страница 2: ...ENSIONS 16 TENSION SETTINGS RIGHT NEEDLE THREAD TENSIONS 17 TENSION SETTINGS LEFT NEEDLE THREAD TENSIONS 18 STITCH LENGTH 19 CUTTING WIDTH 20 UNDERSTANDING DIFFERENTIAL FEED 21 DIFFERENTIAL FEED STRET...

Страница 3: ...O R K B O O K TABLE OF CONTENTS The information in this workbook applies to the BERNINA Overlocker Machine model shown above L 890 OVERLOCKER TECHNIQUES OUTSIDE CORNER 34 REFERENCE OVERLOCKER NEEDLES...

Страница 4: ...overcasting at the same time so your project is finished faster and will produce neater and more professional results Even though the workings of the overlocker may appear be more complex than a sewin...

Страница 5: ...of the needle which reduces the friction on the thread especially at high speeds Other needles can be used in these machines but tension adjustments may be required to achieve the desired stitch Refer...

Страница 6: ...n will reset any changed setting back to the default settings by simply tapping the button Settings and Help Functions The Home Screen has four buttons that allow you to launch the Setup Program and H...

Страница 7: ...red stitch The Creative Consultant will recommend the optimal stitch in combination with needle thread and presser foot based on the selections made Creative Consultant Breadcrumbs Learn to navigate w...

Страница 8: ...tup Menu under the machine Settings icon Here you can set the language check firmware version recalibrate the touchscreen restore factory settings and launch a software update 1 Touch the Setup icon 2...

Страница 9: ...o the Sewing Screen 1 Select stitches by touching the Stitch Selection tab 2 Select the stitch using the Search by Number or from Stitch Group Folder 3 Select the folder for the stitch group and all s...

Страница 10: ...by selecting the icon This will walk you step by step through all the changes that need to be made for the stitch selected Tip The L 890 will remember the last stitch sewn and the prompts work from th...

Страница 11: ...will start as recommended preset defaults for the stitch selected When adjusted they will be outlined in yellow There are two ways to adjust the thread tensions on the L 890 You can do this directly...

Страница 12: ...Speed will open a screen with a Slider Control and Fine Adjustment icons Tip Remember the sewing speed can also be set in the machine Setup Screen From the Stitch View Screen only the top speed can be...

Страница 13: ...iles and techniques used Always begin with test sewing the stitch If the stitch is not as desired then launch the Stitch Optimizer to troubleshoot the stitch Stitch Optimizer 1 Tap the Stitch Optimize...

Страница 14: ...t setting along the folded edge trimming off the fold Stitch off the edge of the fabric and continue until the thread chain is long enough to be cut in the thread cutter at the side of the machine 6 8...

Страница 15: ...c in half to 5 x 10 and sew the seam along the fold trimming off a slight amount 3 Look at the stitch You can see that when the tension is too tight the upper looper pulls the lower looper red thread...

Страница 16: ...etting of 1 and sew the seam on the opposite side 2 Examine the stitch formation When it is too loose the lower looper red thread is pulled to the front 3 Label the sample Lower Looper Too Loose 4 Tou...

Страница 17: ...Tension Too Tight 1 Now adjust the tension setting to the lowest setting of 1 and sew the seam on the opposite side 2 Examine the stitch formation Notice how you can now see the needle thread making l...

Страница 18: ...to the lowest setting of 1 and sew the seam on the opposite side 2 Examine the stitch formation You will notice that on the back of the seam you will see the yellow thread being pulled by the loopers...

Страница 19: ...stitch length to 2 mm and sew to the third mark 6 Adjust the stitch length to 1 mm and sew to the end 7 Mark the stitch length settings on the fabric sample 8 Touch clr to return stitch length to its...

Страница 20: ...three equal sections along the folded edge 3 Adjust the Cutting Width knob to the widest setting 9 Sew to the first mark on the fabric stopping when the knife edge is on the mark 4 Reduce the cutting...

Страница 21: ...you adjust differential feed you are in fact adjusting the rate at which the front feed dog moves Look at the diagram and the Differential Feed Dial and settings together When the differential feed i...

Страница 22: ...Differential Feed setting to 1 5 sew along the folded edge of the second fabric halfway to the end 3 Adjust the differential feed setting to 2 and complete sewing the remainder of the fabric to the en...

Страница 23: ...eed to be recorded here for saved stitches remember the machine does not do these things electronically so this will serve as a reminder for you in the future Navigate back to the manual settings in t...

Страница 24: ...llow the steps in Guided Mode or make the noted manual settings in Expert Mode 2 Using the small screwdriver and needle holder tool remove the right needle and thread Tighten the needle set screw afte...

Страница 25: ...eft needle and the right edge of the stitch finger This method allows the fabric to lay totally flat under the stitches Optionally you may choose to trim the folded edge which will allow one fabric to...

Страница 26: ...this exercise 1 Select Stitch 4 and follow the steps in Guided Mode or make the noted manual settings in Expert Mode 2 Using the small screwdriver and needle holder tool loosen the right needle screw...

Страница 27: ...d remove the left needle 4 Fold the fabric in half wrong sides together to 5 x 10 5 Place the fold under the presser foot Guide the fabric halfway between the left needle and the right edge of the sti...

Страница 28: ...move the left needle 4 Disengage the stitch finger by placing the Rolled Hem Selection Lever in the R position 5 Start the machine and run a chain for several inches so that you have a thread tail to...

Страница 29: ...l loosen the right needle screw and insert the right needle Tighten the needle set screw Thread the needle 3 Remove the left needle thread Loosen the left needle set screw and remove the left needle 4...

Страница 30: ...looper 4 Fold the fabric in half to 5 x 10 Place the fold under the presser foot Guide the fabric halfway between the left needle and the right edge of the stitch finger This method allows the fabric...

Страница 31: ...he Upper Looper Converter to the upper looper 3 Place the StitcH2O on top of the fabric and under the presser foot Guide the fabric so that a small amount of the fabric and StitcH2O is cut off 4 Slowl...

Страница 32: ...6 Continue stitching At the end of the fabric sew just off the edge of the fabric Carefully pull the threads off the stitch finger by placing the Rolled Hem Selection Lever in the R position temporar...

Страница 33: ...settings in Expert Mode 2 Cut an inside corner into the fabric 3 Snip into the corner about the width of the stitching See Image 1 4 Sew until the knife reaches the end of the cut 5 Use the handwheel...

Страница 34: ...e sewing trim away the seam allowance for about 2 on each corner of the square 2 Beginning at one trimmed corner stitch trimming very slightly as you sew to the end of the fabric Take one stitch off t...

Страница 35: ...ended to accommodate the usage of certain specialty needles stretch Microtex etc but keep in mind that adjustments to tensions may be required for a proper stitch formation Need to Know Always make su...

Страница 36: ...on Thread such as YLI Woolly Nylon Maxi Lock Stretch or Wonderfil SoftLoc A very elastic thread with excellent coverage perfect for rolled edges and knit seams Topstitching Thread such as YLI Jeans St...

Страница 37: ...S FOR OPTIONAL OVERLOCKER TECHNIQUE PAGES 32 THROUGH 34 QUANTITY SIZE FABRIC 3 10 x 10 Firm Fabric such as Heavy muslin High quality quilting cotton Medium weight denim 1 3 x 12 Lightweight Fabric FAB...

Отзывы: