


English |
11
1 609 92A 44U • 7.9.17
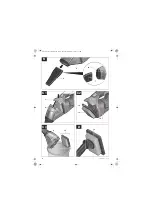
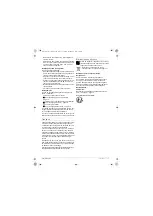
Battery Insertion/Removal (see figures A1 – A2)
Do not use force to insert the battery.
The bat-
tery is designed in such a way that it can only be
inserted into the vacuum cleaner when it is in the
right position.
– Slide the battery pack
5
all the way into the bat-
tery port
11
.
– To remove the battery pack
5
, press the unlock-
ing buttons
12
and pull the battery pack out of
the battery port
11
.
Mounting the Crevice Nozzle
(see figure B)
Remove the battery before cleaning or per-
forming maintenance on the vacuum cleaner,
making tool adjustments, changing accesso-
ries or storing the vacuum cleaner.
This safety
measure prevents the vacuum cleaner from be-
ing started accidentally.
The crevice nozzle
9
can be connected directly to
the dust chamber
8
.
– Firmly insert the crevice nozzle
9
into the intake
port
10
on the dust chamber
8
with the mark
shown in the illustration facing down.
Operation
Remove the battery before cleaning or per-
forming maintenance on the vacuum cleaner,
making tool adjustments, changing accesso-
ries or storing the vacuum cleaner.
This safety
measure prevents the vacuum cleaner from be-
ing started accidentally.
Starting Operation
Before vacuuming, ensure that the filter as-
sembly is assembled securely.
Only use an undamaged filter (no cracks, small
holes, etc.). Replace a damaged filter immedi-
ately.
Switching On and Off
To save energy, only switch the vacuum cleaner on
when using it.
– To
switch on
the vacuum cleaner, press the
On/Off button
2
.
– To
switch off
the vacuum cleaner, press the
On/Off button
2
again.
Maintenance and Service
Maintenance and Cleaning
In all correspondence and spare parts orders,
please always include the 6-digit article number
given on the type plate of the vacuum cleaner.
Remove the battery before cleaning or per-
forming maintenance on the vacuum cleaner,
making tool adjustments, changing accesso-
ries or storing the vacuum cleaner.
This safety
measure prevents the vacuum cleaner from be-
ing started accidentally.
For safe and proper working, always keep the
vacuum cleaner and ventilation slots clean.
– Clean the vacuum cleaner housing from time to
time using a moist cloth.
– Clean soiled charger contacts using a dry cloth.
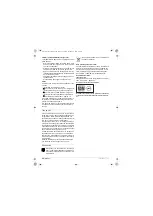
Cleaning the Dust Cup (see figures C1–C3)
To maintain the optimum performance of the vacu-
um cleaner, clean the dust cup
8
after each use.
– Hold the vacuum cleaner down slightly so that
dust cannot fall out of the dust chamber when
the vacuum cleaner is opened.
– Press release button
1
and remove the dust cup
8
from the motor housing
7
.
– Reach into the opening
13
on the motor housing
7
and pull the filter assembly
15
off the motor
housing by the filter seal
14
.
– Shake/tap out the dust cup
8
over a suitable
waste bin.
– If required, clean the dust cup with a moist cloth.
If required, clean the filter assembly (see “Clean-
ing the Filter Assembly”, page 11).
– Insert the filter assembly
15
with the filter seal
14
back into the motor housing
7
.
Afterwards, hang the dust cup at the bottom into
the motor housing, apply light pressure until the
dust cup can be heard to engage.
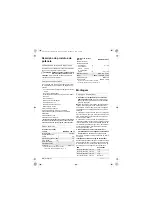
Cleaning the Filter Assembly (see figure D)
The filter assembly
15
must not be wet cleaned.
– Hold the vacuum cleaner down slightly so that
dust cannot fall out of the dust chamber when
the vacuum cleaner is opened.
– Press release button
1
and remove the dust cup
8
from the motor housing
7
.
– Reach into the opening
13
on the motor housing
7
and pull the filter assembly
15
off the motor
housing by the filter seal
14
.
– Brush down the flaps of the pleated filter with a
soft broom.
– Assembly is carried out in reverse order.
OBJ_BUCH-2458-002.book Page 11 Thursday, September 7, 2017 5:51 PM