background image

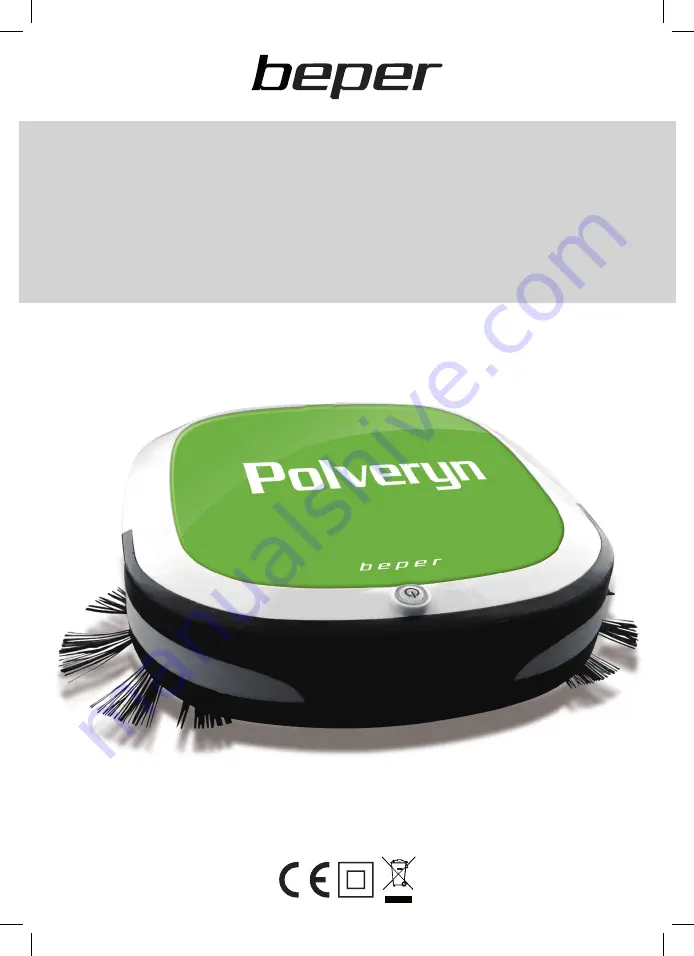
• ROBOT ASPIRAPOLVERE - MANUALE DI ISTRUZIONI

•ROBOT CLEANER - USE INSTRUCTIONS

• ROBOT ASPIRATEUR - MANUEL D’INSTRUCTIONS

• SAUGROBOTER - BETRIEBSANLEITUNG

•ROBOT ASPIRADOR - MANUAL DE INSTRUCCIONES

• ASPIRATOR ROBOT - MANUAL DE INSTRUCȚIUNI 

Cod.: 50.600

Содержание 50.600

Страница 1: ...LVERE MANUALE DI ISTRUZIONI ROBOT CLEANER USE INSTRUCTIONS ROBOT ASPIRATEUR MANUEL D INSTRUCTIONS SAUGROBOTER BETRIEBSANLEITUNG ROBOT ASPIRADOR MANUAL DE INSTRUCCIONES ASPIRATOR ROBOT MANUAL DE INSTRUCȚIUNI Cod 50 600 ...

Страница 2: ...Fig A Fig B pag 4 pag 9 pag 14 pag 19 pag 24 pag 29 For further information and or for instructions for use in other languages please visit beper com ITALIANO ENGLISH FRANÇAIS DEUTSCH ESPAÑOL ROMÂNĂ ...

Страница 3: ...3 Fig C Fig D Fig E ...

Страница 4: ...ione è danneggiato esso deve essere sostitu ito dal Costruttore o dal suo Servizio Assistenza Tecnica o comunque da una persona con qualifica similare in modo da pre venire ogni rischio Collegare l apparecchio esclusivamente ad una presa di corrente elettrica alternata In generale è sconsigliabile l uso di adattatori prese multiple e o pro lunghe Qualora il loro uso si rendesse indispensabile è ne...

Страница 5: ...TENERE L APPARECCHIO ED IL SUO CAVO FUORI DALLA PORTATA DEI BAMBINI Alcune avvertenze 1 Non cercare di riparare o modificare il prodotto potreste causare scosse elettriche e o lesioni personali 2 Non utilizzare caricabatterie diversi da quello in dotazione con il prodotto 4 Non piegare eccessivamente il cavo di alimentazione o appoggiar vi sopra oggetti pesanti altrimenti potrebbe danneggiarsi 5 D...

Страница 6: ...er panno e il panno non è necessario alcun attrezzo si può fare a mano 1 Per assemblare il supporto per panno inserire i 4 piedini sporgenti posti sul retro del supporto nei 4 fori posti sul fondo dell apparecchio e premere leggermente 2 Se non è necessario utilizzare un panno per la pulizia rimuovere il supporto per panno 3 Applicare il panno per la pulizia sul supporto premendo su di esso 4 Rimu...

Страница 7: ... sull apparecchio indica che il prodotto alla fine della propria vita utile dovendo essere trattato separatamente dai rifiuti domestici deve essere conferito in un centro di raccolta differenziata per apparecchiature elettriche ed elettroniche oppure riconsegnato al rivenditore al momento dell acquisto di una nuova apparecchiatura equivalente L adeguata raccolta differenziata per l avvio successiv...

Страница 8: ...asporto o da cadute accidentali b Errata installazione o inadeguatezza impianto elettrico c Riparazioni o modifiche operate da personale non autorizzato d Mancata o non corretta manutenzione e pulizia e Prodotto e o parti di prodotto soggette a usura e o consumabili es lampade batterie lame f Mancata osservanza delle istruzioni per il funzionamento dell apparecchio negligenza o trascuratezza nell ...

Страница 9: ... personnel only which shall also ensure that the section of the socket cables is suitable for your appliance power absorption Never pull the supply cord to unplug the appliance Make sure that the supply cord never comes into contact with hot or cutting surfaces Do not use this appliance if the supply cord is damaged In case of damage it must be replaced by the manufacturer its service agent or sim...

Страница 10: ...iance any longer make it unservice able by simply cutting the supply cable after disconnecting the plug from the socket ALSO MAKE ANY DANGEROUS PARTS UNSERVICE ABLE ESPECIALLY FOR CHILDREN WHO COULD PLAY WITH THE APPLIANCE Some warnings 1 Do not try to repair or modify the product otherwise it could cause electric shock or body injury 2 Don t use other chargers except for the one equipped with the...

Страница 11: ... themselves HOW TO DISASSEMBLE OR ASSEMBLE WIPING BOARD AND WIPING CLOTH Fig C To disassemble assemble the wiping board and cloth no need any tools you can do by hand 1 Press slightly the 4 protruding pins placed on the back of the wiping board into the 4 holes placed on the bottom of the appliance 2 If you don t need to use wiping cloth please remove the wiping board 3 Apply the wiping cloth on t...

Страница 12: ...loth 3 Assemble the wiping cloth again TECHNICAL SPECIFICATIONS Lithium Battery 2000 mAh 7 4V Adaptor INPUT 110 240V 50 60Hz OUTPUT 9V 500 mA For any improvement reasons Beper reserves the right to modify or improve the product without any notice The European directive 2011 65 EU on Waste Electrical and Electronic Equipment WEEE requires that old household electrical appliances must not be dispose...

Страница 13: ... for which it has been intended The appliance has not been tampered with otherwise it is not maintainable The purchase receipt shall be presented The appliance showing a fair wear and tear shall not be covered by this guarantee Therefore any part that could be accidentally broken or having visible signs of use in consumable products such as lamps batteries heating elements the aesthetic parts are ...

Страница 14: ...uissance de l appareil En cas d incompatibilité entre la prise électrique murale et celle de l appareil faire changer la prise de l appareil par un professionnel qualifié Ce dernier devra s assurer que la section des câbles de la prise soit adaptée à la puissance absorbée par l appareil Ne jamais tirer sur le câble d alimentation pour débrancher la prise électrique S assurer que le câble n entre p...

Страница 15: ...ec des capacités physi ques sensorielles ou mentales réduites ou manquant d expérience ou de connaissance technique utiliser cet appareil sans surveillance S assurer que les enfants ne jouent pas avec cet appareil DÈS LORS QUE L APPAREIL DOIT ÊTRE DÉTRUIT IL EST RECOMMANDÉ DE COUPER LE CÂBLE D ALI MENTATION ET DE RETIRER TOUTES LES PARTIES SUSCEPTIBLES DE PRÉSENTER UN QUELCONQUE DANGER EN PARTICUL...

Страница 16: ...EMONTER OU ASSEMBLER LE SUPPORT POUR CHIFFON ET LE CHIFFON Fig C Pour démonter assembler le support pour chiffon et le chiffon il n est pas nécessaire d avoir un équipement on peut le faire à main 1 Pour assembler le support pour chiffon insérer les 4 petits pieds dépassants placés sur le rétro du support dans les 4 trous placés sur le fond de l appareil et appuyer légèrement 2 S il n est pas néce...

Страница 17: ... chiffon 3 Essayer d assembler le chiffon de nouveau DONNEES TECHNIQUES Batterie au lithium 2000 mAh 7 4V Adaptor INPUT 110 240V 50 60Hz OUTPUT 9V 500 mA Dans un soucis de constante amélioration Beper se réserve la faculté d apporter des modifications ou améliorations à ce produit sans préavis Le produit en fin de vie doit être détruit selon les normes en vigueur relatives à l élimination des déch...

Страница 18: ...n de l installation électrique c Réparations ou modifications effectuées par un personnel non autorisé d Manque ou incorrect entretien et nettoyage e Produit et ou parties du produit relevant de l usure et ou consommables ex lampes piles lames f Manque d observation des instructions pour le fonctionnement de l appareil négligence dans l utilisation La liste indiquée ci dessus est à titre purement ...

Страница 19: ...ät aufgenommenen Leistung entspricht 6 Die Benutzung von Paßstücken Vielfrachsteckdosen und oder Verlangerungskabel ist in der Regel nicht ratsam insbesondere in Badezimmer oder Duschraum Müssen diese Teile unbedingt verwen det werden so benutzen Sie nur Einfach oder Vielfrachpaßstücke bzw Verlangerungskabel die den geltenden Sicherheitsvorschriften entsprechen Darauf achten daß die auf dem Einfac...

Страница 20: ...gseinflüssen Regen Wind Schnee Ha gen usw aussetzen 19 Bei Nicht benutzen bzw Reinigen den Gerätestecker aus der Steckdose ziehen 20 Falls Sie entscheiden das Gerät nicht mehr zu verwenden dann ist es empfehlenswert das Gerät durch Abschneiden des An schlußkabel außer Betrieb zu setzen nachdem der Stecker aus der Steckdose gezogen wurde Es wird ferner empfohlen die Gerätetei le die lebensgefährlic...

Страница 21: ...ng des Produkts im Laufe der Zeit zu erhalten und eine längere Lebensdauer zu gewährleisten empfehlen wir die meisten Tierhaare vor der Nutzung des Geräts mit einem Besen zu entfernen Produktbeschreibung Fig A 1 Staubsauger 2 Ladegerät 3 Rotierende Bürsten 2 Stück 4 Filter 5 Tuch 2 Stück Bevor Sie das Gerät einschalten überprüfen Sie 1 ob der Staubsammelbehälter voll ist oder nicht Wenn er voll is...

Страница 22: ... kann es nicht verwendet werden das Gerät funktioniert dann nicht WIE MAN DEN STAUBSAMMLUNGSBEHÄLTER REINIGT Fig D 1 Öffnen Sie die obere Abdeckung indem Sie nach oben ziehen 2 Entfernen Sie die Abdeckung 3 Entfernen Sie die Staubbehälterabdeckung 4 Entfernen Sie den Staubsammelbehälter 5 Entfernen Sie die Filterabdeckung 6 Leeren Sie den Behälter REINIGUNG DES FILTERS UND DES STAUBSAMMELBEHÄLTERS...

Страница 23: ...ellen f Nicht befolgen der Gebrauchsanweisungen des Gerätes Fahrlässigkeit oder unvorsichtigem Gebrauch Die obige Liste ist beispielhaft und nicht erschöpfend da diese Garantie für all jene Situationen ausgeschlossen ist den keinem Produktionsfehler zuzuweisen sind Die Garantie ist auch in allen Fällen von missbräuchlichen Verwendung des Gerätes und im Falle vom berufli chen Einsatz ausgeschlossen...

Страница 24: ...corriente sustituir el enchufe por otro por una persona profesio nalmente cualificada En concreto este último deberá también cor roborar que la sección de cables de presa sea la idónea a la potencia necesaria para el aparato No tirar nunca el cable para desenchufarlo de la corriente eléctrica Asegurarse de que el cable no esté en contacto con superficies ca lientes o cortantes No utilizar el apara...

Страница 25: ...e recomienda con vertirlo en inoperante previamente cortando el cable de alimentación SE RECOMIENDA ADEMÁS CONVERTIR EN INÓCUAS LAS PARTES DEL APARATO SUSCEPTI BLES DE CONSTITUIR UN PROBLEMA ESPECIAL MENTE PARA LOS NIÑOS QUE PODRÍAN UTILIZAR EL APARATO PARA JUGAR Advertencias 1 No pruebe a reparar o modificar el aparato porque puede provocar descargas eléctricas y o lesiones personales 2 No emplee...

Страница 26: ...r desmontar el soporte para el paño y este mismo no necesita de algún utensilio puede emplear las manos 1 Para montar el soporte para el paño introduzca los 4 piés sobresalientes colocados en la parte trasera del soporte dentro los 4 agujeros colocados al final del aparato y pulse ligeramente 2 Si no es necesario emplear un paño para limpiar quite el soporte para el paño 3 Coloque el paño para lim...

Страница 27: ...oam biente 2011 65 EU y le re cuerda que todos los productos electrónicos y eléctricos deben ser objeto de recogida por separado al finalizar su ciclo de vida Para obtener información sobre el reciclaje de este producto y dónde encontrar puntos de re cogida llame las supuestas autoridades locales Una eliminación no correcta de este producto podría conllevar sanciones TABLA PARA RESOLVER FÁCILMENTE...

Страница 28: ...nforme c Reparaciones o modificaziones realizadas por personal no especializado d Falta o incorrectos limpieza y mantenimiento e Aparato y o partes del aparato expuestas a deterioro y o consumo lámparas pilas cuchillas f Falta de cumplimiento de las instrucciones para el funcionamiento del aparato negligencia en el uso Esta lista es simplificada y no completa ya que esta garantía se anula para tod...

Страница 29: ...nal calificat autorizat spe cializat care ar trebui să se asigure că secțiunea ștecherului cablului este potrivit pentru tensiunea aparatului dvs Pentru a scoate ștecherul din priză nu trageți niciodată de cablu doar de ștecher Trebuie să vă asigurați că niciodată nu intră cablul în contact cu suprafețe fierbinți sau ascuțite Nu folosiți aparatul dacă cablul de curent este deteriorat În cazul unei...

Страница 30: ...TĂ CÂND APARATUL ESTE FOLOSIT LÂNGĂ SAU DE COPII ASIGURAȚI VĂ CĂ AL DVS COPIL NU SE JOACĂ CU APARATUL ÎN CAZUL ÎN CARE DECIDEȚI SĂ NU MAI FOLOSIȚI VREODATĂ APARATUL FACEȚI L IREPARABIL TĂIND CABLUL DE CURENT DUPĂ SCOATEREA ȘTECHERULUI DIN PRIZĂ DECI TOATE PĂRȚILE PERICULOASE ALE APARATULUI TRE BUIE SĂ FIE FĂCUTE IREPARABILE ÎN SPECIAL PENTRU COPIII CARE S AR PUTEA JUCA CU APARATUL Câteva avertisme...

Страница 31: ...nu aveți nevoie de niciun instrument aceasta poate fi făcută doar cu mâna 1 Apăsați ușor cele 4 piese proeminente aflate pe spatele plăcii de șters în cele 4 orificii aflate pe partea inferioară a aparatului 2 Dacă nu aveți nevoie să folosiți prosopul de șters vă rugăm îndepărtați placa de șters 3 Aplicați prosopul de șters pe placa de șters prin apăsarea acestuia 4 Îndepărtați prosopul de șters m...

Страница 32: ... garanție și orice defect rezultat din nerespectarea regulilor privind utilizarea neglijența în folosire și sau întreținerea aparatului nepăsare greșeală sau instalare improprie deteriorare în timpul transportului și orice altă deteriorare neatribu tabile pentru furnizor Pentru orice defecțiune care nu poate fi reparată în perioada de garanție aparatul va fi înlocuit gratuit În orice caz dacă part...

Отзывы: