background image

Introduction

8

Benq Corporation

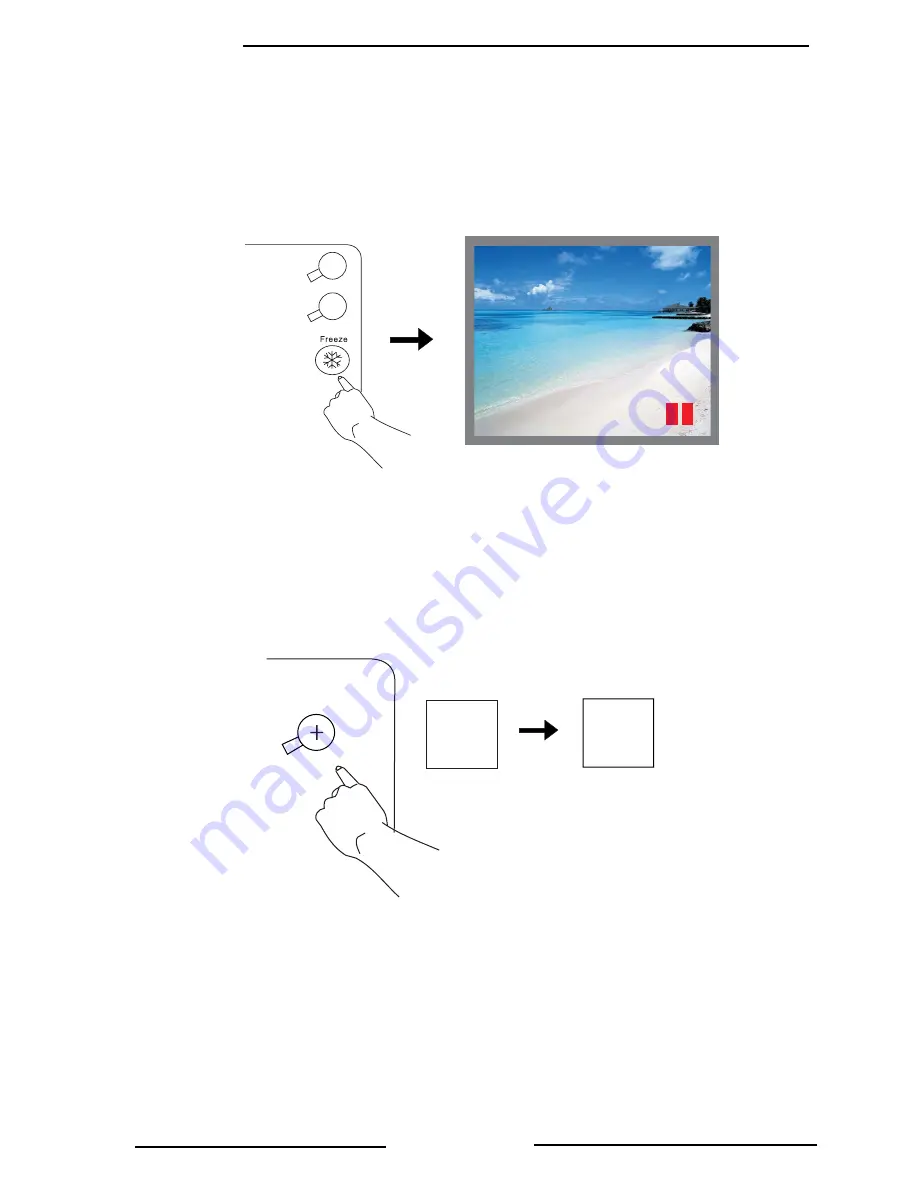
FREEZE

The image can be frozen when FREEZE is pressed. A “Pause” icon will appear in the 
lower right corner of the screen for three seconds.  To release the freeze function, 
press the FREEZE button, RETURN button or SOURCE button (when the input source 
is switched over during display) again. A “Play” icon will appear in the lower right corner 
of the screen for three seconds when the freeze function is released. 


ZOOM IN/OUT

By pressing ZOOM IN +, the center of the picture will be magnified. When the 

+

 button 

is pressed again, the picture is further magnified, up to four times the original size. By 
pressing ZOOM OUT -, the size of the image is reduced. When the 

-

 button is pressed 

again, the picture is further reduced until it is restored to its original size. To return to 
the normal display mode, press the RETURN button. (This function can be used in 
combination with FREEZE. )  


A

A

Zoom In

Содержание SL 703S

Страница 1: ... Save this user s guide for future reference OUTLINE This DLP Projector can display various computer signals and NTSC PAL SECAM video signals FEATURES 1 High Brightness 2 High Resolution 3 Compact Size Feather Weight for Portability 4 Durable Magnesium Alloy Body 5 RGB Output Terminal 6 One Touch Auto Adjustment Function 7 Easy Keystone Adjustment ...

Страница 2: ...ranties either expressed or implied with respect to the contents hereof and specifically disclaims any warranties merchantability or fitness for any particular purpose Furthermore Benq Corporation reserves the right to revise this publication and to make changes from time to time in the contents hereof without obligation of Benq Corporation to notify any person of such revision or changes Fill thi...

Страница 3: ...iii Disclaimer ...

Страница 4: ...10 Screen Size 10 Connecting to Various Equipment 10 Operation 11 Start Up 11 Digital Keystone Correction 12 Auto Adjustment 12 Source Selection 13 Menu System 13 1 Display Menu 14 2 Image Menu 15 3 Source Menu 16 4 Control Menu 17 5 PIP Menu 17 Shutdown 18 Maintenance 19 Lamp Information 19 Use and Replacement of Lamp 19 LED Status Indicators 19 Lamp Replacement 19 Resetting Lamp Hours 21 Service...

Страница 5: ...Table of Contents iv Benq Corporation Troubleshooting 23 Status Messages 24 Specifications 25 Projector Specifications 25 Timing Chart 26 Dimensions 27 ...

Страница 6: ... it to a qualified technician when service or repair is required Incorrect reassembly can cause electric shock when the appliance is subsequently used 5 Do not place this product on an unstable cart stand or table The product may fall causing serious damage to the product 6 This product is capable of displaying inverted images for ceiling mount installation Please use suitable equipment for mounti...

Страница 7: ... to radio communications It has been tested and found to comply with the limits for a Class A computing device pursuant to Subpart B of Part 15 of the FCC Rules which are designed to provide reasonable protection against such interference when operated in a commercial environment Operation of this equipment in a residential area is likely to cause interference in which case the user at his her own...

Страница 8: ...he necessary cables required for standard PC Macintosh or laptop computer connections Carefully unpack and verify that you have all the items shown below If any of these items are missing please contact your place of purchase Optional Accessories 1 Spare lamp kit 2 Macintosh Adaptor ...

Страница 9: ...e next page 2 Projection lens 3 Front adjustment feet 4 IR remote sensor 5 Ventilation grill 6 Kensington lock 7 AC power cord input 8 S video connector 9 Video connector 10 D sub connector for computer HDTV input 11 Audio input 12 Rear adjustment feet 13 Lamp access door underneath unit 5 12 ...

Страница 10: ...ted the Left and Right buttons will function as Keystone hot keys Press the Exit button to go back to the main menu Press Exit again to leave the menu system The Status Indicator will blink or light up when the lamp needs service cooling or replacement See Lamp Information on page 19 for more detailed information When the projector is on Back lit Power will blink during warm up and turn to solid g...

Страница 11: ...he following features Compact and portable unit Full function remote control One key auto adjustment to display the best picture quality Easy digital keystone correction through hot keys to correct tilted pictures Adjustable color balance control for data video Ultra high brightness projection lamp Ability to display high quality 16 7 million colors On screen menus in 7 languages English French Ge...

Страница 12: ...q Corporation Remote Control Description Remote Control Features The remote control sensors are located in the front back of the projector The distance between the sensor and the remote control should not exceed 6 meters ...

Страница 13: ...ower right corner of the screen for three seconds when the freeze function is released ZOOM IN OUT By pressing ZOOM IN the center of the picture will be magnified When the button is pressed again the picture is further magnified up to four times the original size By pressing ZOOM OUT the size of the image is reduced When the button is pressed again the picture is further reduced until it is restor...

Страница 14: ... by the diagram inside the compartment Position the lid over the compartment and snap it back into place Caution Avoid excessive heat and humidity Danger of explosion may happen if a bat tery is incorrectly replaced Replace only with the same or equivalent type recommended by the manufacturer Dispose of used batteries according to the manufacturer s instructions ...

Страница 15: ...esired picture size see the table below Connecting to Various Equipment It only takes a few seconds to connect your projector to your computer notebook VCR or other systems However a Mac adapter an optional accessory is needed for connection for Macintosh users 1 1 5 2 2 5 3 4 5 6 7 8 9 10 Computer HDTV S Video Video Audio Video S Video ...

Страница 16: ...ket 2 Press POWER for 1 second The back lit POWER key blinks green and stays green when the power is turned on When the power is turned off there is a 60 second cooling period before the projector can be re started 3 Switch on all connected equipment Power Power Projector Remote Control ...

Страница 17: ...stone as needed Press to correct keystoning at the top of the image Press to correct keystoning at the bottom of the image Auto Adjustment In some cases you may have to optimize the picture quality manually To do this press the AUTO key on the control panel of the projector or on the remote control Within 3 seconds the built in Intelligent Auto Adjustment function will re adjust to the best pictur...

Страница 18: ...Source Source Power Power Menu Bar Sub menu Display Image Source Control PIP PC Keystone Brightness Contrast Phase H Size Auto resize H position V position Color Temp Information Mirror Source Volume Treble Bass Mute Langauge OSD OSD Time Auto Off Reset Lamp hour Main page PIP Source PIP Size PIP Pos H Position V Position More Options Sub Page Brightness Contrast Color Tint Sharpness System Y Pb P...

Страница 19: ...he desired image size This function is not available when the input mode are Video S video H Size Adjusts to avoid the occurrence of flicker This function is not available when the input mode are Video S video Color Adjusts to increase or decrease the colors R G B of image This function is not available when the input mode is PC Tint Adjusts to make the image look more red or blue This function is...

Страница 20: ... ratio 1 4 3 Normal 2 16 9 Wide This function is not available when the input mode are PC YPbPr System 4 modes can be selected 1 Auto 2 PAL M 3 PAL N 4 SECAM The default setting of System is Auto This function is not available when the input mode are PC YPbPr Sharpness Adjusts to make the image look sharper or softer This function is not available when the input mode are PC YPbPr Color Adjusts to ...

Страница 21: ...eiling mounted projection 3 Rear screen projection 4 Ceiling mounted and rear screen projection Source Selects sources between PC Video S video and YPbPr Volume Adjusts the volume level Treble Adjusts the treble level Bass Adjusts the bass level Mute 1 2 3 4 Off On ...

Страница 22: ...ings the time of manufacturing Lamp hour Shows lamp usage time PIP Source Selects the source from which the PIP picture comes PIP Size Uses 3 4 key to scroll through the 4 alternatives Off Small Medium Large PIP Position Selects a desired PIP position H Position Adjusts the horizontal position of PIP image V Position Adjusts the vertical position of PIP image More Options Uses 3 4 key to select mo...

Страница 23: ...rompt up To turn off the projector Press POWER again 2 The fan will continue to run for approximately 60 seconds 3 Disconnect the power cord from the wall socket Caution Please do not unplug the power cord before POWER is shut down or during the 60 second cooling process Power Power ...

Страница 24: ...ed continuously it is warning you that the lamp life has exceeded 1500 hours Replace the projec tion lamp with a new one immediately CHANGE THE LAMP AND RESET THE LAMP TIMER The lamp has been in operation for 1400 hours Change a new lamp for optimal performance CHANGE THE LAMP THE POWER WILL TURN OFF AFTER 20 HOURS The lamp has been in operation for 1480 hours and the power will turn off after 20 ...

Страница 25: ...e screws are not loosened completely they could injure your fingers Do not insert your hand into the box after the lamp is removed If you touch the optical parts inside this could cause color unevenness 4 Replace the lamp with a new one Insert it into the projector and tighten the screws firmly Loose screws may cause a bad connection which may result in malfunction 5 Re install the lamp cover and ...

Страница 26: ...hing the lens do not touch the empty lamp compartment when the lamp is removed This lamp contains mercury Consult your local hazardous waste regulations to dispose of this lamp in a proper manner Resetting Lamp Hours If you replace the lamp after 1500 hours of operation please proceed as follows within 10 minutes of power on OSD FUNCTION Press the Exit button on the projector for 3 seconds to disp...

Страница 27: ...tp www benq com Description Part Number Power cord EU 27 01218 191 Power cord US 27 01118 131 Power cord UK 27 02718 201 Signal cable 50 J0508 502 Video cable 50 J1303 501 S Video cable 50 72920 011 PC PC Audio cable 50 74405 501 Audio PC Audio cable 50 J0705 501 Soft carrying case 98 J1302 001 Lens cover 60 J1334 001 Remote control 98 J2401 001 3 2 converter 22 91007 001 Skin case 98 J1904 001 De...

Страница 28: ...he screen Use the Keystone correction key on the control panel of the projector or the remote control unit POOR COLOR Select the correct video system Adjust brightness contrast or saturation BLURRED IMAGE Press Auto on the control panel of the projector or the remote control unit to get better picture quality Adjust the focus Reposition the unit to improve its screen angle Ensure the distance betw...

Страница 29: ...nal frequency exceeds the projector s CHANGE THE LAMP AND RESET THE LAMP TIMER The lamp has been in operation for 1200 hours Lamp replacement is recommended CHANGE THE LAMP THE POWER WILL TURN OFF AFTER 20 HOURS The lamp has been in operation for 1480 hours and the power will turn off after 20 more hours Replace the lamp as soon as possible CHANGE THE LAMP The lamp has been in operation for over 1...

Страница 30: ...CHIP DMD Lens F Number F 2 6 Lamp 120W VIP lamp Electrical Power supply AC100 240V 2 3A 50 60 Hz Automatic Power consumption 185 W Max Mechanical Dimensions 220 mm W x 52 mm H x 175 mm D Operating Temperature range 10 C 40 C Weight 3 4 lbs 1 5 Kg Input terminal Computer Input RGB HDTV Input D sub 15 pin female Video Signal Input S VIDEO Mini DIN 4 pin terminal VIDEO RCA Jack terminal Audio Signal ...

Страница 31: ...VESA 640x480 31 5 60 0 VESA 640x480 37 9 72 8 VESA 640x480 35 0 66 7 Macintosh 640x480 43 3 85 0 VESA 800x600 35 2 56 3 VESA 800x600 37 9 60 3 VESA 800x600 46 9 75 0 VESA 800x600 48 1 72 2 VESA 800x600 53 7 85 1 VESA 832x624 49 7 74 5 Macintosh 1024x768 48 4 60 0 VESA 1024x768 56 5 70 1 VESA 1024x768 60 0 75 0 VESA 1024x768 68 7 85 0 VESA 1280x1024 64 0 60 0 VESA ...

Страница 32: ...Dimensions 27 Benq Corporation DIMENSIONS 220 mm 175 mm 52 mm ...

Отзывы: