background image

58  Playback mode

Engli

sh

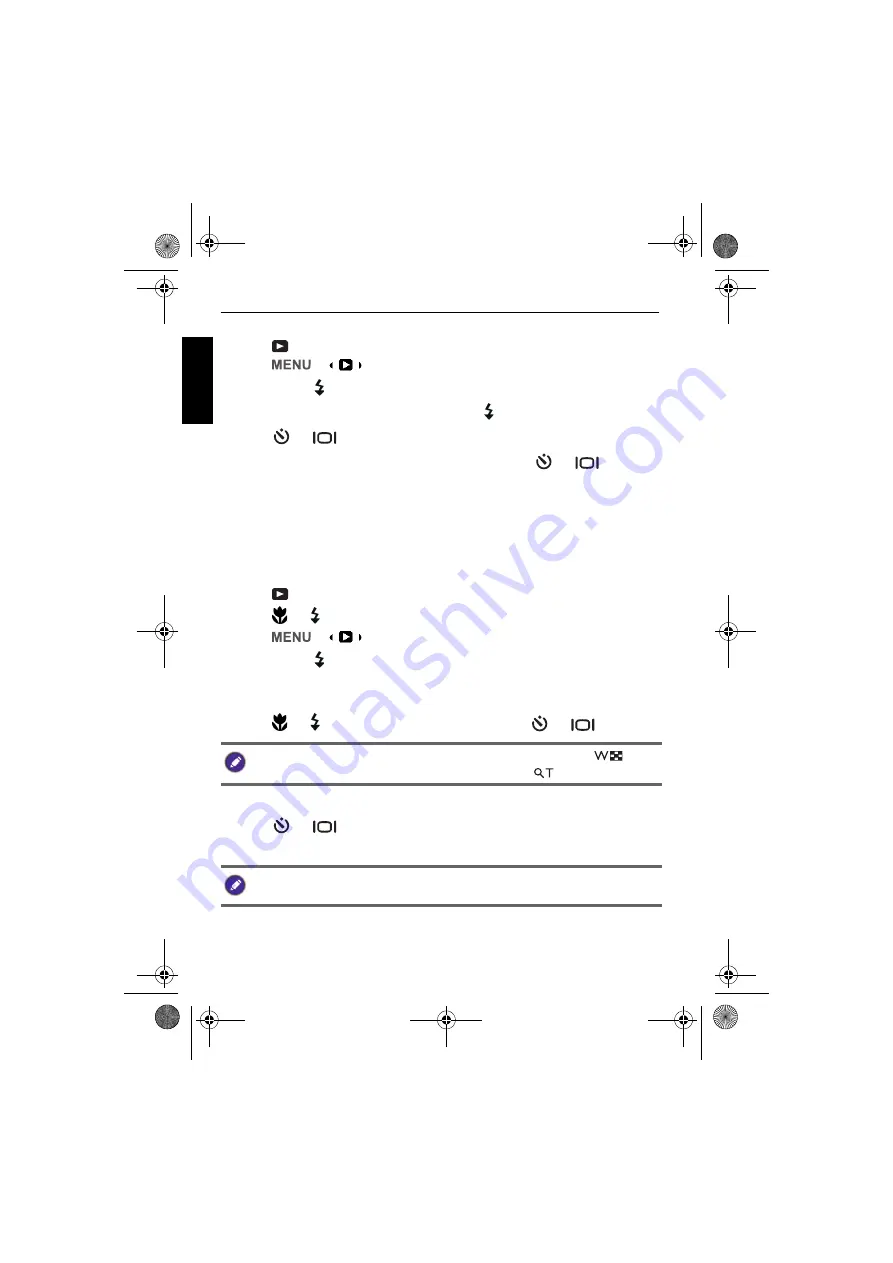
To copy all files:

1. Press 

 to switch to 

Playback

 mode.

2. Press 

 > 

 > 

Copy

.

3. Press 

 or   to enter the submenu.

4. Choose the copy method, and press 

 or   to continue.

5. Press  

or   

to 

All Images

 and press 

.

6. A confirmation message appears on the screen. Press 

 or 

 to select 

Yes 

and press 

 to start copying all files.

Movie Paste

Combines two videos that have the same specifications (movie size and frame 
rate) into one video.

To combine two video:

1. Press 

 to switch to 

Playback

 mode.

2. Press 

 or   to select the original (first) video.

3. Press 

 > 

 > 

Movie Paste

.

4. Press 

 or   to enter the submenu.

The videos with the same specifications as the original video are displayed in 
thumbnail view.

5. Press 

 or   to select the second video and press 

 or 

 to mark it.

6. Press 

 and a confirmation message appears on the screen. 

7. Press 

 or 

 to select 

Yes 

and press 

 to merge the second video 

onto the end of the original (first) video.

To view the selected file in full screen display, slide the Zoom lever to 

. To 

switch back to thumbnail display, slide the Zoom lever to 

.

• The total length of the combined videos cannot be longer than 30 minutes.
• After combining the videos, the second video will be deleted.

OK

OK

OK

OK

OK

OK

OK

GH700 UM - EN.book  Page 58  Thursday, April 5, 2012  2:53 PM

Содержание GH700

Страница 1: ...GH700 Digital Camera User Manual GH700 UM EN book Page 1 Thursday April 5 2012 2 53 PM ...

Страница 2: ...urposes only Disclaimer BenQ Corporation makes no representations or warranties either expressed or implied with respect to the contents hereof and specifically disclaims any warranties merchantability or fitness for any particular purpose Further BenQ Corporation reserves the right to revise this publication and to make changes from time to time in the contents hereof without obligation of BenQ C...

Страница 3: ...rporate life cycle design in the aspects of material selection manufacturing packaging transportation using and disposal of the products BenQ ecoFACTS label lists key eco friendly design highlights of each product hoping to ensure that consumers make informed green choices at purchase Check out BenQ s CSR Website at http csr BenQ com for more details on BenQ s environmental commitments and achieve...

Страница 4: ...tes uses and can radiate radio frequency energy and if not installed and used in accordance with the instructions may cause harmful interference to radio communications However there is no guarantee that interference will not occur in a particular installation If this equipment does cause harmful interference to radio or television reception which can be determined by turning the equipment off and...

Страница 5: ...ts such as memory cards and batteries could be easily dismantled and swallowed by them Use only the original accessories to avoid possible risks to health and property and thus meet all related legal regulations Do not dismantle the camera under any circumstances When using the flash do not go too close to human eyes particularly for babies toddlers and children or animal eyes Otherwise when the f...

Страница 6: ...ake the camera A rude behavior of using the camera may damage the internal electronic circuit board deform the lens shape or make the lens unretractable Do not use harsh chemicals cleaning solvents or strong detergents to clean the camera Finger grease may be left on the camera lens and will result in unclear images or videos To avoid this problem be sure to clean the camera lens before taking pic...

Страница 7: ...o not use or store your camera in the environments listed below Direct sunlight Dusty places Next to an air conditioner electric heater or other heat sources In a closed car that is in direct sunlight Unstable locations Do not use your camera outdoors when it is raining or snowing Do not use your camera in or near water The camera operating temperature is between 0 and 40 degrees Celsius It is nor...

Страница 8: ...P When the camera is not in use always turn the power off Plus before storing the camera in its case make sure the lens has retracted successfully and you put the lens cover back If you do not intend to use the camera for a long time please remove the batteries from the camera and store the batteries carefully Keep your camera away from sharp objects and avoid collision When the camera is not in u...

Страница 9: ...e 21 Operating the camera 22 Capture mode 24 Flash mode 25 Using the Self timer 26 Focus mode 27 Selecting the Shooting Mode 28 Using HDR mode 29 Using Continuous Shooting mode 29 High speed Burst 30 Pre shooting 31 Sporty Burst 120 Sporty Burst 240 31 Smart Selector 31 Multi shot 16 32 Using Night Portrait mode 33 Using Handheld Night Shot mode 33 Setting the Scene mode 33 Smile Capture 35 Blink ...

Страница 10: ...ck and editing 49 Enlarging an image 49 Trimming 49 Rotating an image 50 Viewing multiple files at a time 50 Playing back video clips 50 Using Movie Edit 51 Adjusting the playback volume 52 Deleting files 52 Slideshow 53 Protecting files 53 Voice memo 55 Resizing 55 DPOF 56 Copy 57 Movie Paste 58 Making connection 59 Bundled software 59 Connecting the camera to a computer 59 Connecting the camera ...

Страница 11: ...English Troubleshooting and service information 64 Technical support 66 Specifications 67 GH700 UM EN book Page 11 Thursday April 5 2012 2 53 PM ...

Страница 12: ...ftware User Manual CD 7 Pouch optional 8 Lens cover 9 Lens strap All pictures screen captures and icons used in this manual are for illustration only Actual and available products accessories as well as their appearance may vary depending on sales region If any items are missing or damaged contact your dealer Save the packaging for future shipment or storage 1 2 3 4 5 7 8 9 6 GH700 UM EN book Page...

Страница 13: ...rophone 3 Zoom lever 4 Shutter button 5 Strap eyelet 6 Power button 7 AF Assist Lamp Self timer LED indicator 8 Mode dial 9 Flash 10 Flash button 11 Speaker 12 Tripod mount 13 Battery card cover 5 6 7 8 4 3 2 1 9 12 13 5 11 10 GH700 UM EN book Page 13 Thursday April 5 2012 2 53 PM ...

Страница 14: ...No light The digital camera is off Solid green The digital camera is ready to capture images The digital camera is powering on or is in the power saving mode Status LED Blinking green The digital camera cannot focus The digital camera is capturing a video clip The flash is charging or the USB communication transfer is in progress Self timer LED Blinking red The self timer function is activated 2 3...

Страница 15: ... LCD display on this camera is manufactured with sophisticated technology and more than 99 99 of the pixels on the LCD display meet standard specifications Yet it is possible that less than 0 01 of the pixels on the LCD display may have some light spots or show unusual colors This is normal and does not indicate display malfunction nor will this affect the pictures you take with the camera The LCD...

Страница 16: ... end of the neck strap through the strap eyelet 2 Route it through the buckle as the inner loop 3 Route the other end of the neck strap to the other strap buckle to secure it Follow the above steps to attach the other side of the neck strap 4 Insert one end of the lens strap through the strap eyelet Make a loop to secure it 5 Attach the other end of the lens strap on the lens cover GH700 UM EN boo...

Страница 17: ...button up and then slide the battery card cover to the right to release and open it 2 Insert the batteries in the correct direction by matching the label on the battery slot 3 Close the battery card cover and then slide it to the left to lock it in place Wrapping the strap around your neck is dangerous Refrain children from playing with the strap Remove the lens cover before using the camera GH700...

Страница 18: ...m the camera if you are going to store the camera for a long time The batteries may be warm after being used This is normal and not a malfunction When using the camera in a cold environment keep the camera and its batteries warm by holding it inside your jacket or another warm protective environment Please select the correct battery type before use see Battery Type on page 47 for details High capa...

Страница 19: ...ert an SD card in the correct direction 3 Close the battery card cover and then slide it to the left to lock it in place To remove an SD card 1 Push the button up and then slide the battery card cover to the right to release and open it 2 Lightly press the edge of the memory card to eject 3 Close the battery card cover and then slide it to the left to lock it in place Before initial use of an SD c...

Страница 20: ...sh You need to manually open the flash before switching the flash mode To open the flash Press the Flash button to open it To close the flash Push down the flash to close it Before turning on the camera be sure to remove the lens cover Otherwise the lens will not be extended and the camera will beep four times Do not use your hands to forcibly lift open the flash When the flash is closed flash mod...

Страница 21: ...you want 4 Press to set the language Setting date and time When using the camera for the first time or when the battery has been removed from the camera for a long time you need to set the date and time The date and time is recorded when a video or image is captured To set date and time 1 Press Step 1 is needed only after the initial setting is complete 2 Press or to locate Date Time and then pres...

Страница 22: ...he Shutter button down it might result in a blurred photo 6 Press the Shutter button down fully to capture the image 7 To switch to Movie mode press The video recording automatically starts While recording use the Zoom lever to zoom in zoom out on the subject Press again to stop video recording 8 To switch to Playback mode press In Playback mode you can view captured images or recorded videos You ...

Страница 23: ...separator Flash is automatically turned off in the Movie mode In Movie mode the camera records both sound and video The recording time is continuous but recording will stop once the memory card space is full At any time you can press the Power button to turn off the camera In Capture or Playback mode press to select what information to show on the screen GH700 UM EN book Page 23 Thursday April 5 2...

Страница 24: ...atus 5 Number of shots available 6 Battery status 45 7 Storage media 8 Wind Cut 44 9 Movie size 44 10 Camera shake warning 11 Date stamp 42 12 Stabilizer 43 13 Histogram 14 ISO 40 15 Shutter speed 16 Aperture value 17 AF area 41 1 2 3 5 4 6 8 10 19 16 15 14 7 9 11 12 13 17 18 20 21 22 23 GH700 UM EN book Page 24 Thursday April 5 2012 2 53 PM ...

Страница 25: ...hanges to green camera shake warning appears only if the camera itself detects possible shaking aperture shutter speed and ISO setting are also shown on the screen Icon Mode Description Auto Flash The flash fires automatically based on the photographic conditions Auto Anti Red eye Reduces the red eye phenomenon when capturing natural looking images of people and animals in low light conditions Be ...

Страница 26: ...ash does not fire Select this mode when flash photography is prohibited or when the distance to the subject is beyond the effective range of the flash The flash mode is not available in Continuous Shooting HDR and Handheld Night Shot modes The flash mode will remain at Flash Off if the flash does not open When the flash is closed flash mode is automatically set to flash off Icon Mode Description 1...

Страница 27: ...a recording a video clip To select the focus mode 1 Set the mode dial to the desired shooting mode See Selecting the Shooting Mode on page 28 for details 2 Press repeatedly to toggle between Normal and Macro In addition you can use Super Macro if the subject is at a very close distance To enable press Then steadily slide the zoom lever until the zoom indicator is roughly in the middle of the zoom ...

Страница 28: ... Using Handheld Night Shot mode on page 33 for details 4 Night Portrait Lets you capture night scenes and portraits clearly See Using Continuous Shooting mode on page 29 for details 5 Handheld Night Shot Lets you capture photos in a low light environment such as in the evening or at night See Using Handheld Night Shot mode on page 33 for details 6 Scene Mode Lets you select the desired scene mode ...

Страница 29: ...et both aperture and shutter speed manually See Setting the Scene mode on page 33 for details Before After The flash mode is automatically set to flash off Icon Mode Description High speed Burst Press and hold the Shutter button to take continuous shots at 10fps the maximum number of photos is 10 Pre shooting The images are captured before fully pressing the Shutter button This feature begins by h...

Страница 30: ...ess to exit the menu mode Sporty Burst 120 Use this feature to capture 54 photos with at least 1 120 shutter speed with a press of the Shutter button Sporty Burst 240 Use this feature to capture 54 photos with at least 1 240 shutter speed with a press of the Shutter button Smart Selector Press and hold the Shutter button to take several shots of an image When the Shutter button is released ONLY th...

Страница 31: ...o features to capture 54 photos in 1M with at least 1 120 shutter speed 1 240 shutter speed for Sporty Burst 240 per shot 1 Set the mode dial to 2 Press to select Continuous Shooting 3 Press or and then select Sporty Burst 120 or Sporty Burst 240 4 Press to exit the menu mode 5 Press the Shutter button to capture continuous shots Shooting ends when the camera reaches the maximum number of photos S...

Страница 32: ...m on a single picture 1 Set the mode dial to 2 Press and select Continuous Shooting 3 Press or and then select Multi shot 16 4 Press to exit the menu mode 5 Press the Shutter button to capture 16 shots The captured images are displayed as one 16 thumbnail photo Auto review appears directly on the screen after every shot is taken even if Auto Review is set to off Before After The image size is auto...

Страница 33: ...mode Select one of the following scene modes to fit your shooting condition You can press and select Night Portrait by pressing for Hand held or Tripod option You can press and select Night Scene by pressing for Hand held or Tripod option Icon Mode Description Portrait Makes the subject usually a person stand out with smooth and natural looking skin tones Landscape Captures a scene in the distance...

Страница 34: ... source Flash is always off Flowing Water Uses a low shutter speed for motion blur Please keep the camera steady or use a tripod while using this mode Food Captures food by enhancing color brightness and giving more vivid colors Text Improves clarity contrast when taking a close up picture of documents Smile Capture Automatically takes a shot when a smile is detected Blink Detection Warns of eye b...

Страница 35: ...mile is detected the camera instantly takes a picture 7 The camera continues to detect smiles and takes more pictures Step 4 is repeated Blink Detection Automatically detects blinking when you capture an image 1 Set the mode dial to 2 Press to enter the scene menu 3 Press or to select Blink Detection 4 Press to confirm the setting 5 Press the Shutter button to capture an image If blinking is detec...

Страница 36: ... and Night Portrait 1 Set the mode dial to 2 Press the Shutter button halfway to set automatic focus The selected shooting mode is displayed in the top left corner of the screen 3 Press the Shutter button to capture an image 4 The camera only saves the sharpest photo and the others are erased automatically Using Manual mode You can choose the aperture value and shutter speed in Manual mode To adju...

Страница 37: ...n the screen This feature is only applicable to videos with size of 1080p 30fps 720p 30fps or VGA 30fps The camera will automatically stop recording when the memory capacity is full Video recording at FHD 1080p HD 720p will automatically stop when the video file size reaches 4GB or the total recording time is near 29 minutes Recording a video at Full HD and HD mode requires a Class 4 or above SDHC...

Страница 38: ...d exit the menu mode Photo size To select an image size 1 Press Photo Size 2 Press or to enter the submenu 3 Press or to select a setting 4 Press to confirm setting Icon Description Icon Description 16 megapixels 4608 x 3456 5 megapixels 2592 x 1944 16 megapixels 4608 x 3456 3 megapixels 2048 x 1536 3 2 14 megapixels 4608 x 3072 HD 16 9 1920 x 1080 in full HD format 8 megapixels 3264 x 2448 VGA 64...

Страница 39: ...colors can display properly when you capture images To select White Balance 1 Press White Balance 2 Press or to enter the submenu Icon Mode Description Auto Adjusts white balance automatically Daylight Used in bright daylight conditions Cloudy Used in twilight or shady conditions Tungsten Used when subjects lit by tungsten incandescent lighting Fluorescent_1 Adjusts for fluorescent lighting Correc...

Страница 40: ...value the brighter picture you can take in a low light environment Yet you may see more noise in the picture as you increase the ISO value To select an ISO value 1 Press ISO 2 Press or to enter the submenu 3 Press or to select an ISO Value 4 Press to confirm setting Icon Description Automatically sets the ISO value Equivalent to color ISO 160 200 film Used for outdoor photography in bright sunligh...

Страница 41: ...o confirm setting Icon Mode Description Multi Detects the exposure based on multiple points in the subject area Center Detects the exposure of the entire shooting screen but gives more importance to the values near the center Spot Detects the exposure based on the center spot in the subject area Icon Mode Description Face Priority Automatically detect faces and track faces continuously Wide Automa...

Страница 42: ...l Zoom 2 Press or to enter the submenu 3 Press or to select On 4 Press to confirm setting Date Stamp Imprints the date when a picture was taken on the picture itself To set the date stamp 1 Press Date Stamp 2 Press or to enter the submenu 3 Press or to select Date Date Time or Off 4 Press to confirm setting Auto Review This feature displays a preview of the still image for 1 second right after cap...

Страница 43: ...Movie Menu Press to access Movie menu options Set the necessary settings before you start recording the video clip 1 Press 2 Press or to select a menu item 3 Press or to enter the submenu 4 Press or to select the settings 5 Press to save the setting and exit the menu mode During auto review half press the Shutter button to return to the capture mode When the battery power is low the Stabilizer wil...

Страница 44: ...or to select Single AF or Full time AP 4 Press to confirm setting Wind Cut Use this feature to reduce wind noise during video recording To enable Wind Cut 1 Press Wind Cut 2 Press or to enter the submenu Icon Description Icon Description Full HD 1080p 60 fps VGAp 30 fps Full HD 1080p 30 fps QVGAp 120 fps HD 720p 60 fps QVGAp 240 fps HD 720p 30 fps The Full HD and HD options are only available when...

Страница 45: ... Mode Description Sounds Startup Set a type of the startup sound Shutter Set the shutter sound on and off Beep Volume Adjust the volume Power Save 1 min For power conservation the camera automatically enters the standby mode after it has been idle for a period of time Press any key to resume 3 min 5 min Off The camera remains on when idle Date Time Set the date and time Language Select a language ...

Страница 46: ...available HDMI settings Auto 576p 720p 1080i 1080p TV Out should be set to either NTSC or PAL depending on your region For details about which system should be used check with your local authorities LCD Brightness Auto The LCD brightness is automatically set based on the surrounding environment Bright The LCD brightness is increased Normal The LCD brightness remains at the default value Startup Im...

Страница 47: ...s Ni MH Lithium Select if the type of battery used in the camera is Lithium Reset All Resets the entire menu and button operation settings to initial default The following settings do not change after Reset All Date Time setting Language setting TV Out setting Manual White Balance setting Icon Mode Description GH700 UM EN book Page 47 Thursday April 5 2012 2 53 PM ...

Страница 48: ...le is protected and cannot be deleted 53 3 Indicates key guide Press the button to play the recorded video 4 Indicates this file has a voice memo or the file is an audio file 55 5 File number 6 Battery status 45 7 Storage media 8 Displays the recording information of the file Press to toggle between different displayed information 9 Indicates the file is marked for printing 56 10 Image size 10 9 1...

Страница 49: ...de use the Zoom lever to adjust the zoom ratio 4 Press or to move to the area you want to view Trimming Crops part of an image file and saves it as another new file To trim an image 1 Press to switch to Playback mode 2 Press or to select the image you want to enlarge 3 Slide the Zoom lever to to zoom in on a captured image In Zoom mode use the Zoom lever to adjust the zoom ratio 4 Press or to loca...

Страница 50: ...h to Playback mode 2 Press or to select the video clip you want to view 3 Press to start playing the video clip Press to stop the video clip or press to pause it Press again to resume This function does not actually change the image it just add a flag on orientation tag of the EXIF data and save it after each rotation If there are more than 9 thumbnails a scroll bar appears on the screen During vi...

Страница 51: ... 2 Press or to set the movie time interval The movie length must be at least more than 2 seconds 3 To preview the video press or to select and press 4 To save the edited video press or to select and press Select Save and press to save the file 5 To exit Movie Edit mode press or to select and press It returns to the video paused display screen Start Point End Point The edited video clip will be sav...

Страница 52: ...s To delete a single file 1 Press to switch to Playback mode 2 Press or to select the file that you want to delete 3 Press 4 Press or to select Single and press 5 A confirmation message appears on the screen Press or to select Yes and press to confirm file deletion 6 Repeat steps 2 5 to delete other files To delete multiple files 1 Press to switch to Playback mode 2 Press 3 Press or to select Mult...

Страница 53: ...mage and video files first frame only To play a slideshow 1 Press to switch to Playback mode 2 Press Slide Show 3 Press or to enter the submenu 4 Change the slideshow settings Press or to select Interval and press or to set the transition interval between 1 3 5 10 seconds Press or to select Repeat and press or to select whether you want to repeat the slideshow 5 Press or to select Start and press ...

Страница 54: ... to select Multi and press The images are displayed in thumbnail view 5 Press or to select the files that you want to protect and press or to mark the file for protection A icon appears on the marked files 6 Press to lock the selected files To protect all files 1 Press to switch to Playback mode 2 Press Protect 3 Press or to enter the submenu 4 Press or to select Lock All and press A icon appears ...

Страница 55: ...ess to play the voice memo 2 Press to pause the playback Press again to resume the playback 3 Press to stop the playback Resizing Changes an image file to a smaller size and overwrites the image file or saves it as another new file To resize an image 1 Press to switch to Playback mode 2 Press or to select the image you want to resize 3 Press Resize 4 Press or to enter the submenu You can remove th...

Страница 56: ...Press or to select Select Images and press to set the DPOF setting on the selected image The images are displayed in thumbnail view 5 Press or to select the files that you want to mark for printing and press or to specify the number of copies 6 Press to define the DPOF setting Press or to select Date and press or to select whether you want to print the recording date time Press or to select Info a...

Страница 57: ...into the memory card Copy to Camera copy all files stored in the memory card into the camera s internal memory 5 Press or to Selected Images and press to select the files that you want to copy The images are displayed in thumbnail view 6 Press or to select the files and press or to mark for copying and press 7 A confirmation message appears on the screen Press or to select Yes and press to start c...

Страница 58: ...st video 3 Press Movie Paste 4 Press or to enter the submenu The videos with the same specifications as the original video are displayed in thumbnail view 5 Press or to select the second video and press or to mark it 6 Press and a confirmation message appears on the screen 7 Press or to select Yes and press to merge the second video onto the end of the original first video To view the selected fil...

Страница 59: ...r computer 5 Press or to select Computer and press 6 Wait for the connection A PC Mode message appears on the screen when the connection is established 7 A Removable Disk icon appears in My Computer Click this icon to access the files in your camera ArcSoft MediaImpression Easily creatively and productively manage your multimedia files Create your own movies or photo slide shows and share your pho...

Страница 60: ...e yellow video plug and the white audio plug of the AV cable to a video input jack and an audio input jack left channel on your TV 3 Turn on the TV and then switch the input source of the TV to AV 4 Turn on the camera 5 Follow the on screen instructions to operate the camera via the TV Before connecting the camera to a TV set the TV Out to match TV s video output format See TV Settings on page 46 ...

Страница 61: ...he USB cable to an available USB port on your printer 4 Turn on the printer Wait for a while until it finishes starting up and is ready to print 5 Turn on the camera 6 Press or to select Printer and press 7 Wait for the connection 8 On Print Mode menu select one of the following options Print Select select to configure the printing settings on the selected image Print All Select to print all image...

Страница 62: ...tart printing To set the printing settings on all files 1 On Print Mode menu press or to select Print All and press to select the files that you want to print The images are displayed in thumbnail view All images are marked for printing and the number of printing copies is automatically set to 1 2 Press or to view the files and press or to adjust the number of copies 3 Press to enter the printer s...

Страница 63: ...gs are complete press or to select Print and press to start printing The above procedure may vary depending on the printer type you are using If you connect the camera to your printer while the printer is still starting up the camera will be automatically turned off Failure to follow the above procedure will make the camera show an error message Please disconnect the camera and the camera will be ...

Страница 64: ...atteries The battery power is draining quickly The external temperature is extremely low Many shots are being captured in dark places requiring a flash The batteries or camera is warm The camera or flash was used continuously over a long period of time The LCD screen is black The lens cover is on Remove the lens cover No image is displayed on the screen and the camera beeped four times The lens co...

Страница 65: ...y card is write protected Remove the write protection End of the memory card life Insert a new memory card I cannot download images from the camera to my computer The free space on the hard disk of your computer is insufficient Ensure that the hard disk has enough space for running Windows and that the drive for loading image files has free space equal to or greater than the memory card in the cam...

Страница 66: ...utter button all the way down The internal memory or memory card does not have any free space Load a new card or delete unwanted files The flash is recharging Wait until the flash mode icon indicated on the screen stops flashing The camera does not recognize the memory card Format the memory card before the initial use or before using with another camera I cannot print images with PictBridge compl...

Страница 67: ...x 480 30fps QVGA 320 x 240 240fps Continuous recording with sound Shutter Speed Auto 1 2000 1 sec Manual mode 1 2000 15 sec Fireworks 2 sec White Balance Auto Daylight Cloudy Tungsten Fluorescent H Fluorescent L Manual Exposure 2 0 2 0 EV 0 3EV step ISO Auto 160 200 400 800 1600 3200 3M or lower 6400 3M or lower Flash Auto Flash Auto Anti Red eye Forced On Slow Sync Forced Off Drive mode Off 10 se...

Страница 68: ...B 2 0 compatible Audio Video output NTSC PAL HDMI PictBridge compatible Accessories USB Cable Software User Manual CD Quick Guide Lens Cover Lens Strap Neck Strap Pouch optional Non rechargeable AA Batteries Available accessories depend on the actual items shipped and may vary from the list above All information designs and specifications are subject to change without prior notice GH700 UM EN book...

Отзывы: