background image

20 

How to adjust your monitor  
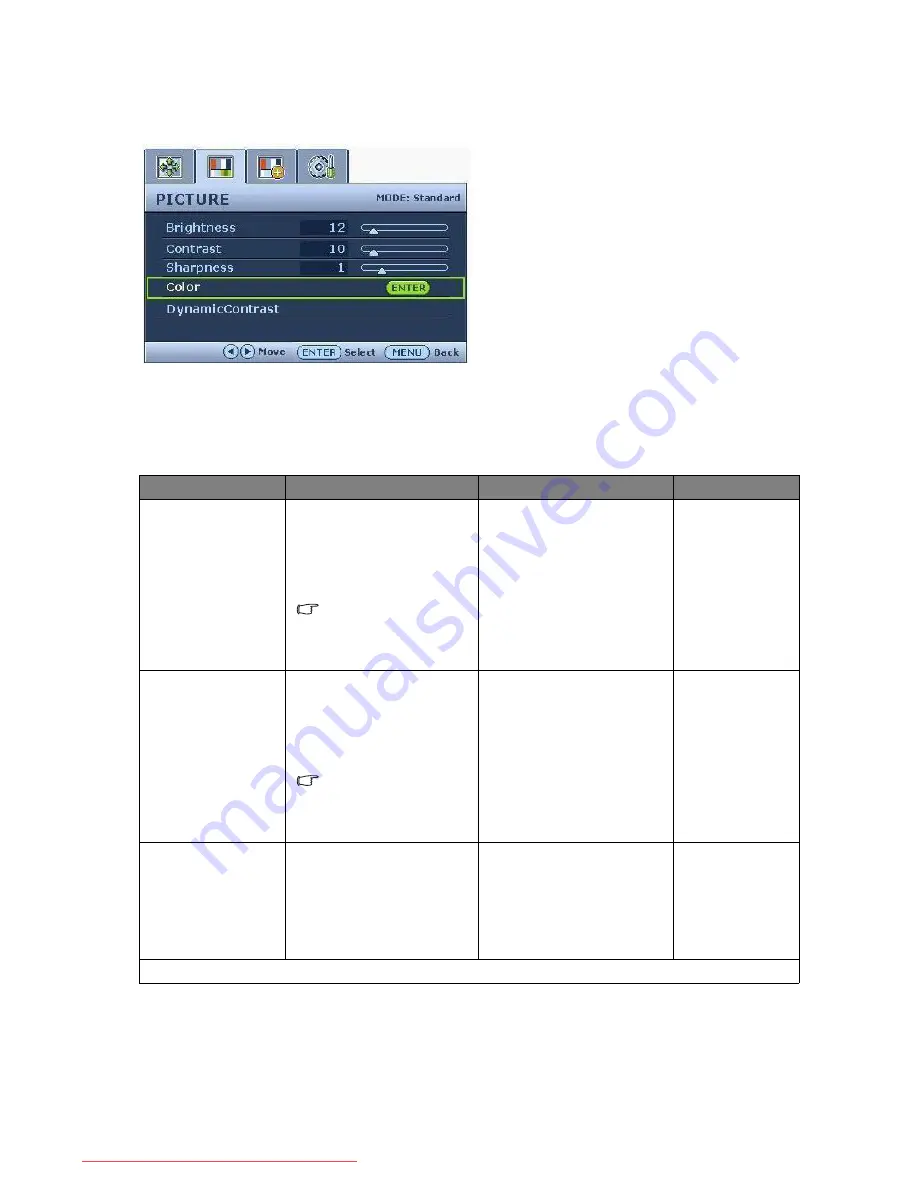
Picture menu

1. Press the MENU key to display the main 

menu.

2. Press the 

W

 or 

X

 keys to select PICTURE 

and then press the ENTER key to enter the 
menu.

3. Press the 

W

 or 

X

 keys to move the 

highlight to a menu item and then press 
the ENTER key to select that item.

4. Press the 

W

 or 

X

 keys to make 

adjustments or selections.

5. To return to the previous menu, press the 

MENU button.

Item

Function

Operation

Range

Brightness

Adjusts the balance 
between light and dark 
shades.

The function is not 

available for use when 

DynamicContrast


is 

on.

Press the 

X

 key to 

increase the brightness 
and press the 

W

 key to 

decrease the brightness.

0 to 100

Contrast

Adjusts the degree of 
difference between 
darkness and lightness. 

The function is not 

available for use when 

DynamicContrast


is 

on.

Press the 

X

 key to 

increase the contrast and 
press the 

W

 key to 

decrease the contrast.

0 to 100

Sharpness

Adjusts the clarity and 
visibility of the edges of 
the subjects in the image.

Press the 

W

 key to 

improve the crispness of 
the display and press the 

X

 key to have softness 

effect on the display.

1 to 5

Color - Press ENTER to enter the Color menu.

Downloaded from ManualMonitor.com Manuals

Содержание G2400WAD

Страница 1: ...Welcome G2400WAD 24 Wide Screen LCD Monitor User Manual Downloaded from ManualMonitor com Manuals...

Страница 2: ...wer supply cord serves as a power disconnect device for pluggable equipment The socket outlet should be installed near the equipment and be easily accessible This product should be operated from the t...

Страница 3: ...onitor 10 How to install the monitor on a new computer 11 How to upgrade the monitor on an existing computer 12 How to install on Windows Vista systems 13 How to install on Windows XP system 14 Pictur...

Страница 4: ...Consider keeping the box and packaging in storage for use in the future when you may need to transport the monitor The fitted foam packing is ideal for protecting the monitor during transport BenQ LC...

Страница 5: ...5 Getting to know your monitor 2 Getting to know your monitor Front view Back view 1 AC power input jack 2 D Sub input socket Downloaded from ManualMonitor com Manuals...

Страница 6: ...tor and screen by clearing a flat open area on your desk and placing a soft item like the monitor packaging bag on the desk for padding Gently lay the screen face down on a flat clean padded surface W...

Страница 7: ...the plugs from acci dently falling out during use 3 Connect the power cable to the monitor Plug one end of the power cord into the socket labelled POWER IN on the rear of the monitor Do not connect th...

Страница 8: ...turn it on Picture may differ from product supplied for your region Turn on the monitor by pressing the power button on the front of the monitor Turn on the computer too and follow the instructions in...

Страница 9: ...ike a stapler or a mouse will crack the glass or damage the LCD substrate voiding your warranty Sliding or scraping the monitor around on your desk will scratch or damage the monitor surround and cont...

Страница 10: ...turn on your computer after connecting the monitor to your computer Windows will automatically recognise the new or different hardware and will launch its Found New Hardware wizard Follow the wizard...

Страница 11: ...ld not be following these instructions You should instead be following the instructions for How to upgrade the monitor on an existing computer 1 Follow the instructions in How to assemble your monitor...

Страница 12: ...testing of this driver on other versions of Windows and cannot guarantee its operation on those systems Installing monitor driver software involves selecting an appropriate information file inf on th...

Страница 13: ...D Monitor CD ROM into a CD drive on the computer 7 In the Update Driver Software window select the option Browse my computer for driver software 8 Click Browse and navigate to the following directory...

Страница 14: ...hing further Cancel out of these property windows However if BenQ is not listed as the manufacturer or the correct model is not currently shown you will need to continue with these instructions 5 Clic...

Страница 15: ...he test program auto exe from CD ROM You could also use any other image such as the desktop of your operating system However we recommend that you use auto exe As you run auto exe a test pattern displ...

Страница 16: ...r Mode 4 Power Turn the power on or off 5 X Contrast Brightness key For Right Increase adjustment The key is the hot key for Brightness and Contrast 6 ENTER key Enter sub menus and select items OSD On...

Страница 17: ...ightness and Contrast indicators Further press the the W or X keys then the ENTER key to select Brightness or Contrast The X key will increase the level while the W key will decrease the level To exit...

Страница 18: ...anguage on page 24 under OSD Settings for more details For more information on each menu please refer to the following pages Display menu on page 19 Picture menu on page 20 Picture Advanced menu on pa...

Страница 19: ...the screen settings automatically for you The AUTO key is a hot key for this function Press the ENTER key to select this option and make adjustment H Position Adjusts the horizontal position of the sc...

Страница 20: ...The function is not available for use when DynamicContrast is on Press the X key to increase the brightness and press the W key to decrease the brightness 0 to 100 Contrast Adjusts the degree of diff...

Страница 21: ...olor tint of the image e g if you reduce the Blue level the image will gradually take on a yellowish tint If you reduce Green the image will become a magenta tint Press the W or X keys and the ENTER k...

Страница 22: ...tions 5 To return to the previous menu press the MENU button Item Function Operation Range Picture Mode Selects a picture mode that best suits the type of images shown on the screen Standard for basic...

Страница 23: ...ales the input image to fill the screen Ideal for 16 10 aspect images Aspect The input image is displayed without geo metric distortion filling as much of the display as possible 16 9 images will fill...

Страница 24: ...rn to the previous menu press the MENU button Item Function Operation Range OSD Settings Press ENTER to enter the OSD Settings menu Language Sets the OSD menu language Press the W or X keys to change...

Страница 25: ...ons will be disabled Press the W or X keys to change the settings To unlock the OSD controls when the OSD is preset to be locked press and hold the MENU key for 15 seconds to enter the OSD Lock option...

Страница 26: ...D screen Cycle power on off These are pixels that are permanently on or off and is a natural defect that occurs in LCD technology The image has a faulty coloration It has a yellow blue or pink appeara...

Страница 27: ...ay appear distorted or stretched on the monitor running at its native resolution To have the optimal display performance of each type of input sources you can use the Display Mode function to set a pr...

Отзывы: