background image

4  


Power safety

• The AC plug isolates this equipment from the AC supply.

• The power supply cord serves as a power disconnect device for pluggable equipment. The 

socket outlet should be installed near the equipment and be easily accessible.

• This product should be operated from the type of power indicated on the marked label. If you 

are not sure of the type of power available, consult your dealer or local power company.

• The Class I pluggable equipment Type A must be connected to protective earth.

• An approved power cord greater or equal to H03VV-F or H05VV-F, 2G or 3G, 0.75mm

2

 must 

be used.

• Use only the power cord provided by BenQ. Never use a power cord that appears to be 

damaged or frayed.

For Germany only:

• (If the weight of the product is less than or equal to 3 kg) An approved power cord greater or 

equal to H03VV-F, 3G, 0.75mm

2

 must be used.

• (If the weight of the product is more than 3 kg) An approved power cord greater or equal to 

H05VV-F or H05RR-F, 3G, 0.75mm

2

 must be used.

• (If a remote control is provided) RISK OF EXPLOSION IF BATTERY IS REPLACED BY AN 

INCORRECT TYPE. DISPOSE OF USED BATTERIES ACCORDING TO THE 
INSTRUCTIONS.

For models with adapter:

• Use only the power adapter supplied with your LCD Monitor. Use of another type of power 

adapter will result in malfunction and/or danger.

• Allow adequate ventilation around the adapter when using it to operate the device or charge 

the battery. Do not cover the power adapter with paper or other objects that will reduce 
cooling. Do not use the power adapter while it is inside a carrying case.

• Connect the power adapter to a proper power source.

• Do not attempt to service the power adapter. There are no service parts inside. Replace the 

unit if it is damaged or exposed to excess moisture.

Please follow these safety instructions for best performance, and long life for your monitor.
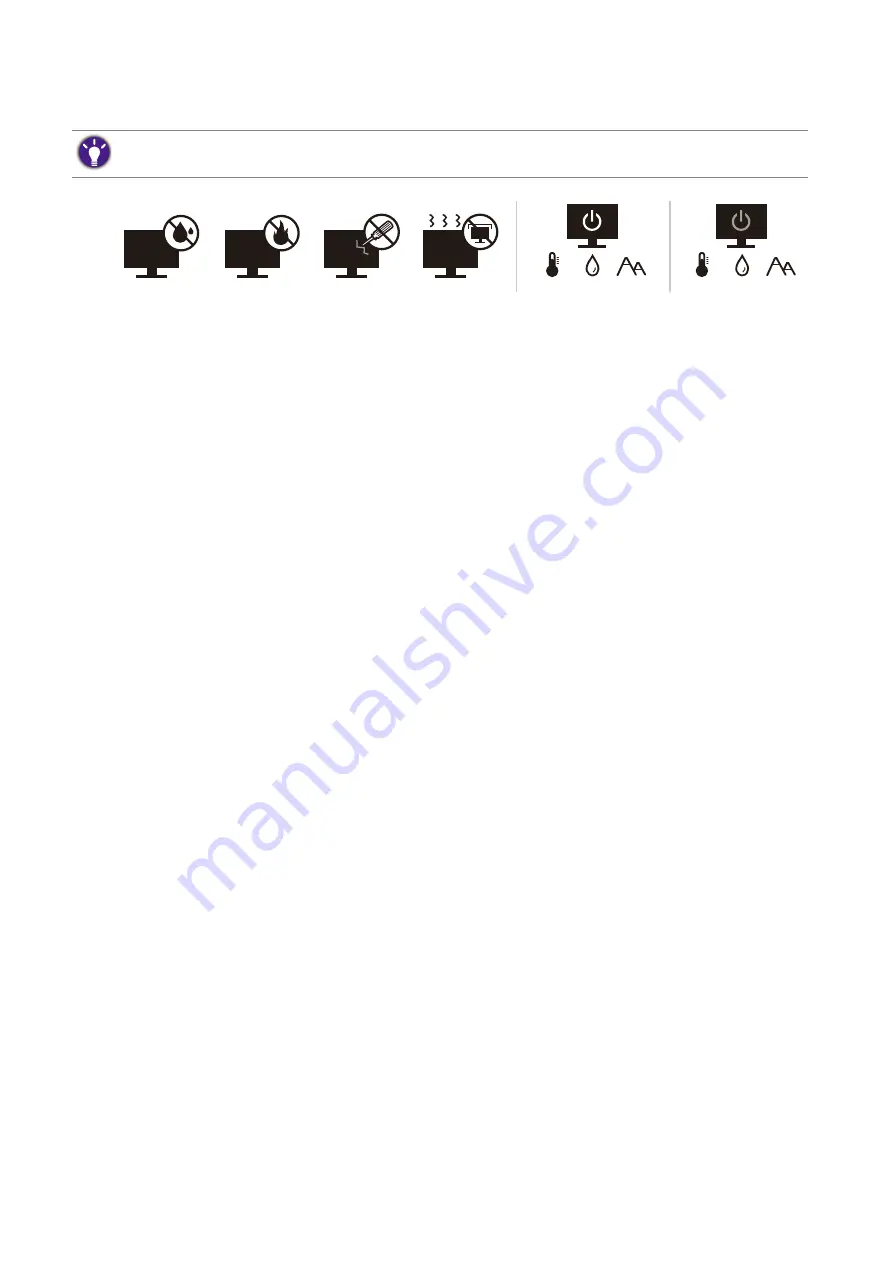
10-90% 0-3000m

0-40°C

10-60% 0-12000m

-20-60°C

Содержание AQCOLOR DesignVue PD Series

Страница 1: ...LCD Monitor User Manual DesignVue Designer Monitor PD Series...

Страница 2: ...may be affected by external factors such as poor cable quality unstable power supply signal interference or poor grounding and not limited to the above mentioned external factors Applicable for flick...

Страница 3: ...related document Drivers and applications EU only Dismantled information Available on the user manual download page This document is provided based on Regulation EU 2019 2021 to repair or recycle your...

Страница 4: ...used If the weight of the product is more than 3 kg An approved power cord greater or equal to H05VV F or H05RR F 3G 0 75mm2 must be used If a remote control is provided RISK OF EXPLOSION IF BATTERY I...

Страница 5: ...s or in a built in installation unless proper ventilation is provided Do not place heavy loads on the monitor to avoid possible personal injury or damage to the monitor Consider keeping the box and pa...

Страница 6: ...nsed form for example Menu System Information Icon Symbol Item Meaning Warning Information mainly to prevent the damage to components data or personal injury caused by misuse and improper operation or...

Страница 7: ...ow to upgrade the monitor on an existing computer 26 How to install on Windows 10 system 27 How to install on Windows 8 8 1 system 28 How to install on Windows 7 system 29 How to adjust your monitor 3...

Страница 8: ...the following items If any are missing or damaged please contact the place of purchase for a replacement BenQ LCD Monitor Monitor Stand Monitor Base Quick Start Guide Safety Instructions Regulatory S...

Страница 9: ...e actual contents and the product supplied for your region And the package contents may subject to change without prior notice For cables that are not supplied with your product you can purchase them...

Страница 10: ...ensor Eco sensor 2 Control buttons 3 Power button 4 Power LED indicator 1 2 3 4 5 AC power switch 6 AC power input jack 7 Cable management hole 8 USB 3 1 Gen 1 port upstream connecting to the PC 9 USB...

Страница 11: ...DisplayPort output socket for Multi Stream Transport MST 15 Headphone jack 16 Quick release button Depending on the product specifications the supported resolution and timing may vary Above diagram ma...

Страница 12: ...e following connection illustrations are for your reference only For cables that are not supplied with your product you can purchase them separately For detailed connection methods see page 15 16 Spea...

Страница 13: ...re information 1 Attach the monitor base Please be careful to prevent damage to the monitor Placing the screen surface on an object like a stapler or a mouse will crack the glass or damage the LCD sub...

Страница 14: ...arefully lift the monitor turn it over and place it upright on its stand on a flat even surface You might want to adjust the monitor stand height See Adjusting the monitor height on page 20 for more i...

Страница 15: ...he monitor to any video source other than DP first Go to System and DisplayPort on the OSD menu of the monitor and change the setting from 1 2 to 1 1 Once the setting is done unplug the current video...

Страница 16: ...e monitor Connect USB devices via other USB ports downstream on the monitor These downstream USB ports transmit data between connected USB devices and the upstream port 5 Connect the power cable to th...

Страница 17: ...pacity of the headphone hook is 500g 8 Connect to and turn on the power Plug the other end of the power cord into a power outlet and turn it on Picture may differ from product supplied for your region...

Страница 18: ...ce down on a flat clean padded surface Please be careful to prevent damage to the monitor Placing the screen surface on an object like a stapler or a mouse will crack the glass or damage the LCD subst...

Страница 19: ...19 How to assemble your monitor hardware And then detach the base from the stand You can remove the headphone hook as illustrated Keep the headphone hook somewhere safe 2 1...

Страница 20: ...ands on the upper or lower part of the height adjustable stand or at the bottom of the monitor as ascending or descending monitor might cause personal injuries Keep children out of reach of the monito...

Страница 21: ...uld be followed to adjust the screen orientation Refer to the help document of your operating system for details 2 Fully extend the monitor and tilt it Gently lift the display up and extend it to the...

Страница 22: ...Viewing angle adjustment You may position the screen to the desired angle with monitor tilt swivel and height adjustment functions Check the product specifications on the website for details 4 Adjust...

Страница 23: ...r 1 Remove the monitor stand Lay the screen face down on a clean and well padded surface Detach the monitor stand as instructed in step 1 2 in How to detach the stand and the base on page 18 2 Remove...

Страница 24: ...he monitor to your computer Windows will automatically recognize the new or different hardware and will launch its Found New Hardware wizard Follow the wizard instructions Further details and step by...

Страница 25: ...3 When Windows starts it will automatically detect the new monitor and launch the Found New Hardware Wizard Follow the prompts until it displays the option to Install Hardware Device Drivers 2 Check S...

Страница 26: ...del monitor you have connected and letting Windows install the corresponding driver files You need only steer it in the right direction Windows has an Upgrade Device Driver Wizard to automate the task...

Страница 27: ...tab 4 Click Generic PnP Monitor and then the Properties button 5 Click the Driver tab and the Update Driver button 6 In the Update Driver Software window select the option Browse my computer for drive...

Страница 28: ...lay Devices and Printers and right click the name of your monitor from the menu 2 Select Properties from the menu 3 Click the Hardware tab 4 Click Generic PnP Monitor and then the Properties button 5...

Страница 29: ...ur monitor from the menu 2 Select Properties from the menu 3 Click the Hardware tab 4 Click Generic PnP Monitor and then the Properties button 5 Click the Driver tab and the Update Driver button 6 In...

Страница 30: ...our monitor How to adjust your monitor The control panel No Name Description 1 Control keys Accesses the functions or menu items displayed on the screen right next to each key 2 Power key Turns the po...

Страница 31: ...stom keys and are designated for particular functions 3 Select Menu to access the main menu 4 In the main menu follow the icons next to the control keys to make adjustments or selection See Navigating...

Страница 32: ...key you want to change 4 In the sub menu select a function that can be accessed by this key A pop up message will appear showing that the setup is complete Custom Key 2 By default the key is the hot...

Страница 33: ...tor to your MacBook series product While the monitor is connected to your MacBook series product switch to M book mode which represents MacBook s color matching and visual representation on your monit...

Страница 34: ...ation Supported resolution To perform MST a limited number of connected monitors is required to ensure image quality The following information shows the image resolution available to each monitor 1st...

Страница 35: ...ill become grayed out And keys that are not available will be disabled and the corresponding OSD icons will disappear For models without certain functions their settings and related items will not app...

Страница 36: ...items will not appear on the menu 1 Select Menu from the hot key menu 2 Use or to select Display 3 Select to go to a sub menu and then use or to select a menu item 4 Use or to make adjustments or use...

Страница 37: ...to go to a sub menu and then use or to select a menu item 4 Use or to make adjustments or use to make selection 5 To return to the previous menu select 6 To exit the menu select 50 100 100 R G B 100 D...

Страница 38: ...een and Blue primary colors can be altered to change the color tint of the image Go to the succeeding R red G green and B blue menus to change the settings Decreasing one or more of the colors will re...

Страница 39: ...select a menu item 4 Use or to make adjustments or use to make selection 5 To return to the previous menu select 6 To exit the menu select 50 Display Picture Picture Advanced Audio System Ergonomics E...

Страница 40: ...s mode enhances the sharpness and clarity of shades and shows more details M book Minimizes the visual differences between the monitor and the connected MacBook series product User Applies a combinati...

Страница 41: ...Use this feature to hide annoying edge noise if present around your image ON OFF HDMI RGB PC Range Determines the range of color scales Select an option that matches the RGB range setting on the conn...

Страница 42: ...n functions their settings and related items will not appear on the menu 1 Select Menu from the hot key menu 2 Use or to select Audio 3 Select to go to a sub menu and then use or to select a menu item...

Страница 43: ...ed items will not appear on the menu 1 Select Menu from the hot key menu 2 Use or to select System 3 Select to go to a sub menu and then use or to select a menu item 4 Use or to make adjustments or us...

Страница 44: ...egion English Fran ais Deutsch Italiano Espa ol Polski esky Magyar Rom n Nederlands Svenska Portugu s Display Time Adjusts the display time of the OSD menu 5 sec 10 sec 15 sec 20 sec 25 sec 30 sec OSD...

Страница 45: ...s Association VESA DDC CI capability allows monitor controls to be sent via the software for remote diagnostics ON OFF DP Auto Switch When this function is activated DP port will be in the input auto...

Страница 46: ...te DP standard for data transmission 1 1 1 2 USB Awake By default this function is disabled and the USB ports are not supplied with power while the monitor is in standby mode To keep supplying power t...

Страница 47: ...use to make selection 5 To return to the previous menu select 6 To exit the menu select Display Picture Picture Advanced Audio System Ergonomics Eco Mode Standard Bright Intelligence Light Meter Sens...

Страница 48: ...r to make adjustments or use to make selection 5 To return to the previous menu select 6 To exit the menu select Display Picture Picture Advanced Audio System Ergonomics Eco Mode Standard ECO Sensor E...

Страница 49: ...49 Navigating the main menu ECO Sensor Meter Sets to display the countdown to turn off the monitor ON OFF Sensor Range Decides how far the sensor can detect Near Middle Far Item Function Range...

Страница 50: ...o the factory defaults If the image is still not correct and the OSD also has faulty coloration this means one of the three primary colors is missing in the signal input Now check the signal cable con...

Страница 51: ...t mode is active Press any button on the computer keyboard or move the mouse If that does not help check the signal cable connectors If any pin is bent or broken off please contact your dealer to get...

Страница 52: ...lly white and fluorescent colors reflect light and the sensor cannot detect the main light sources The ECO sensor of the monitor does not work well The ECO sensor is located at the front bottom of the...

Отзывы: