27
3. After drilling, REMOVE DUST thoroughly from each hole
using compressed air and/ or bristle brush. Make certain that
the Columns remain aligned with the chalk line.
ALWAYS WEAR SAFETY GOGGLES.
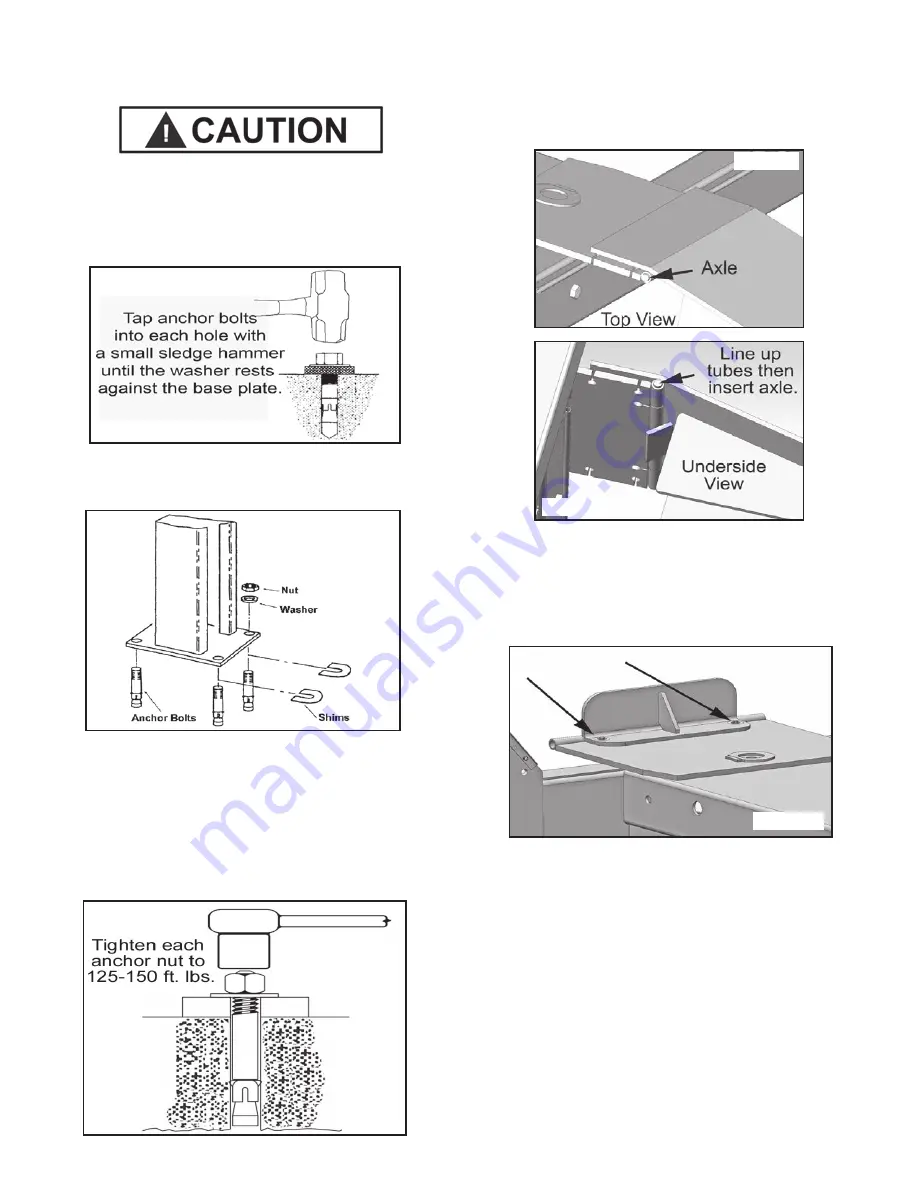
4. Assemble the washers and nuts on the anchors then
tap into each hole with a sledge until the washer rests
against the base plate. Be sure that if shimming is required,
enough THREADS ARE LEFT EXPOSED. (See Fig. 14.3)
5. If shimming is required, insert the shims as necessary
under the base plate so that when the anchor bolts are
tightened, the columns will be plumb. (See Fig. 14.4)
6. After any necessary shims are installed, tighten
each anchor nut 3-5 turns past hand tight. IMPORTANT
- If anchor bolts do not hold when torqued to require d
amount, concrete must be replaced. Saw cut and remove
24” x 24” square area under each column base then
re-pour with reinforced 2500 PSI concrete to a depth of
six inches minimum, keying new concrete under existing
floor. (See Fig. 14.5)
STEP 15
(Final Assembly)
1. Install the approach ramps on the entry side of the lift.
(See Fig. 15.1 &15.2)
2. Install the front tire stops at the forward end of the lift
using the hex bolts, nuts and washers. (See Fig. 15.3)
STEP 16
(Leveling / Synchronizing)
1. Using an engineer’s automatic Level (transit), locate
the Level, at a convenient location in the shop that allows
an unobstructed view of all four corners of the runways.
2. Follow the Level manufacturer’s instructions for prop-
er setup of the Level. Be sure it is ADJUSTED LEVEL in
all directions.
3. Raise the lift approximately 30” - 40” . Then lower lift
until all locking latches are engaged in each column and
the runways are in full down position on locks.
4. Place a Level target on the right/ front corner of the
runway. (See Fig. 16.1)
Fig. 14.3
Fig. 14.4
Fig. 14.5
Fig. 15.1
Fig. 15.2
Fig. 15.3


