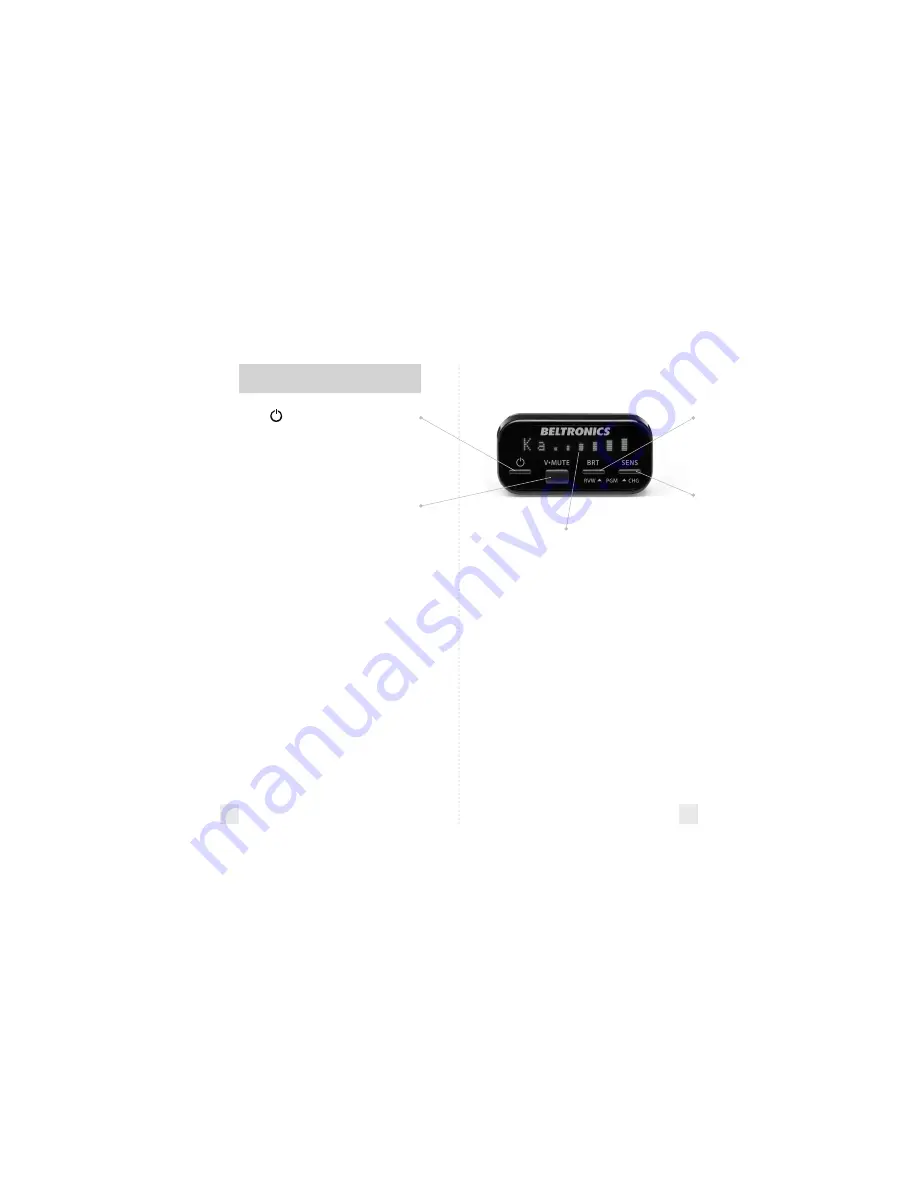
Power
To turn the RX45 on or off, simply press the
power button located on the far left side of
the display controller.
NOTE: We recommend wiring the
RX45 to the vehicle’s ignition switch
so it turns on and off with the key.
Volume Control/Mute Button
To set your volume level for alerts, press
and hold the V•MUTE button located in the
center of the display controller. Once
you’ve reached your desired level of audio,
simply release the button. The RX45 will
remember this setting even when power is
turned off.
To mute an audible alert, briefly press
this button on the display controller to
silence the audio for a specific alert. (The
audio will alert you to the next encounter.)
Page 7
AutoMute
Beltronic’s patented AutoMute
automatically reduces the volume level of
the audio alert.
Page 7
If you prefer, you can turn AutoMute
off.
Page 12
Matrix Display
RX45’s display will show “Highway”,
“AutoScan,” or “Auto NoX” as its standard
power-on indication.
Page 6
If you prefer, you can choose other
power-on indications.
Pages 8-10
During an alert, the display will
indicate radar band, and a precise bar graph
for the signal strength.
Page 9
You can program the RX45 for
ThreatDisplay mode, which displays
multiple radar signals and their signal
strength, or choose our new TechDisplay
mode, which provides the actual numeric
frequency of the radar signal.
Pages 10-11
The display can also show Safety Radar
text messages.
Pages 22-23
BRT Button
Press to adjust display brightness. There are
three brightness settings, plus Dark Mode.
In the Dark Mode RX45’s display will
remain dark and only the audio will alert
you.
Page 9
SENS Button
The sensitivity button, (SENS) toggles
between sensitivity modes including
“AutoScan”, “Auto No X”, and “Highway”
settings. In general, we recommend the
AutoScan mode.
Page 7
Preferences
RX45 is pre-programmed at the factory
ready to go once it is installed – just turn it
on. But you can also easily change 5
features for your preferences. Press both
the BRT and SENS buttons to enter the
Preferences, then easily Review or Change
your settings.
Pages 12-14
Quick Reference Guide
4
5


