background image

USING THE MAIN OVEN - ELECTRIC 

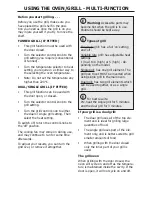
There is no need to interchange dishes 

onto different shelves part way through 

cooking, as with a conventional oven.

To help the air circulate freely

Position the shelves evenly within the 

oven and maintain a clearance from the 

oven roof and base.
If more than one cooking dish or bak-

ing tray is to be used on a shelf, leave a 

gap of at least 25mm between the items 

themselves and the oven interior.

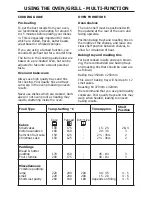
Defrosting and cooling in the  

main oven

To defrost frozen foods, turn the main 

oven control to the defrost position, place 

the food in the centre of the oven and 

close the door.
To cool foods after cooking prior to refrig-

erating or freezing, turn the main oven 

control to the defrost position and open 

the door.

Defrosting times

Small or thin pieces of frozen fish or meat 

- eg; fish filets, prawns & mince will take 

approximately 1 - 2 hours.
Placing the food in a single layer will 

reduce the thawing time.
A medium sized casserole or stew will 

take approximately 3 - 4 hours.
A 1½kg/3lb oven ready chicken will take 

approximately 5 hours, remove the giblets 

as soon as possible.

Be safe

Do not defrost stuffed poultry using this 

method.
Do not defrost larger joints of meat and 

poultry over 2kg/4lb using this method.
Never place uncooked food for defrosting 

next to cooked food which is to be cooled, 

as this can lead to cross contamination.

Defrosting meat, poultry, and fish can be 

accelerated using this method but make 

sure they are completely thawed before 

cooking thoroughly. Place meat and poul-

try on a trivet in a meat tin.

MAIN OVEN BAKING GUIDE
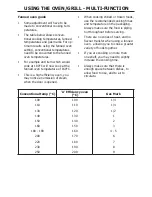
Cooking times & temperatures

The temperature settings and times given 

in the baking guide are based on dishes 

made with block margarine. If soft tub 

margarine is used it may be necessary to 

reduce the temperature setting.
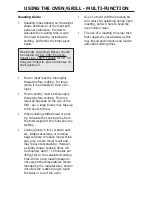
Allow enough space between shelves for 

food that will rise during cooking.
Do not place items on the oven base as 

this will prevent air circulating freely.

Содержание DB4 90E

Страница 1: ...Belling Range Electric Induction UK Users Guide Installation Handbook Part No 082759701 Date 12 12 2011 ...

Страница 2: ...ur call has been accepted and is being held in a queue Calls are answered in strict rotation as our Customer care representatives become available Alternatively general information spares and service information is available from our website The address is located on the back page of this book WARRANTY Your new appliance comes with our 12 month guarantee protecting you against electrical and mecha...

Страница 3: ...given supervi sion or instruction concerning use of the appliance in a safe way and understand the haz ards involved Children should not play with the appliance Cleaning and maintenance shall not be made by children with out supervision WARNING Servicing should be carried out only by autho rised personnel The appliance must never be disconnected from the mains supply during use as this will seriou...

Страница 4: ...ems on the cooking surface If the surface is cracked bro ken or shattered switch off the appliance to avoid the possibil ity of electric shock and call for a service engineer s visit Metallic objects such as knives forks spoons and lids should not be placed on the hob sur face since they can get hot Ensure you switch off the ap propriate cook zone individually or by the central on off key when you...

Страница 5: ...hopping board or food preparation area as this may lead to it becoming damaged Never put metal cooking utensils cutlery knives or other metal objects on the hob They could become hot if they are near a cooking area which is in use If the appliance has solidplate ele ments never leave pan lids or deco rative covers on top of the elements as any trapped moisture will lead to corrosion If the applian...

Страница 6: ...hot Turn off the heat if it s safe to do so but never lean over a pan to reach the controls If you have a fire blanket put it over the pan If you have put the fire out leave the pan to cool completely Deep fat frying presents more dan gers in your kitchen Never fill a chip pan or other deep fat fryer more than one third full of oil Do not use a fire extinguisher on a pan of oil the force of the ex...

Страница 7: ...moving food from the oven as the area around the cavity may be hot Always use oven gloves when han dling any utensils that have been in the oven as they will be hot Always make sure that the oven shelves are resting in the correct po sition between two runners Do not place the oven shelves on top of the highest runner as this is not stable and can lead to spillage or injury Always use the Minute M...

Страница 8: ...gloves to protect your hands The appliance has a glass hob top make sure you do not drag pans across the ce ramic surface as this will lead to scratches and damage Do not use the hob surface as a chopping board or food preparation area as this may lead to it becoming damaged WARNING Do not use the hob if the glass is cracked as electrical parts are directly beneath To avoid the possibil ity of ele...

Страница 9: ...larly in re lation to surface temperatures becoming hot and component parts not working efficiently The cooling fan if fitted is designed to run on after the control has been switched off This induction hob complies with the applicable EMC and EMF standards Therefore it should not interfere with other electronic units Persons fitted with a pacemaker or any other electrical implant should clarify w...

Страница 10: ...ade of multi layer stainless steel rustproof ferrite steel or alum nium with a special base Pans marked for use with induction Unsuitable cookware for induction hobs includes Pots made of copper stainless steel aluminium oven proof glass wood ceramic and terracotta Note when using certain pans you may get various noises from the pans This is due to the design of the pans and does not effect the pe...

Страница 11: ...e 60 Pause This button pauses cooking with one touch cuts power Minute Minder Yes Time cooking Timer Auto Switch off 4 zones Yes All four cooking zones can be simultaneously timed to turn off automatically Pan Detection Lets you know if the correct pans are being used and helps to save energy When a pan is lifted off the zone the power is automatically cut Overheat Pan Detection Yes Helps prevent ...

Страница 12: ...ry low steady heat which is ideal for keeping food warm defrosting foods or melting chocolate To operate Turn on the hob and select the re quired cook zone Select power set ting U located in between 0 and 1 Pause Key The Pause Key should be used to tempo rarily cut the power to the cooking zones when you have unexpected interruptions and you are unable to supervise the cooking on the induction hob...

Страница 13: ...ne To operate Turn on the hob using the on off key Select the timer CL do not activate any cook zone Set the right hand digit up to 9 min utes Single Minutes Units and wait a couple of seconds The display will now indicate for you to set the left hand digit up to 90 minutes 10 Minute Units The timer is now set and begins counting down No zone indicator light should be set You can now use the hob a...

Страница 14: ...imer will beep and the cook zone will auto matically turn off The cook zone will display H if the surface is hot Touch any control to stop the beep ing Additional timer information To modify or cancel a timer setting follow steps 1 to 5 above To set the timer for additional zones fol low steps 1 to 5 above If multiple zones have been set for timed operation the timer display will always display th...

Страница 15: ...mporary warm zone Note The cook zone itself does not heat up but the ceramic glass does get hot because of the hot pan conducting heat back onto the hob glass Overheat Pan Protection The hob is equipped with additional safety systems that help to prevent cookware from overheating providing an additional level of safety not available on conven tional hobs such as gas and ceramic hobs Note The safet...

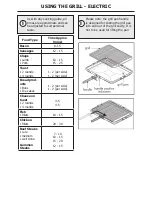
Страница 16: ...nd is better suited to grill smaller amounts of food The grill pan This appliance comes with a grill pan grill pan handle and a grid The handle of the grill pan is detachable to allow you to remove it while the pan is in use this stops it from getting hot Aluminium Foil Never cover the grill pan or grill trivet with foil or allow fat to build up in the grill pan as this creates a fire hazard Types...

Страница 17: ...per side Cheese on toast 2 rounds 4 rounds 4 5 4 5 Fish fillets 10 15 Chicken fillets 20 30 Beef Steaks rare medium well done Gammon Steaks 7 10 10 15 15 20 12 15 As with any cooking guide all times are approximate and can be adjusted to suit personal taste i Please note the grill pan handle is designed for sliding the grill pan into and out of the grill cavity It is not to be used for lifting the...

Страница 18: ...The oven must be preheated when cook ing frozen or chilled foods and we rec ommend preheating for yeast mixtures batters soufflés and whisked sponges Preheat the oven until the indicator light switches off for the first time this will take up to 15 minutes depending on the temperature selected If you are not preheating the oven the cooking times in the following guide may need to be extended as th...

Страница 19: ...40 215 90 100 1 1 1 1 1 1 15 20 mins 20 25 mins 8 12 mins 2 2 hours 10 15 mins 2 3 hours Shortcrust pastry Puff flaky pastry Choux pasrty 200 210 200 210 200 210 1 1 1 Depends on size type of cook ing dish also the filling Biscuits Sponge pudding Milk pudding 160 200 150 140 2 1 1 10 20 mins 30 45 mins 2 2 hours Cooking temperatures The temperature settings and time given in the Baking Guides are ...

Страница 20: ... other types of cooking a pre heat may not be re quired Conventional oven Preheating is always required Manual Operation fanned only The programmer must be set to manual operation before the main oven can be used If A Auto is on the programmer display return the oven to manual by pressing the up and down buttons simul taneously Any programme which has been set is cancelled The cooling fan The cool...

Страница 21: ...the oven This makes it ideal for batch baking eg when planning a party as all the items will be cooked within the same length of time Foods are cooked at a lower temperature than a conventional oven so conven tional recipe temperature may have to be reduced Please refer to the conversion chart Preheating is generally not necessary as a fan oven warms up quickly There is no flavour transference in ...

Страница 22: ...the food in a single layer will reduce the thawing time A medium sized casserole or stew will take approximately 3 4 hours A 1 kg 3lb oven ready chicken will take approximately 5 hours remove the giblets as soon as possible Be safe Do not defrost stuffed poultry using this method Do not defrost larger joints of meat and poultry over 2kg 4lb using this method Never place uncooked food for defrostin...

Страница 23: ...he A ef ficiency temperature of 160 C Conventional temperature C A Efficiency Oven C Gas Mark 100 110 130 140 150 160 180 190 200 220 230 250 100 110 120 130 140 150 160 170 180 190 200 1 4 1 4 1 2 1 2 3 4 5 6 7 8 9 Food Type Temperature set tings C Time Approx Shelf Position Cakes Small cakes Victoria sandwich Semi rich fruit cake Christmas cake Conv 190 180 150 150 Fanned 160 160 125 125 15 25 2...

Страница 24: ... unless specified in the recipe Always use the correct size and shape of tin for the recipe quantities Roast turkey Roasting turkey involves cooking two different types of meat the delicate light breast meat which must not be allowed to dry out and the darker leg meat which takes longer to cook The turkey must be roasted long enough for the legs to cook so frequent bast ing is necessary The breast...

Страница 25: ...ng stuffed meat or poultry calculate the cooking time from the total weight of the meat plus the stuffing For joints cooked in foil or covered roasters and for lidded casseroles add 5 minutes per 450g 1lb to the calculated cooking time Smaller joints weighing less than 1 25kg 2 lb may require 5 minutes per 450g 1lb extra cooking time Position the oven shelf so that the meat or poultry is in the ce...

Страница 26: ... on to show that the oven is heating and once the temperature is achieved it will go out To switch off the oven simply turn the control knob back to the posi tion The cooling fan may come on during use and may continue to run for some time afterwards FANNED OVEN IF FITTED Switching on the fanned oven Use the main oven control to turn your oven on and select your tem perature The thermostat indicat...

Страница 27: ...d Grill The fan allows the heat to circulate around the food Ideal for thinner foods such as bacon fish and gammon steaks Foods do not require turning Use with the oven door closed Fanned Oven The even temperature in the oven makes this function suitable for batch baking or batch cooking foods Defrost To defrost foods such as cream cakes gateaux use with the oven door closed For cooling dishes pri...

Страница 28: ...r results you can turn the grid over or remove it altogether If your grill is a dual grill The dual grill uses all of the top ele ment and is ideal for grilling large quantities of food The single grill uses part of the ele ment only and is better suited to grill smaller amounts of food When grilling with the door closed only the inner part of your grill is used The grill neon When grilling with t...

Страница 29: ...When cooking chilled or frozen foods use the recommended cooking times and temperature on the packaging Always make sure the food is piping hot throughout before serving There are no zones of heat and no flavour transfer when using a fanned oven allowing you to cook a greater variety of foods together If you are cooking on more than one shelf you may need to slightly increase the cooking time Alwa...

Страница 30: ...e small Shortcrust pastry 220 220 200 200 200 180 200 200 180 40 45 15 20 depends on filling 11 12 top middle e 31 190 180 150 150 Fanned Pre heating To get the best results from your oven we recommend pre heating for around 5 to 15 minutes before placing your dishes in This is especially important for items which are chilled frozen batter based yeast based or whisked sponges If you are using a fa...

Страница 31: ... casseroles or roasting bags will help to reduce meat shrink age give a more moist result and may reduce fat splashing However a slightly longer cooking times will be required add 5 10 minutes per 450g 1lb to the calculated cooking time When using roasting bags do not exceed the temperatures recom mended by the manufacturer and do not allow the roasting bag to touch the sides or top of the oven Us...

Страница 32: ...turkey is stuffed add 5 minutes per 1lb to the cooking time If roasting turkey covered with foil add 5 minutes per 1lb to the cooking time To test if the turkey is cooked push a fine skewer into the thickest part of the thigh If the juices run clear the turkey is cooked If the juices are still pink the turkey will need longer cooking Always make sure that the turkey is cooked properly before serv ...

Страница 33: ...ze of cake Insufficient protection around the tin Cake baked on too high a shelf Texture with pronounced holes Too much raising agent Flour unevenly mixed Texture too close and cake insuf ficiently risen Not enough raising agent Not enough liquid Too cool an oven Insufficient creaming Cake crumbles when cut Not enough liquid Baked for too long Not enough sugar Too much baking agent Too dry Over ba...

Страница 34: ...sserole or stew will take around 3 4 hours A 1 kg 3lb oven ready chicken will take around 5 hours remove the giblets as soon as possible Always check foods are thoroughly defrosted before cooking Be safe Do not defrost stuffed poultry using this method Do not defrost larger joints of meat and poultry over 2kg 4lb using this method Never place uncooked food for de frosting next to cooked food which...

Страница 35: ...on The plate warmer is now secure and you can place your plates into it Always make sure that you use oven gloves if you are putting the plate warmer into a hot or recently used oven to pre vent burns Always make sure that your plates are suitable for warming some plates may shatter or crack when exposed to heat We recommend that you heat the oven to 70 C or below if you are warming plates Plate w...

Страница 36: ...ils maybe used for slow cooking provided they have a close fitted lid To rectify a badly fitting lid a piece of cooking foil may be placed over the dish under the lid For convenience and to save washing up the most useful utensils for slow cook ing are the flame proof type which can be used over direct heat and for oven cooking and are sufficiently attractive to use as serving dishes Keeping food ...

Страница 37: ...depending on the size and shape of the meat or poultry Always bring soups casseroles and liquids before placing in a preheated oven To give more colour to meat or poultry fry the meat to brown and add to stock which is hot All meat and poultry recipes need a minimum of 5 hours to cook Make sure all frozen ingredients are well thawed out Always ensure that frozen poultry has thoroughly defrosted in...

Страница 38: ...d later on in this sec tion The function button in the centre is used for setting the minute minder and setting up the automatic cooking See below for details Symbols on the LED display This A symbol appears when either a semi or fully automatic program is selected This symbol will flash while a program is being set Once a program is set the symbol will light up and remain lit until the alarm soun...

Страница 39: ...the down button to listen to the first tone Release the down button and press it again to listen to the second tone etc Releasing the down button after the tone has sounded will automatically select that tone Setting the minute minder To set the Minute Minder press the Function button once The bell sym bol will appear and start flashing The flashing only lasts for 5 seconds so the time must be set...

Страница 40: ...ted Extra time cannot be added nor can the end time be extended To cancel the semi automatic programs press both the Up and Down buttons together This can be done at any time during the cooking process Then if neces sary re program For the instructions on how to use both of these functions please see the following page Fully automatic cooking This function incorporates both a duration and an end t...

Страница 41: ...off once the time has elapsed and the alarm will sound To switch off the alarm press any button To view any remaining time press the function button twice The end time method Press the Function button three times which will skip past the Minute Minder and the Duration programmer 4 The LED display will flash the word End and the A will flash on the left hand side of the display 5 Use the Up and Dow...

Страница 42: ... the time you require within 5 seconds of the dur message 9 Press the function button three times until the A flashes again and the End messages appears 10 11 Using the Up and Down buttons set the time you would like the oven to switch off 12 Set the temperature of the oven and place the food inside While the automatic function is running the A will appear statically on the display with the time T...

Страница 43: ...ter on in this section The function icon in the centre is used for setting the minute minder setting up the automatic cooking see below for details Symbols on the LED display This A symbol appears when either a semi or fully automatic program is selected This symbol will flash while a program is being set Once a program is set the symbol will light up and remain lit until the alarm sounds or the p...

Страница 44: ...d down the alarm will sound To cancel the tone touch hold any of the icons To cancel the minute minder at any time touch hold the plus minus icons together Semi automatic cooking Method 1 duration switch off after set time period Touch hold the centre function icon the bell will flash you will hear a beep Touch the centre function icon again this will skip past the minute minder function The displ...

Страница 45: ...h the word dur the A will flash on the left hand of the display Use the plus minus icons to set the length of time you want to cook for The flashing will last for approximately five seconds so the setting must be done within this time frame or the time of day will show again Touch the centre function icon again this skips past the minute minder dura tion functions The display will flash the word E...

Страница 46: ...in ute minder the bell symbol will light Use the plus and minus buttons to set the length of time before the alarm tone will sound The display will increase decrease in units of 10 sec onds up to 99 minutes 50 seconds and in units of 1 minute from 1 hour 40 minutes upwards The maximum period which may be set is 10 hours The display format will change after 99 minutes and 50 seconds to 1 hour and 4...

Страница 47: ...leaner Supplies can be purchased from the Customer Care Centre Sharp objects can mark the surface of stainless steel but will become less noticeable with time Wipe any spillage immediately taking care to avoid burning your hands Some foods are corrosive eg vinegar fruit juices and especially salt they can mark or damage the metal if they are left on the surface Baby oil can be used to restore stai...

Страница 48: ...el correctly fitted For your safety glass door panels are made of toughened glass This en sures that in the unlikely event that a panel breaks it does so into small fragments to minimise the risk of in jury Please take care when handling using or cleaning all glass panels as any damage to the surfaces or edges may result in the glass breaking without warning or apparent cause at a later date Shoul...

Страница 49: ...or cleaning when the shelves are cold to prevent burning yourself To remove the telescopic shelves Make sure the shelf is cool enough to touch Push the oven shelf back into the cavity until it hits the stop position Grasp the shelf bars in the centre and lift the back of the shelf clear of the stop position You can then lift the front of the shelf clear of the retaining tabs To replace the telesco...

Страница 50: ...pillage as soon as pos sible Clean the hob top as regularly as possible this will prevent any build up of grease which may be a fire hazard Solid plate hobs Prime and Season this helps main tain the finish of the elements Use a damp clean cloth to wipe the solid plate making sure that you follow the circular grooves and avoid damaging the red spots Make sure that you allow the hotplate to dry befo...

Страница 51: ...n the doors or handles Open the door and grasp the frame of the cooker taking care that the door does not shut on your fingers Take care to avoid damage to soft or uneven floor coverings when moving the appliance Some cushioned vinyl floor cov erings may not be designed to withstand sliding appliances without marking or damage Important Ensure that you route all mains cables well clear of any adja...

Страница 52: ...uld be less than 650mm above the hob top but please check this with the hood manufacturers instructions If your appliance has a side opening door we recommend a side clear ance of 60mm to allow the oven door to fully open The cooker must have a side clear ance above hob level of 90mm up to a height of 400mm The important dimensions are those around the appliance ...

Страница 53: ... of the appliance Locate fitted screw A through the slots in both of the metal splashback plates Tighten screw A and nut B Now locate and tighten screw C and nut D through hole 2 at both ends of the rear surface of the appliance Make sure that the splashback is securely attached but avoid over tightening Fitting the towel rail if applicable On the towel rail there are two hole top A and bottom B t...

Страница 54: ...ction should be made with a suitable flexible cable First strip the wires then push the cable through the cable clamp Connect the cable to the terminal block and tighten the cable clamp screws see diagram Refit the terminal box cover Sufficient cable should be used to allow the cooker to be pulled out but must hang clear of the floor so it does not become twisted or trapped when the cooker is push...

Страница 55: ...L DATA Induction Hob kW Rating 240v Left Front Left Back Right Front Right Back 1 4kW 1 4kW Boost to 2 0kW 1 9kW Boost to 2 3kW 1 4kW Appliance Size 220 240V 50 Hz DB4 or Classic DB4 Classic 900 14 03kW 14 65kW ...

Страница 56: ... when it happens by doing the following Pre heat the oven at a high tempera ture before putting food in the oven and cover the food you are cooking wherever possible Whenever you can cook wet foods at higher temperatures Don t leave food in the oven to cool down Automatic cooking will normally pro duce condensation when the oven is cooling down with food inside Should the cooling fan continue to r...

Страница 57: ...ild up of mineral deposits Best used with Ceramic Hob Scraper Kit 300ml bottle Ceramic Hob Scraper kit All Ceramic glass hobs including Induction Ideal for removing cooked on marks from ceramic glass hobs Best used with Ceramic Hob Cleaner Sealed Hotplate Conditioner All sealed solid plate hobs Restores the sleek matt black finish to solid hotplates Multipurpose Kitchen Cleaner General kitchen cle...

Страница 58: ...with you Please remember that bulbs are not cov ered by your warranty No of Lamps Bulb location Oven Type Instructions 2 Side All Remove the oven shelves Grasp the lens cover on the light fitting and pull it away from the side of the oven Unscrew the bulb and replace Replace the lens cover 1 Rear Fanned Multifunction Electric Remove the oven shelves Remove the loose oven back by unscrewing the 4 s...

Страница 59: ...Please keep this handbook for future reference or for anyone else who may use the appliance ...

Страница 60: ... silver data label on your product which is located Ovens Open the door adjacent to the oven cavity High level grill products Inside the base compartment Hobs On the underside of the product Enter appliance numbers here for future reference Model No Serial No SERVICE RECORD Date of purchase Installed by Installation Date Place of purchase Date Part s replaced Engineer s name For customers outside ...

Отзывы: