background image

INSTRUCTION MANUAL

PLEASE READ THE INSTRUCTION MANUAL CAREFULLY BEFORE
USING THE UNIT.

www.belling.com.au


www.belling.co.nz

BDU958DBK

90

cm


Dual Fuel Upright Cooker, Matte Black

Содержание BDU958DBK

Страница 1: ...INSTRUCTION MANUAL PLEASE READ THE INSTRUCTION MANUAL CAREFULLY BEFORE USING THE UNIT www belling com au www belling co nz BDU958DBK 90cm Dual Fuel Upright Cooker Matte Black...

Страница 2: ...2...

Страница 3: ...Thank you for choosing one of our qua lity products capable of giving you the very best service To make full use of its performance features read the parts of this manual which refer to your appliance...

Страница 4: ...or where live parts may be accessed Never use the warming compartment for storing inflammable liquids or items which do not withstand heat such as wood paper aerosol cans matches etc If taps become s...

Страница 5: ...which may result in shattering of the glass Do not spray aerosols in the vicinity of this appliance while it is in operation Do not use or store flammable materials in the appliance storage drawer or...

Страница 6: ...the oven see fig 11 Each chain must be firmly attached to the rear vertical wall behind the oven The anchor used to attach the chains to the rear wall must be of a type suitable for the purpose If the...

Страница 7: ...actorysetforNaturalgas Thetest point pressure should be adjusted to 1 00kPa with the Wok burner operating at maximum Ensure that the gas regulator supplied with the cooker is connected as close as pra...

Страница 8: ...tap Ignite the burner at maximum flame pull off the knob without using a lever against the control panel which might be damaged access the by pass with a small screwdriver and back off by about 3 turn...

Страница 9: ...pointer to the on position release the knob in this position and move a burning match towards the burner IT MUST NOT IGNITE Time needed to excite the magnet during igni tion 10 seconds approx Automat...

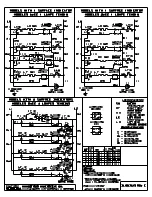
Страница 10: ...the back of this manual For the ELECTRIC WIRING DIAGRAM see figure 2 at the back of this manual The electrical power is stated on the name plate visible inside the warming compartment if present or on...

Страница 11: ...as supply must be cut off within no more than 90 seconds for the hob burners FOR COOKERS WITH ELECTRIC IGNI TION All the above applies except that the match is no longer required a spark is obtained b...

Страница 12: ...s in operation MULTI FUNCTION ELECTRIC OVEN With different heating elements controlled using a selector switch and regulated by a thermostat this oven offers various cooking methods There are three pr...

Страница 13: ...er by using the or keys Release the or key when you have matched your desired time In a few seconds the current time appears on the display together with the 4 symbol The countdown starts immediately...

Страница 14: ...bulb of the oven are disabled To enable again the oven just touch and keep the M key up to see the symbol 2 on the display and the A symbol disappears OTHER PROGRAMMER FUNCTIONS How to delete a cooki...

Страница 15: ...sert the oven shelf properly just slide the shelf following the relevant side supports To pull the shelf out it is necessary to gently lift it out of the side racks and then pull out the shelf REMOVIN...

Страница 16: ...16 5 U LPG Nat Gas Figures CONNECTION DIAGRAM TWO PHASE Wire gauge 3 5 kW 3x2 5 mm2 2 2 3 5 kW 3x1 5 mm2 0 2 2 kW 3x1 mm2 1 2 L N 2 3 6 A B C 4 A AUXILIARY R RAPID TC W WOK 1 R R A C T C T...

Страница 17: ...17 7b Figures 7a 8 10a 10b...

Страница 18: ...18 Figures POSITION 2 POSITION 1 15 B...

Страница 19: ...t on either cupboard as far back as possible locate the cooker into position and pass the safety chains through the 16mm holes with the cooker in the final position pull both safety chains and secure...

Страница 20: ...e the chains sufficientlysecured figure 1 shows an example of how far forward an oven can tip when not secured properly Note Correct installationis part of the installerscompliance Left Side of oven c...

Страница 21: ...n The chains then need to be pulled as tight as possible from inside the cabinet while at the same time being fixed to the rear of the cabinet using a self drilling wood screw It is better to have the...

Страница 22: ...oses including business or commercial use a period of 90 days from the date the product is purchased as a brand new product from a retailer located in Australia New Zealand Belling Design products are...

Страница 23: ...n Australia New Zealand as a brand new product 3 Consumer guarantees Our goods come with guarantees that cannot be excluded under the Australian New Zealand Consumer Law You are entitled to a replacem...

Страница 24: ...t is superseded or no longer in stock with a product of as close a specification as possible Goods presented for repair may be replaced by refurbished goods of the same type rather than being repaired...

Страница 25: ...____________________ ______________________________________________________ ______________________________________________________ ______________________________________________________ ______________...

Страница 26: ...nd building codes with compliance being issued as required by state or national legislation Additionally all upright cookers must have the anti tilt device installed correctly in adherence to the rele...

Отзывы: