background image

Chip Pan Fires

What causes a chip pan fire?

#

Chip pan fires start when oil of fat overheats and catches fire,

or when oil or fat spills on to the cooker because the pan has

been filled too high.

#

They can also start when wet chips are put into hot oil,

making it bubble up and over flow.

Preventing a chip pan fire

#

Never fill the pan more than a third full with oil of fat.

#

Never leave the pan alone with the heat on - even for a few

seconds.

#

Dry chips before putting them in the pan.

#

Never put chips in the pan if the oil has started smoking.

Turn off the heat and leave the oil to cool down, or else it

could catch fire.

In the event of a chip pan fire

#

If your chip pan does catch fire - don’t panic, and don’t move

the pan. Serious burns are often caused by picking up the

pan and running outside with it.

#

If it is safe to do so, and you don’t have to reach across the

pan, turn off the heat.

#

Never throw water, or use a fire extinguisher.

#

If you can, drape a damp cloth or towel over the pan to

smother the flames.

#

Leave the pan to cool down for at least half an hour.

#

If you can’t control the fire yourself, close the door, get out

and tell everybody else to get out.

#

Call the fire brigade. Don’t go back inside whatever the

reason.

Содержание 100 GT

Страница 1: ...Belling 100 110 GT...

Страница 2: ...ooling fan to run at its optimum efficiency Particularly Built In appliances See clearance dimensions in the installation section of the booklet During use the Appliance must never be disconnected fro...

Страница 3: ...www belling co uk contact warranty If your appliance is covered by the warranty and guaran tee you will not be billed for work undertaken should your appliance be faulty terms and conditions do apply...

Страница 4: ...Guide General Baking Guide Cleaning Your Gas Hob Cleaning Your Cavities Cleaning Your Appliance Cook Shop Trouble Shooting Before You Call Changing Light Bulbs Installation Instructions Installing You...

Страница 5: ...ar protective gloves when installing and moving this appliance This will prevent any injury Our policy is one of constant development and improvement Strict accuracy of illustrations and specification...

Страница 6: ...ver use the hob for any other purpose than cooking food Plastic cooking utensils can melt if they come into contact with a warm hob Never leave them close to or on top of the hob Never leave the burne...

Страница 7: ...the oil has started smoking Turn off the heat and leave the oil to cool down or else it could catch fire In the event of a chip pan fire If your chip pan does catch fire don t panic and don t move th...

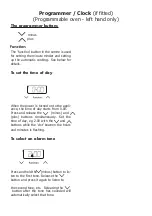
Страница 8: ...turned on to the appli ance the time of day starts from 0 00 Press and release the minus and plus buttons simultaneously Set the time of day eg 2 00 with the and buttons while the dot beween the hour...

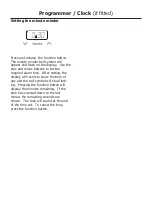
Страница 9: ...us buttons to set the required alarm time After setting the display will revert to show the time of day and the bell symbol will stop flash ing Pressing the function button will display the minutes re...

Страница 10: ...ton can be pressed and released twice to show how much cooking time remains on the clock At the end of the cooking time the alarm will sound and the oven will automatically switch off To switch off th...

Страница 11: ...his time release the control knob and wait one minute before attempting to re ignite Energy Saving Position pans centrally over the elements Only heat the amount of liquid you need Once liquids have b...

Страница 12: ...the pan support over the burners using the locating feet on the underside of the griddle Take care to avoid damage to the surface of the pan supports Before cooking preheat the griddle for 3 minutes o...

Страница 13: ...over the narrow edge of the grill pan and slide to the centre as shown in the diagrams Auto re ignition if applicable Should the grill door be closed accidentally while the grill is in use the gas sup...

Страница 14: ...the the oven and do not attempt to re ignite for at least one minute Note Using a gas appliance results in the production of heat and moisture in the room in which it is installed Always ensure that t...

Страница 15: ...before serving Turkey Roasting times Most Turkeys are measured by the kilogram Timing should be calculated in either of these ways 40 minutes per 1kg plus 10 minutes per 1 4 kg or 20 minutes per 1lb p...

Страница 16: ...temperature too high Oven too small for the size of cake Insufficient protection around the tin Cake baked on too high a shelf Texture with pronounced holes Too much raising agent Flour unevenly mixe...

Страница 17: ...e are carbon deposits or fat stains and can be removed using a soap filled pad Do not put burners in the dishwasher or soak them Using dishwasher powders washing up liquids and caustic pastes can dama...

Страница 18: ...an cloth which has been wrung out in hot soapy water If larger splashes of fat do not readily disappear you can use a mild cream cleaner to remove them More stubborn marks can be removed using a soap...

Страница 19: ...loth Dry with a soft clean towel or cloth Do not use steam cleaners Glass parts Only use a clean cloth wrung out in hot soapy water or a specialist glass cleaner Rinse away any excess cleaner and dry...

Страница 20: ...ceramic glass hobs including induction Sealed hotplate conditioner 082606783 1 All sealed solid plate hobs Stainless steel cleaner 082606764 1 All stainless steel parts Oven cleaner spray 082606786 1...

Страница 21: ...r You cannot always prevent it but you can minimise it when it happens by doing the following Pre heat the oven at a high temperature before putting food in the oven and cover the food you are cooking...

Страница 22: ...lace lens cover and replace oven back 1 25W rear Conventional Wait until the oven is cool then remove the oven shelves The oven light is at the rear of the oven cavity Unscrew the lens cover turn anti...

Страница 23: ...g this appliance it may be heavier than it looks If you need to lift the appliance make sure you use an appropriate lifting method Soft or uneven flooring may be damaged unless the appliance is moved...

Страница 24: ...the hob top but please check this with the hood manufacturers instructions If your appliance has a side opening door we recommend a side clearance of 60mm to allow the oven door to fully open The cook...

Страница 25: ...required If the room has a door which opens directly to the outside or exceeds 10m no air vent is required For room volumes between 5m and 10m and air vent of 50cm is required If there are other fuel...

Страница 26: ...ilding Standards Scotland Consolidated issued by the Scottish Development Department I E E Wiring Regulations Electricity at Work Regulations BS 6172 Installation of Domestic Gas Cooking For LP Gas re...

Страница 27: ...a bayonet type hose suitable for use on LP Gas up to 50mbar pressure and 70 C temperature rise The flexible hose should be coloured black with a red stripe band or label If in doubt contact your suppl...

Страница 28: ...e wires in the mains lead of the appliance may not correspond with the coloured markings identifying the terminals in your plug proceed as follows The wire which is green and yellow must be connected...

Страница 29: ...r lifting the mat Open the appliance doors and loosen screw A located on bracket 2 Do not remove this screw entirely Insert screw B through slot 3 and screw into the small hole at the bottom of bracke...

Страница 30: ...level with the front edge Remove the cooker and mark off 450mm from the pencil line to locate the front edge of the lower bracket Fix the bracket to the floor Measure from floor level to engagement ed...

Страница 31: ...data badge for specified gas type Never attempt to convert an appliance unless the data badge states that you can Burner Aeration Fixed Pressure setting G20 Natural Gas 20mbar G30 Butane 28 30mbar G3...

Страница 32: ...cm Total Gas Input 21 90kW 21 90kW Fuel Type Hotplate Burner Element Nominal Rate Qn Butane g h Propane g h Injectors used Natural Gas Hob small Hob medium Hob Large Hob wok Total heat input 7 burners...

Страница 33: ...rial number in the space below Where are my model and serial numbers Freestanding HL appliances base of storage drawer Freestanding appliances front frame near oven cavity Built in oven front frame ne...

Страница 34: ...h with us UK and Northern Ireland only please call Stoves Customer Care Centre Helpline on 0844 815 3746 For customers outside the UK and Northern Ireland please contact your local supplier Glen Dimpl...

Отзывы: