


Customizing The Multimedia Keys
To choose a new application or rename an application, please follow the “Selecting A New Application” and
“Renaming A Target Application” earlier in this guide.
You can change the function of any of the multimedia keys and save custom configurations to load when a specific
program is active. For instance, you may not need any of the pre-set keys for the internet while in your video edit-
ing program. It may be useful to program the www buttons to open your sound editing program or trigger helpful
keyboard shortcuts.
Modifying Individual Multimedia Keys
To modify the function of a multimedia key first highlight it by clicking on its picture in the driver interface or by sim-
ply pressing the multimedia key you want to modify on your keyboard. The name of the button that is highlighted
will appear under "Button Name". To the right of this, under "Button Action", the currently programmed function will
be listed. To change this function click on it and a drop-down menu will appear with choices to program the button
with. Take note of the "Open Item" and "Keystroke" choices. These require additional user input and open up
many possibilities for programming. When "Open Item" is selected a Windows browser window appears asking
you to select which application you would like to open when this multimedia key is pressed. You can select any
.exe file that has been installed on your computer. When "Keystroke" is selected under button action, a new field
appears below it titled Keystroke. Click in it’s text field and type whatever key or combination keystroke you would
like to be assigned to the multimedia key. There is also a "Comment" field where you can type notes describing
the key’s function. When you are happy with the changes you have made click on the apply button to save the
changes.
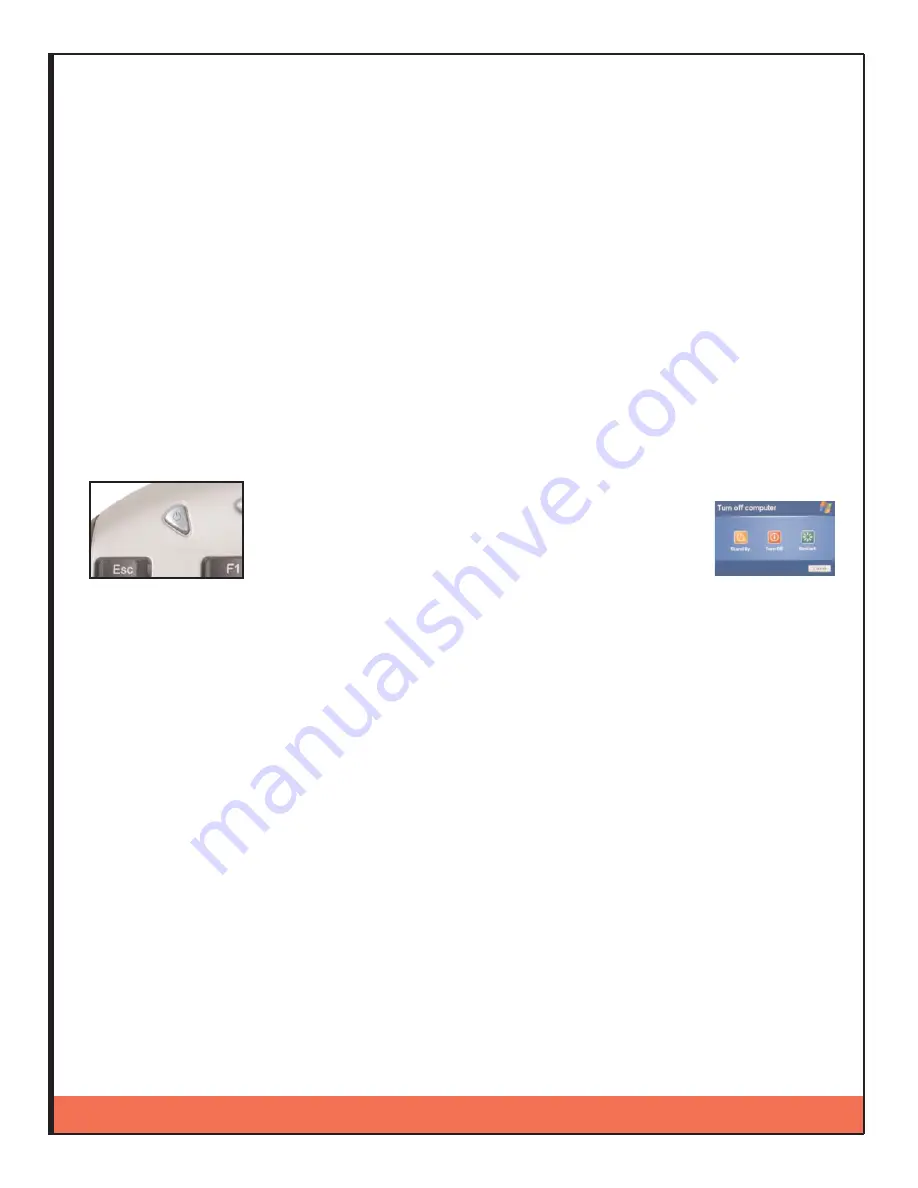
Using the Power Button
To the left of the Multimedia keys is the Power button: by pressing
the button, you will get the “Shut Down Computer screen. use
your keyboard or mouse to make the appropriate selection. Note:
the Power button will not wake up or turn on the computer - you
must do this via the switch on the computer.
Importing & Exporting Settings
You can easily load settings using the Import Settings feature located under the File menu. Once you have select-
ed Import Settings you will be able to select the setting from the Open dialog box. Chose the appropriate file and
choose Open. The settings will now be loaded and ready for use.
To export a setting, make sure the setting you wish to export is selected in the Target Application box, then choose
Export Settings under the File menu. Select the destination where you would like the file to be saved, and click
Save.
Removing Settings
WARNING: Removal of settings is permanent and can not be undone.
Although having additional settings in the Target Application will
not
decrease performance, you may wish to
remove settings that you are not using. To Remove a setting, simply select the setting you would like to remove in
the Target Application dialog box, then go to Remove Settings under the File menu, and the setting will immediate-
ly be removed.
Changing a Target Application
Our driver determines what application setting to load based upon the executable file for the software, for example
“Vegas4.exe” If you install a new release of the software, it is possible that the executable file name will be
changed (perhaps to Vegas5.exe). If this happens, you will notice that the jog/shuttle will no longer work. To fix
this, simply make sure the old target application - in this case Vegas 4 - is selected as the Target Application.
Under the File menu, simply select “Change Target Application” and choose the new file, “Vegas5.exe” and all of
the previous settings for Vegas 4 will now work with Vegas 5. Finally, you will want to rename the setting from
Vegas 4 to Vegas 5.
DV Keyboard & Professional Series User Guide
Page
12


