


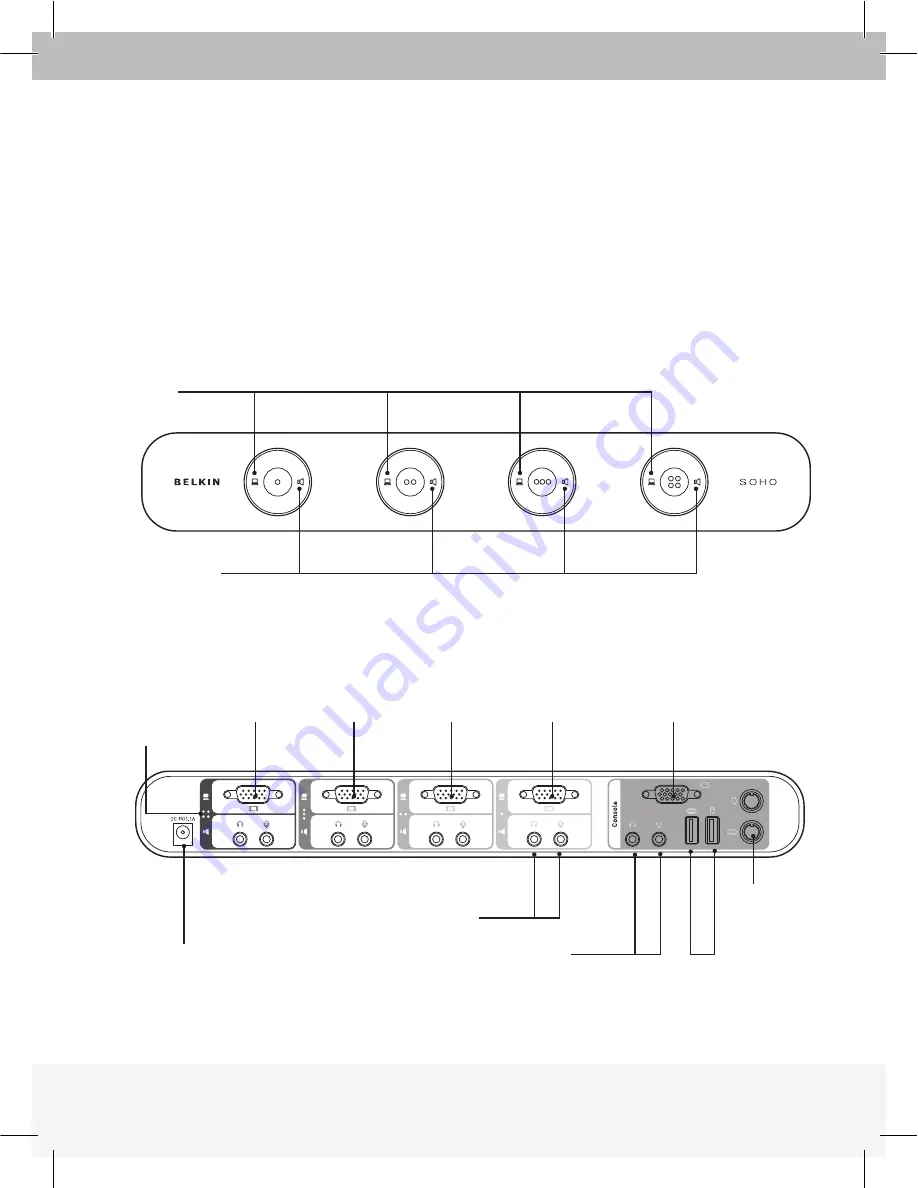
Front View
KVM Soho VGA U-type 4 Port Enclosure
Print Graphics v.2.1 F1DS102L, F1DS104L
front panel
back panel
KVM Soho DVI 4 Port Enclosure
Print Graphics v.2.1 F1DD102L, F1DD104L
front panel
back panel
KVM Soho VGA T-type 4 Port Enclosure
Print Graphics v.2.1 F1DS102J, F1DS104J
front panel
back panel
Audio/Mic Switch
KVM Switch
Back View
KVM Soho VGA U-type 4 Port Enclosure
Print Graphics v.2.1 F1DS102L, F1DS104L
front panel
back panel
KVM Soho DVI 4 Port Enclosure
Print Graphics v.2.1 F1DD102L, F1DD104L
front panel
back panel
KVM Soho VGA T-type 4 Port Enclosure
Print Graphics v.2.1 F1DS102J, F1DS104J
front panel
back panel
DC Power Jack
1st Computer
Audio/Mic
Console Jacks
Audio/Mic
Console Jacks
USB Console
Port
PS/2
Console
Port
VGA Console
Port
1st Computer
Port
2nd Computer
Port
3rd Computer
Port
4th Computer
Port
Additional Computer Audio/Mic Console Jacks
Port Indicators
Once all cables have been connected, power up the CPUs that are attached to the KVM
Switch. All computers can be powered on simultaneously. The KVM Switch emulates a
mouse and keyboard on each port and allows your computer to boot normally. Your KVM
Switch should now be ready for use.
Powering Up the Systems


