

F1DN-MOD-VMOUNT 8820-03129 Rev.A00
© 2020 Belkin International, Inc. All rights reserved. All trade names are registered trademarks of respective manufacturers
F1DN-MOD-VMOUNT
Belkin Modular KVM/KM VESA Mount
For models: F1DN102-BA-4, F1DN202MOD-BA-4, F1DN104MOD-BA-4, F1DN204MOD-BA-4, F1DN002KM-4, and
F1DN004KM-4
1. Determine the location for the mount to be located on the back of the monitor.
2. Slide the unit with Power Connector and Host/Console cables into the mount with the cables facing the tie
wrap slots.
3. Ensure that maximum distance between the KVM/KM bracket and each computer does not exceed your
cabling lengths
.
4. The unit can be secured using the included cable ties around each or several host and console cables. In addition, using tie wraps provided with the cables,
secure each cable to the mount (multiple colors are included to allow for an easy recognition of the enclave connected). Ensure that the KVM/KM included
remote control buttons are easily visible and accessible by the intended user.
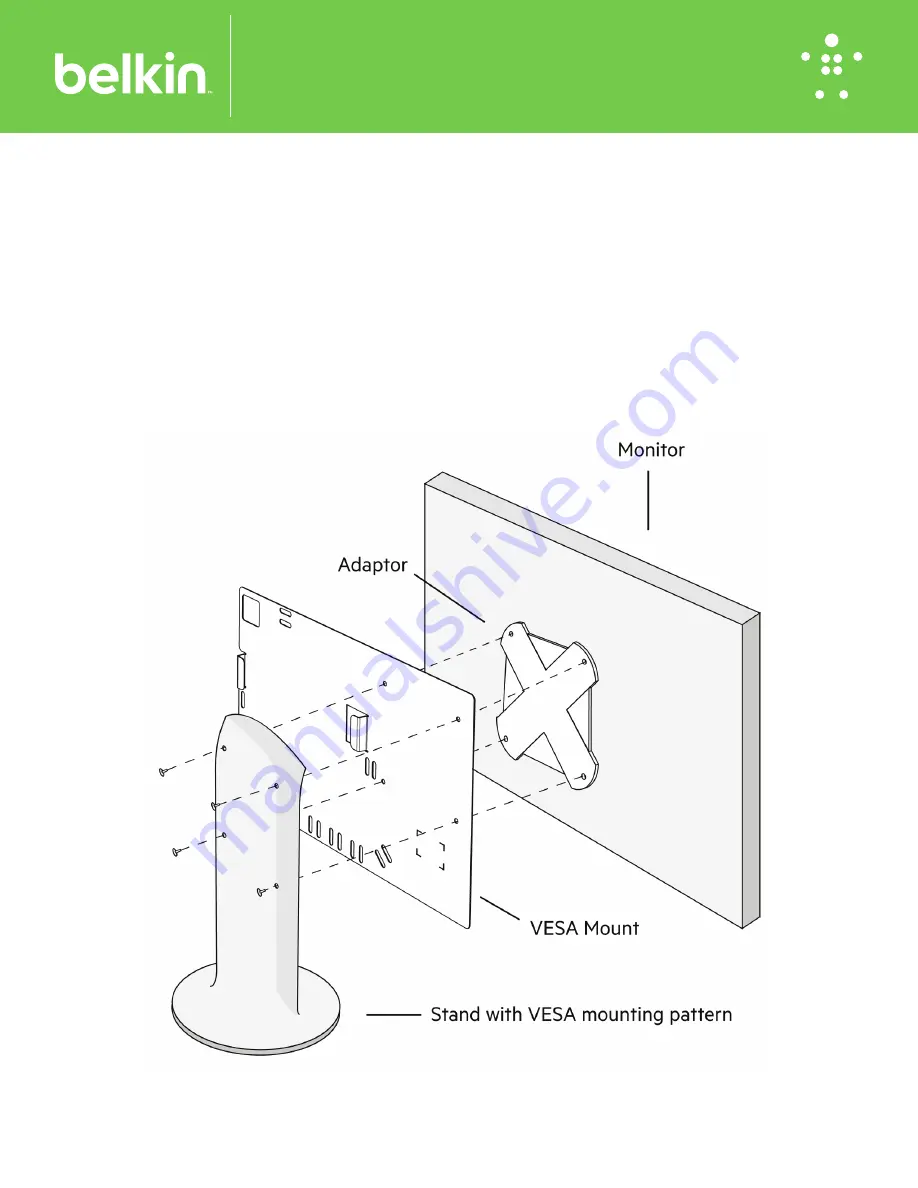
5. Screw the bracket to the monitor VESA pattern (100mm x 100mm) using 4 of the screws provided. Or use other non-provided hardware as required with an
adapter and stand.
6. Attach the Keyboard, Mouse, and included Remote Control to the KVM/KM unit.
7. Once installed, follow the power up instructions provide with the KVM/KM unit as required.
Installation


