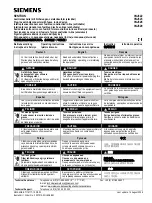
9. Insert jacketed connector
into the Support Handle
10. Open the activator tab and insert
fiber into the connector. Refer to point D
for fiber contact distance.
11. Create a bow and slide the activator
tab to the closed position. Then bring
the boot to the rear of the connector.
12. Unclip the connector then create
another bow of 3 mm and maintain it
until next step.
13. Spread the Kevlar around
the threads then gently screw
on boot and release bow
14. Remove connector and
tighten boot (1/4 turn)
3 mm
7. Clean bare fiber
8. Cleave fiber at
8
mm
+0.5
-0.0
1. Mark jacket at points A and B,
then strip jacket at point A
*
Fiber
Express
Brilliance
®
LC-SC-ST
Jacketed
Installation Card
This guide assumes that you have read the instruction manual (PX105234) for the complete installation procedure. This document should be used as a reference only.
2. Cut Kevlar off at point A
*
3. Strip jacket at point B
*
4. Insert boot
5. Ensure fiber is fully pushed into
jacket then mark points C, D and E
*
6. Wrap around fingers then
mark and strip off at point C
*
15 mm
45 mm
+
15 mm
29 2 mm
+
-
15 mm
7 mm
20 mm
2 mm
Jacket
Buffer
Fiber
Point E Point D
Point B
Point A
Point C
Quick Reference Diagram (lengths to scale)
Field
Cleaver
Precision
Cleaver


