background image

21

TROUBLE SHOOTING GUIDE

POSSIBLE CAUSES

SOLUTIONS

SYMPTOMS

Pitting of stainless

steel items

Dishes not dry

Scratches on

glassware

Prolonged contact with salty or highly

acidic foods or with undissolved or highly

concentrated detergent.

Remove spots with silver polish. Rewash.

Wash soon after use, or pre-wash items

if they will not be washed right away. Do

not overload cutlery basket. Avoid spilling

or pouring detergent directly on flatware.

Make sure dispenser cup is properly closed.

Load so that all items are properly tilted

for good drainage. Avoid nesting of dishes

and/or silverware.

Add liquid rinse aid .

Improper loading.

Rinse aid supply depleted.

A water or chemical reaction with some

glassware. Usually caused by some

combination of soft or softened water

and alkaline washing solutions reacting

with the glassware. Can be accelerated

by poor rinsing, overloading and excessive

temperature.

The condition may not always be

preventable. To minimize the possibility

of etching, use minimum amount of

detergent.

Use of the appropriate programme.

Use of a rinse aid may also help.

Detergent cakes in

detergent

dispenser.

Chipping and

breakage of

dishes/glasses

Odour in

dishwasher

Make sure dispenser is dry before adding

powder detergent. Start dishwasher

immediately.

Start dishwasher soon after adding gel

detergent. Do not allow detergent to dry

out in dispenser.
Do not overfill. Cover should close tightly.

Check cover for fit.

Do not place large items in front of

dispenser.
Use detergent within one to two months

of purchase. To assure freshness, buy

detergent as needed and no more than

one or two at a time. Store in a cool, dry

place.

If using powder detergent, there may be

dampness in the dispenser.

If using gel detergent, the detergent may

be left in dispenser too long before using.

Faulty cover.

Improper loading.

Old detergent.

Improper loading.

Dishes washed only every two or three

days.

A dirty filter system may contribute to a

bad odour.

Load with care following the instructions

for use. Place glassware so it does not

touch the other dishes. Remove from

dishwasher carefully.

Use the pre-wash cycle at least once a

day until a load accumulates, or hand

rinse dishes before loading dishwasher.

Clean filter system.

Printed in Turkey

Part no: 17 2214 01 00

Revision : 0

Содержание DWD8650X

Страница 1: ...her 9 How to use 10 Water hardness Regeneration settings 10 Filling the Water softener Dishwasher salt 11 Detergent use 12 Filling the detergent dispenser 12 Rinse aid 13 Filling the rinse aid dispenser 13 Loading the Dishwasher 14 Folding plate support rods 14 Three way split cutlery basket 15 Upper basket height adjustment Unloaded 15 Standard loading and testing institute information 16 Operati...

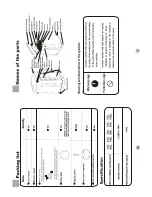
Страница 2: ...Starting Guide Removable work top Removable kick plate Turbo Fan Heat Drying System Load Capacity Height Width Depth Depth Height without worktop Net weight Supply voltage Fuse currrent Total power Heater power Pump powers 12 Place settings 850 mm 598 mm 598 mm 570 mm 820 mm 51 kg 220 240 V 50 Hz 13 A 1900 2200 W 2000 W 125 30 W Top Spray 1 2 3 4 5 6 On Off 7 8 Start Stop Half Load Wash Rinse End ...

Страница 3: ...he front door is open After unpacking your machine keep the packing material out of children s reach Warning Long cutlery such as ladles and long knives etc must be placed horizontally on top of the full cutlery basket or on the racks to prevent accidental injury The appliance is not intended for use by young children or infirm persons without supervision This dishwasher has been designed to clean...

Страница 4: ...ery and stainless steel cutlery As a precaution do not wash together Iron and cast iron objects can rust and stain other items Pay special attention to whether or not the item you wash in the dishwasher is dishwasher proof If in doubt contact the manufacturer of the item Do not overload your dishwasher or do not load items other than those mentioned in this manual 6 After unpacking your dishwasher...

Страница 5: ...If the fitted moulded plug is not suitable for your socket then the plug should be cut off and an appropriate plug fitted Destroy the old plug which is cut off as a plug with a bared cord could cause a shock hazard if inserted into a socket elsewhere in the house The moulded plug on this appliance incorporates a 13A fuse Should the fuse need to be replaced an ASTA approved BS1362 fuse of the same ...

Страница 6: ...he foul drains and not surface water drainage system The hose should be placed between 50 cm and 110 cm from the floor level and must not be extended otherwise the machine may not empty the waste water Connect the straight end to your water mains supply Ensure plastic filter and black rubber seal is in place Please turn on the tap and check for leakages after connecting the hose Please ensure the ...

Страница 7: ... of the recess correspond to those shown in the picture Position the machine next to a water tap and a drain When inserting the machine ensure that the water inlet and drain hoses are not kinked or squashed Care must be taken to ensure that the appliance does not stand on the electrical supply cable Good levelling is essential for correct closure and sealing of the door Make sure your dishwasher i...

Страница 8: ...commend that you use filters and purifiers When your machine is switched off turn the Programme Knob to position 1 While keeping the Start Stop button pressed switch the machine on by pressing the On Off button and release the On Off switch Press and hold Start Stop button for 10 seconds Last setting will be displayed on the panel of your dishwasher for 5 seconds Water hardness level 1 will be sho...

Страница 9: ...ore adding softening salt should always be done immediately before you start the dishwasher Caution Only fill with salt just before starting one of the complete washing programmes to prevent any grains of salt causing corrosion You can put approximately 2 kg softening salt in the Water softener To fill the container with softening salt remove the lower rack first and unscrew the cap of the water s...

Страница 10: ...e can not be adjusted to best suit the requirements of the dishes being washed and the water supply available in your home If you experience problems after using such detergents contact the manufacturer of detergent for assistance The product guarantee does not cover damages to plates glass ware cutlery crockery and also damage to the product itself as a result of using these Three in one Two in o...

Страница 11: ...inse aid usage Your machine is pre set at the factory to level 4 According to the finish and drying results obtained adjust the dose of rinse aid by means of the six position selector Position 1 minimum dose Position 6 maximum dose Gradually increase the dose if there are drops of water or lime spots on the dishes after washing Reduce it if there are sticky whitish streaks on the dishes 13 Open th...

Страница 12: ...the basket the racks or the supports not against the dishes The shelves on the rack are made height adjustable to accommodate tall items When loading your dishwasher please ensure tall glasses and or wine glasses rest against the sides of the upper basket Do not allow tall glasses to rest against each other since they may be damaged during washing if not properly supported Always arrange saucepans...

Страница 13: ... you want to reassemble the cutlery basket the reverse of the above operations should be carried out Part A can not be placed in the upper basket Long cutlery such as ladles and carving knives should not be placed in the upper basket parts B or C They can be placed on the side racks on the upper basket horizontally In order to obtain the best cleaning and drying performance in cutlery basket use t...

Страница 14: ...12 place settings 5 25 gr as compliant to EN 50242 DIN 44990 I EC436 international norms Economy 50 C as compliant to EN 50242 international norms 7 3 1 6 3 2 2 3 1 2 1 3 8 2 2 3 2 1 3 3 1 2 2 1 3 3 2 2 2 2 3 1 3 1 3 7 4 4 4 4 5 5 5 5 5 5 1 1 4 4 4 4 5 5 5 5 5 5 4 4 4 4 1 8 7 6 5 4 3 2 1 ...

Страница 15: ...s if required The display shows the Total Duration of the selected programme in minutes Press start stop button and check that the function indicator light comes on Do not open the dishwasher door whilst the appliance is in operation However in case the door is opened while the machine is working then a safety mechanism ensures the machine immediately stops Water may be very hot so be careful Care...

Страница 16: ...urer of such cleaning materials 2 You can purchase a special micro fibre cleaning cloth pack called E cloth from your local electrical or hardware store which is suitable to clean and wipe stainless steel surfaces of kitchen appliances without the need to use any chemicals or other cleaning materials You just need warm water You need to follow the instructions supplied inside the packaging of E cl...

Страница 17: ...e coarse filter clockwise until you hear a clicking sound It is important that you fit the filters correctly Caution the dishwasher must not be used without filters Incorrect repositioning of the filters will produce poor washing results Cleaning of the filters is vital to ensure correct operation of the machine 19 Turn the nut anti clockwise and remove both the nut and the spray arm Flush away fo...

Страница 18: ...ll soiled surfaces Do not overcrowd the baskets since this will block the water spray Water not reaching surfaces dishwasher overcrowded Insufficient water fill Powder detergent stored too long or under adverse conditions Rinse aid supply depleted Check to be sure water action is not blocked by dishes Check filter system for accumulated or deposited food or detergent Load dishwasher correctly Keep...

Страница 19: ...iate programme Use of a rinse aid may also help Detergent cakes in detergent dispenser Chipping and breakage of dishes glasses Odour in dishwasher Make sure dispenser is dry before adding powder detergent Start dishwasher immediately Start dishwasher soon after adding gel detergent Do not allow detergent to dry out in dispenser Do not overfill Cover should close tightly Check cover for fit Do not ...

Страница 20: ...Notes 22 ...

Отзывы: