Beko BEKOMAT 32 Скачать руководство пользователя страница 15

14 

I

EN

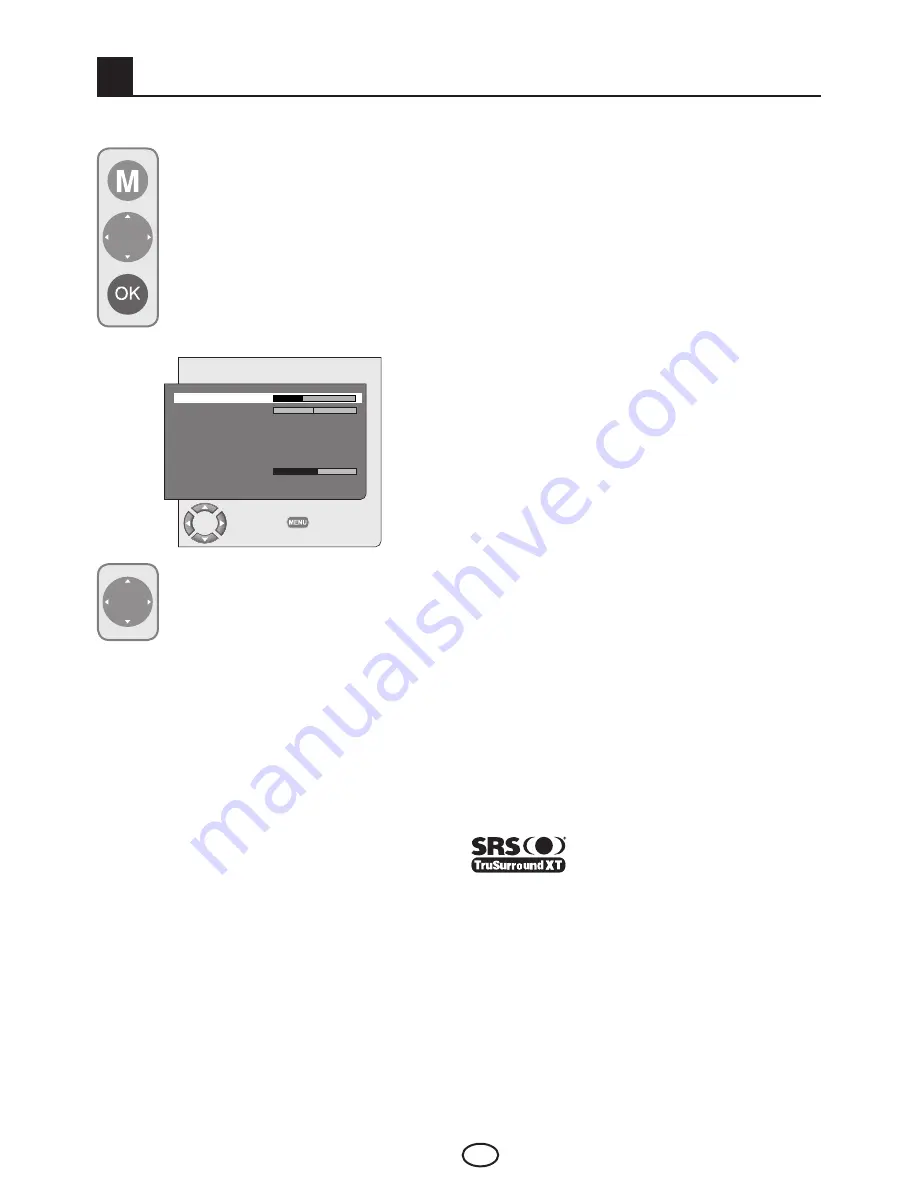
You can select the tab which you want 

to process with the 

Down

 movement 

button and set its level with 

Left/Right


movement buttons.

7.1.1-Balance

To adjust the sound balance between the right 

and left loudspeakers to the desired level, select 

the 

BALANCE

 tab in the sound menu by using 

the 

Down

 movement button. Using the 

Left/

Right

 movement buttons adjust this option to the 

desired level.

7.1.2-Sound Type

The program you watch may be broadcast in 

stereo or in two different languages. Using the 

Right/Left

 movement buttons in this menu, 

you can select Mono/Stereo or Dual-I/Dual-II 

languages.

7.1- Sound Menu Settings

You may perform volume settings by 

using the 

VOL+

 or 

VOL-

 buttons on 

your television or the 

VOL+/VOL-


buttons on your remote control. You can 

perform other Sound settings by entering 

the Sound menu. For this, press the 

M


button on your remote control. Select 

SOUND

 by pressing the 

Up/Down


movement buttons from the main menu 

and press the 

OK

 button. The Sound 

menu is displayed.

7

  Settings of Your New Television

7.1.3-Sound Mode

Sound mode can be set as 

NORMAL

SPATIAL


or 

SRS

 by means of direction buttons. Spatial 

option gives depth to the sound of the program. 

Options in the 

SRS

 menu become active when the 

SRS function is selected.

Note:


SRS

 menu will not be active if the 

SRS

 is 

not selected from the Sound mode tab.

7.1.4-AVL (Automatic Volume 

Limiting)

Television transmitters have different sound 

levels. This can be noticed as high and low 

volume levels in different channels while switching 

from one program to another. Using the 

Left/

Right

 movement buttons, select 

ON

. The AVL 

(Automatic Volume Limiting) function maintains the 

same sound level as you switch from program to 

program. Select 

OFF

 to cancel it.

7.1.5-Headphones

By connecting headphones to your television you 

can listen to the program sounds independently 

from your television. To turn up and down the 

headphone volume level, select 

HEADPHONE

 tab 

from the Sound menu and adjust the volume level 

by using the 

Left/Right

 movement buttons. When 

you want to hear the sound from the headphone 

only, just press the 

MUTE

 button on your remote 

control.

7.1.6-SRS TruSurround Sound

This is the virtual sound technology. With 

TruSurround, 6 different channels of the digital 

sound are processed in two channels and 

conveyed to the audience through two speakers. 

TruSurround system is used to create a virtual 

surround sound effect in environments where there 

is no 4.1 or 5.1 speaker systems exist.

TruSurround is a registered 

trademark of the SRS Labs. Inc.

TruSurround XT technology is covered under 

the license of SRS Labs. Inc.

SOUND

VOLUME 

BALANCE

SOUND TYPE 

STEREO

SOUND MODE 

NORMAL

AVL 

OFF

EQUALIZER

HEADPHONE

SRS 

OFF

CHANGE

BACK

Содержание BEKOMAT 32

Страница 1: ...se 6 4 3 Batteries 6 5 Your new television 7 5 1 TV Control Panel 7 5 2 External Connections 8 5 3 Remote Control 9 6 Performing the initial power on settings 10 6 1 TV controls 10 6 2 Turning on the TV and Setting the Channels 11 6 3 Program Table 13 7 Settings of Your New Television 14 7 1 Sound Menu Settings 14 7 2 Picture Menu Settings 15 7 3 Features Menu Settings 17 7 4 Other Picture Feature...

Страница 2: ...t clean with a soft and dry cloth We recommend that you do not use patented polishes or solvents to clean the screen or cabinet since they may cause damage 1 2 Disposing of your TV at the end of service life The cold cathode fluorescent lamp found in your LCD screen contains a very small amount of mercury Once your TV set has completed its physical life please dispose of it in accordance with loca...

Страница 3: ...lor Transitions CTI Sharpness feature and picture resolution LTI in black white transitions A clearer Picture made possible with a Digital Comb Filter DNR Noise reduction Returning to the last viewed program by single button SWAP Manual Fine Tuning 100 Program memory Infrared remote control equipped with all functions Parental Control Panel Lock Renaming deleting skipping and relocating the progra...

Страница 4: ...rs on the device The screen glass may break and cause serious injuries if something hits it 7 To ensure adequate ventilation please leave a clearance area of at least 10 cm around the television This clearance prevents the TV from overheating and consequently causing damage Using the device in dusty environments should also be avoided Never block the slots and openings by placing the TV on a bed s...

Страница 5: ... it from mains Note 1 If you would like to operate your television by means of the lighter cable in a car then use the cable supplied with the product Using a different cable may damage your appliance Note 2 If your device has an adaptor then use the adaptor and AC power cable supplied with your product Do not use defective sockets Make sure that the plug is firmly inserted into the socket If the ...

Страница 6: ...the TV Otherwise there is the risk of electric shock 19 Do not dispose of the batteries in fire Do not short circuit dismantle or overheat the batteries There is the risk of explosion if the batteries are not replaced correctly Replace only with the same or equivalent type batteries 20 Disposing of the exhausted batteries Dispose of the exhausted batteries in accordance with the local laws and reg...

Страница 7: ...or this remote control UM 4 IEC R03 or AAA 1 5 V batteries are suitable Do not throw your old batteries into the fire discard them in a dedicated waste area for this purpose Do not mix used batteries with new ones or different types of batteries together The performance of the remote control will be reduced at a distance of 8 meters from or at an angle of 30 degrees beyond the centre of the TV If ...

Страница 8: ... or or or or or or 1 Sub menu selection button in menu Volume Up button 2 Down movement in menu Program down button 3 Sub menu selection button in menu Volume down button 4 Up movement in menu Program up button 5 Confirm in menu Menu button Source Menu button Standby button Main Power On Off button 5 1 1 26 32 37 42 TV Control Panel 5 1 2 32 37 42 TV Control Panel 5 Menu button Source selection bu...

Страница 9: ...MI 1 input 14 Sound input CINCH connector Left L 15 Sound input CINCH connector Right R 16 Video input CINCH connector 17 S VHS input 18 Headphone input These features are optional and they are not available on all models Note 1 RGB input via Scart offers the best picture quality Note 2 Above drawing for external connections is representational Their order and places on your TV may be different Pl...

Страница 10: ...evious menu button Up movement button Menu Down movement button Menu Right Left movement buttons Menu Menu selection confirm Volume down button Volume up button Program forward selection button Program backward selection button Red teletext button Picture Mode selection button Green teletext button Sound Mode selection button Yellow teletext button Freeze Picture button Blue teletext button ZOOM m...

Страница 11: ...s any numeric button or PR PR buttons 6 1 2 Channel Selection You may select whichever program number you would like by pressing the PR PR buttons located on your television and your remote control To select the programs that are above 9 you can use the Numerical buttons You may enter the number of the program you would like to select using the numerical buttons For example to switch to the progra...

Страница 12: ...y antenna broadcast for a period of 5 minutes it automatically switches to the stand by position The countdown OSD is displayed on the screen during the last 1 minute SETUP SELECT BACK SYSTEM BG CHANNEL S06 FINE TUNE 0 SEARCH PROGRAM NO P13 STORE AUTOPROGRAM COUNTRY SELECT BELGIUM NORGE CZECH REP ÖSTERREICH DANMARK POLSKA DEUTSCHLAND PORTUGAL ELLADA SCHWEIZ ESPANA SUOMI FRANCE SVERIGE HUNGARY TÜRK...

Страница 13: ...el number Press the M button Move to the SETUP menu by pressing the down movement button in Main Menu and confirm your selection with OK button The Setup menu is displayed Select the system in which you would like to make the search from the SYSTEM tab Move into CHANNEL tab by pressing the down movement button Press OK on your remote control to select S for cable channels and C for channels receiv...

Страница 14: ...NNEL 07 12 03 08 13 04 09 14 SKIP MOVE NAME DELETE SELECT BACK 6 3 3 Skipping a stored channel In the event that you do not wish to see certain programs while navigating through the channels using the PR PR buttons then you can use this function Select the program that will be hidden by pressing the up down or right left movement buttons Press the RED button The name of the program to be skipped s...

Страница 15: ...d Note SRS menu will not be active if the SRS is not selected from the Sound mode tab 7 1 4 AVL Automatic Volume Limiting Television transmitters have different sound levels This can be noticed as high and low volume levels in different channels while switching from one program to another Using the Left Right movement buttons select ON The AVL Automatic Volume Limiting function maintains the same ...

Страница 16: ...e displayed SRS trubass ON DIALOG CLARITY ON CHANGE BACK 7 1 6 1 TruBass TruBass system is a signal processing technology that reinforces the bass sounds 7 1 6 2 Dialog Clarity This feature enhances the understandability of the speeches in dialogues Note When the SRS is set to On AVL and EQUALIZER functions will automatically be set to Off 7 1 7 Equalizer Select the EQUALIZER tab in the Sound menu...

Страница 17: ...t option is not seen in the menu when you have not input this type of a video When a NTSC video is connected via the Scart this option becomes active and it is available in the menu 7 2 6 Active Contrast Optional This feature allows making brightness settings according to the picture A brighter or dimmer picture can be sent to the screen according to the brightness level of the picture Thus a wide...

Страница 18: ... formatted film or video cassette this setting will eliminate or minimize the black stripes on the background by zooming in the picture without diffusing it 7 2 10 6 Subtitle If the subtitles are transmitted in the 16 9 formatted broadcast then this setting will push the picture upwards in order to ensure the entire written text to be seen FEATURES LANGUAGE ENGLISH TIMER CHILD LOCK OFF PANEL LOCK ...

Страница 19: ...and will not function They will be active again when the feature is turned Off 7 4 Other Picture Features 7 4 1 Zoom Press the ZOOM button on your remote control while watching a channel to activate this feature During the zooming process the image is zoomed in in three stages oriented to the centre To move the picture in this mode you can use Up Down or Right Left movement buttons on your remote ...

Страница 20: ...el with Teletext broadcast Being one of the most prominent services of broadcasting today Teletext renders the TV more fruitful Teletext means in short the transmission of various updated information along with the TV broadcast signal in the form of text and graphics To be able to receive a quality teletext broadcast a good antenna system and a broadcast signal that is not weak with no reflections...

Страница 21: ... television picture by pressing the UPDATE button while Teletext is searching for your desired page Once the page you want is found the number of that page appears on the screen 8 8 Question Answer Button REVEAL Sometimes a teletext page contains a hidden answer such as a game or a riddle Press the M button to disclose the hidden answer 8 9 Fastext The colored buttons on the remote control are for...

Страница 22: ...uts to your TV via these inputs By pressing the AV button on your remote control select the external source input to which you connected your device 9 1 Connecting an external equipment via Scart connection Rear view of the TV or or VCR DVD SATALLITE RECEIVER GAME CONSOLE SCART To watch the picture of the broadcast device connected to Scart select AV1 from the Source menu and press OK button You c...

Страница 23: ... select AV2 option from the Source menu and press OK button Your TV will switch to the selected source 9 3 Connecting an external device via S Video connection Side view of the TV CAMERA DVD SATALLITE RECEIVER GAME CONSOLE S Video To watch the picture of the broadcast device connected using the SVHS input select S VHS option from the Source menu and press OK button Your TV will switch to the selec...

Страница 24: ...en a connection is made via HDMI socket select the HDMI input you connected through from the Source menu and press the OK button to be able to display these pictures Your TV will switch to the selected source Connect to the HDMI input at the back of your TV by using the connector located on your PC or your digital video transmission device with a suitable cable not supplied with the TV Note To be ...

Страница 25: ...ision by using an appropriate cable not supplied with your television Again by using an appropriate cable connect the audio output of your PC to the PC AUDIO IN at the back of your television to listen to sounds from your PC and you can adjust the volume level of your source by using VOL VOL buttons 9 6 2 Transition to the PC mode For your LCD TV to switch to the monitor PC mode press the AV butto...

Страница 26: ...wn or enlarge the display by selecting a desired value 9 6 8 PHASE Using the right left movement buttons you can ensure that the colors and shapes are exactly consolidated on the PC image 9 6 9 PICTURE FORMAT You can select the PC image as to be displayed in 16 9 4 3 or 14 9 formats Note In the Monitor mode you can make the Brightness Contrast and Sharpness settings from the PICTURE menu Side view...

Страница 27: ...evel is at the lowest setting Lighten the color Broadcast system setting if setting choice is available Select the broadcast system Problem in channel broadcasting Test with another channel No or defective teletext Television channel no teletext or antenna system Test another channel for fine tuning and shadowy pictures Very weak signal Check the antenna system No sound Temporary sound mute may be...

Страница 28: ...F Digital sound output Standard Standard Standard Headphone socket Standard Standard Standard General technical specifications Power supply AC 220 240V 50 60 Hz Program memory 100 RF Aerial input 75 Ohm Co axial Sound systems Mono Stereo Nicam Batteries 2xUM 4 IEC R03 or AAA 1 5V Channels received VHF Band I Channel 2 4 VHF Band III Channel 5 12 UHF Channel 21 69 Cable TV S1 S20 S21 S41 Broadcasti...

Отзывы: