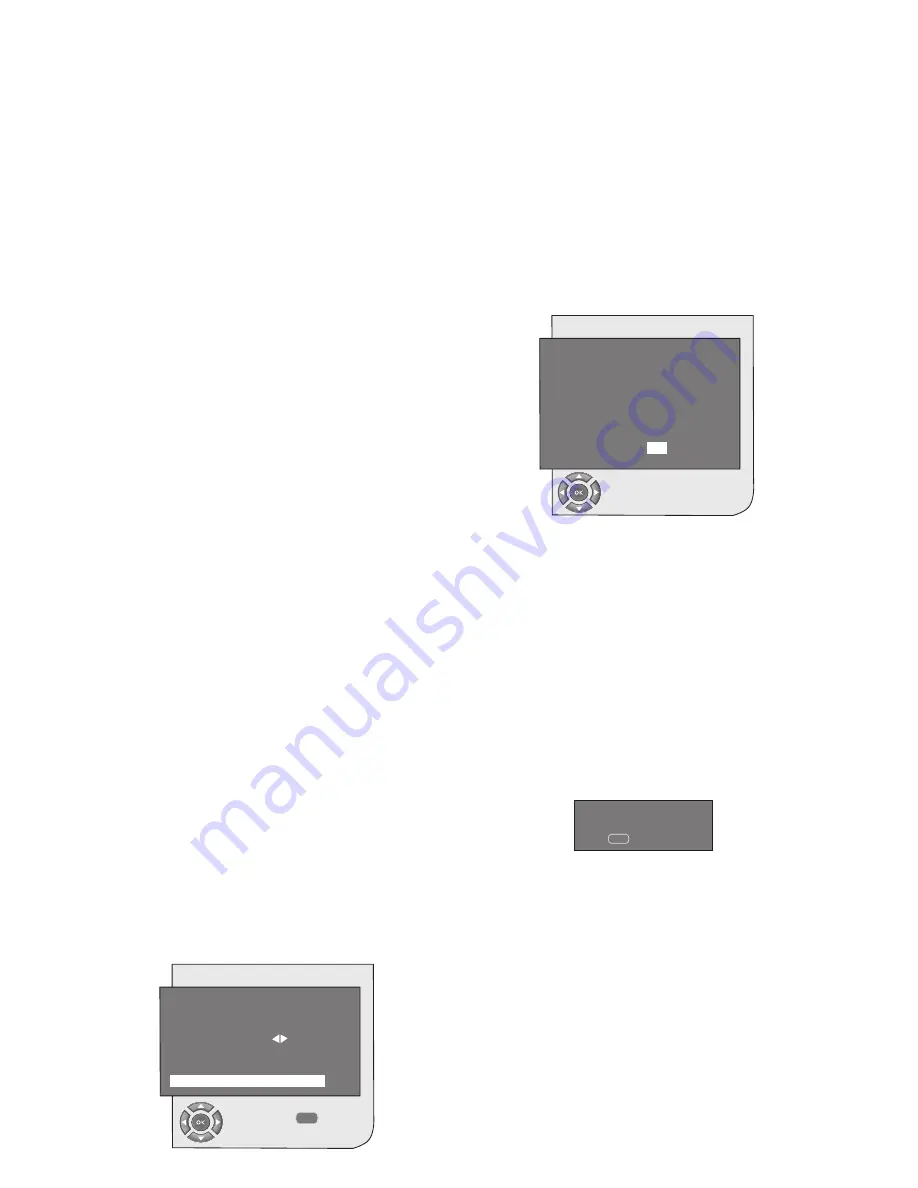
background image

15 

6.3.5.5-Favourite Lists

Please see 6.3.3.2-Creating favorite channel 

list for detailed explanation of this feature.

6.3.5.6-Common Interface Module

To receive subscrıption channels you will 

need to purchase a conditional access 

module (CAM) and card. When no cam is 

fitted the display will show “No Common 

Interface module present.” However with a 

cam fitted the display will indicate “top up 

tv”.

In this menu, you can check the CI Module 

settings.

6.3.5.7-System Menu

You can display your television’s hardware 

and software data under this menu.

6.4-Performing Analogue 

Tuning

You can either tune the Analogue channels 

automatically or manually and store them in 

your television.

6.4.1-Automatic tuning of channels 

and storing in the memory

Note:

 If your television does not receive any 

aerial broadcast for a period of 5 minutes, 

it automatically switches to the stand-by 

position. The countdown OSD is displayed 

on the screen during the last 1 minute 

(applicable for Analogue mode only)

You can tune the programs automatically 

with the Autoprogram function of your 

television and then sort the channels 

as you desire by means of the Program 

Table. Press 

AV

 button on your remote 

control, select 

ANALOGUE TV

 tab from 

the 

SOURCE

 menu by using 

Up/Down


movement buttons and confirm by pressing 

the 

OK

 button. Your TV will switch to 

MENU

AUTOPROGRAM

SEARCHING

% 20

STOP

MENU

SETUP

I

S06

0

P13

SELECT

BACK

SYSTEM

CHANNEL

FINE TUNE

SEARCH

PROGRAM NO

STORE

AUTOPROGRAM

Analogue mode. Press the 

MENU

 button on 

your remote control. Select 

SETUP

 tab with 

Down

 movement button and confirm with 

OK

 button. Setup menu is displayed.

Select 

PROGRAM NO

 tab by pressing 

the 

Up/Down

 movement buttons in Setup 

menu, enter the channel number to be 

searched and stored automatically, then 

select 

AUTOPROGRAM

 tab by using the 

Up/Down

 movement buttons and press 

OK

 button; Country Selection menu will be 

displayed.

COUNTRY SELECTION

BELGIUM

CZECH REP

DANMARK

DEUTSCHLAND

ELLADA

ESPANA

FRANCE

HUNGARY

IRELANDA

ITALIA

NETHERLANDS

NORGE

ÖSTERREICH

POLSKA

SCHWEIZ

SUOMI

SVERIGE

TÜRKİYE

U.K.

..........................

START AUTOPROGRAMMING

In the Country Selection menu, select the UK 

option, by pressing the 

right/left

 movement 

buttons and start autoprogramming by 

pressing the 

OK

 button. The channels will 

be automatically searched and those found 

will be stored in memory starting from the 

program selected in the Setup menu. At the 

same moment, the Autoprogram menu will 

be displayed and a marker indicating the 

progress of the autoprogramming will appear 

as shown below.

To stop the process at any given time, 

please press the 

MENU

 button. The 

Program Table, which will allow you to sort 

the channels as you wish, will be displayed 

after the automatic search is complete.

Содержание 42WLU530HID

Страница 1: ...INTEGRATED DIGITAL HD READY COLOUR TELEVISIONS Operating Instructions 42WLU530HID ...

Страница 2: ... Rear and Side External Connections 8 5 3 Remote Control 9 6 Performing the initial power on settings 10 6 1 TV controls 10 6 2 Turning on the TV and Setting the Channels 11 6 3 Performing Digital Tuning 11 6 4 Performing Analogue Tuning 15 7 Settings of Your New Television 18 7 1 Sound Menu Settings 18 7 2 Picture Menu Settings 19 7 3 Features Menu Settings 21 7 4 Other picture features 22 8 Tele...

Страница 3: ...esses the signals coming from digital transmitters and converts them into superior sound and image quality TV Guide valid for digital broadcasts only informs you about changes in the program list briefly and provides program lists of all digital broadcasts for a number of forthcoming days You can display detailed information about each program by pressing a single button if this feature is support...

Страница 4: ...th the following code Blue Neutral Brown Live Yellow Green Earth As the colours in the mains lead of this appliance may not correspond with the coloured markings identifying the terminals in your plug proceed as follows The wire which is coloured green and yellow must be connected to the terminal which is marked with the letter E or by the earth symbol or coloured green or green and yellow The wir...

Страница 5: ...rations Manual Fine Tuning 100 Analogue Program memory 1000 Digital channel memory Infrared remote control equipped with all functions Parental Control Panel Lock Ability to watch NTSC video playback through Scart input Easy performance of the processes with the advanced menu system 4 3 16 9 14 9 Letterbox Subtitle and Panorama picture formats 8 day EPG Electronic Program Guide Digital mode only M...

Страница 6: ...and cause serious injuries if something hits it 7 To ensure adequate ventilation please leave a clearance area of at least 10 cm around the television This clearance prevents the TV from overheating and consequently causing damage Using the TV in dusty environments should also be avoided Never block the slots and openings by placing the TV on a bed sofa pillow or other similar surfaces MANUAL Neve...

Страница 7: ...order to disconnect it from the mains power Note Do not use defective sockets Make sure that the plug is firmly inserted into the socket If the plug remains loose then it can cause fire due to arcing Refer to an electrician to have your socket replaced 13 Make sure that the mains lead is not stepped on and that there is no bending at the plug sections plug heads and TV output point 14 Use only the...

Страница 8: ...the risk of explosion if the batteries are not replaced correctly Replace only with the same or equivalent type batteries 20 Disposing of the exhausted batteries Dispose of the exhausted batteries in accordance with the local laws and regulations in order to protect our environment 21 Do not dispose of your TV with regular household waste Observe local laws and regulations for disposal Note 1 This...

Страница 9: ...ones or different types of batteries together The performance of the remote control will be reduced at a distance of 8 meters from or at an angle of 30 degrees beyond the centre of the TV 4 Start Remove your television carefully from its box You can keep the packaging of your television to use in future Items supplied with your television Instruction Manual Mains lead Remote control 2 Batteries No...

Страница 10: ...ponent video input Y 10 Component video input Pb 11 Component video input Pr 12 Component audio input L 13 Component audio input R 14 SPDIF Digital audio output 15 HDMI 1 input 16 HDMI 2 input 17 VGA PC connection input 18 PC audio input 19 Stereo Headphone socket 20 CI slot input Note Above drawing for external connections is representational Their order and places on your TV may be different Ple...

Страница 11: ...ode button Right movement button Menu Change source in PIP mode button Menu selection confirm Program table selection button D Volume down button Volume up button Program forward selection button Program backward selection button Red teletext button MHEG display button Green teletext button Yellow teletext button Blue teletext button Teletext Mix selection button Equalizer selection button Teletex...

Страница 12: ...splayed Select DIGITAL TV ANALOGUE TV or desired AV mode from the Source menu with Up Down movement buttons and confirm with OK button so that your television will switch to the source you have selected 6 1 4 Performing the Volume setting You can adjust the volume of your television by using the VOL VOL buttons on your remote control 6 1 5 Temporary sound mute MUTE To temporarily mute the sound of...

Страница 13: ...SS MENU KEY TO EXIT message will be displayed You can make Analogue channel tuning with OK button or finish the searching process by pressing the MENU button 6 3 Performing Digital Tuning You can either tune the Digital programs automatically or manually and store them in your television 6 3 1 Automatic Tuning of Channels and Storing in the Memory Press AV button on your remote control select DIGI...

Страница 14: ...nged according to the search method you have chosen Channel Search Waiting for signal Service found TV 0 Radio 0 Other 0 Stop Search Add Channels With this option the new channels in the frequency which is desired to be manually searched will be scanned and added to the existing channel list Replace Channels With this option you can update the existing channel list with the modifications made by t...

Страница 15: ...n the EPG menu Important Note Not all broadcasters supply a detailed TV guide Most of the broadcasters provide daily program information but they do not give detailed explanations Some broadcasters on the other hand do not give any program information at all It may also take a short while to load the full EPG data All TV 1 BBC ONE 2 BBC TWO 3 ITV1 4 CHANNEL 4 5 FIVE 6 ITV2 13 15 Program 15 10 News...

Страница 16: ...esent System Menu Select Back Lock Unlock Channels Select Lock Unlock Channels tabs from Access Control menu and press OK button to confirm All TV Channels list will be displayed select the channel you want to lock with Up Down movement buttons and press OK button to confirm x mark will be displayed at the beginning of the channel name which is to be locked To unlock repeat the same steps Select t...

Страница 17: ...nt buttons and confirm by pressing the OK button Your TV will switch to MENU AUTOPROGRAM SEARCHING 20 STOP MENU SETUP I S06 0 P13 SELECT BACK SYSTEM CHANNEL FINE TUNE SEARCH PROGRAM NO STORE AUTOPROGRAM Analogue mode Press the MENU button on your remote control Select SETUP tab with Down movement button and confirm with OK button Setup menu is displayed Select PROGRAM NO tab by pressing the Up Dow...

Страница 18: ... and confirm your selection with the OK button Setup menu will be displayed Select the system in which you would like to make the search from the SYSTEM tab Move into CHANNEL tab by pressing the Down movement button Press OK on your remote control to select S for cable channels and C for channels received via the aerial Select SEARCH tab using the Up Down movement buttons and scan the channels in ...

Страница 19: ... and then select the desired letter number or sign again with the up down movement buttons After entering all the characters store the name you have written in the memory by pressing the YELLOW button To write names for any of the other programs simply repeat the above procedure If you want to exit the menu simply press the EXIT button If the program is not named then the channel number of that pr...

Страница 20: ...eadphones By connecting headphones to your television you can listen to the program sounds independently from your television To turn up and down the headphone volume level select HEADPHONE tab from the Sound menu and adjust the volume level by using the Left Right movement buttons When you want to hear the sound from the headphone only just press the MUTE button on your remote control 7 1 6 SRS T...

Страница 21: ... the MENU button to store the settings and exit the user option You may exit the equalizer menu by pressing the MENU button again Note You can select the equalizer options directly by pressing the button on your remote control 7 1 8 Dynamic Bass optional Dynamic Bass makes the bass content of the music clearer throughout the volume level range When the volume is set to a lower level bass frequenci...

Страница 22: ...left movement buttons Note If your TV is equipped with Active Contrast feature and this feature is set to On then Backlight tab is not displayed in the menu 7 2 7 MPEG NR Optional You may remove the artifacts that appear in the picture as square shaped blocks by using this feature except in the Tuner mode Select Mpeg NR tab from the Picture menu with the Up Down movement buttons to activate this f...

Страница 23: ...the MENU button on your remote control Select FEATURES by pressing the Up Down movement buttons from the main menu and press the OK button The Features menu will be displayed You can select the titles for which you would like to perform an operation in Features menu by using the Up Down movement buttons 7 2 9 3 14 9 This is a movie format 7 2 9 4 4 3 Use this setting to watch the broadcasts in the...

Страница 24: ...here the device is connected When it is set to Off your TV does not switch to the external device automatically 7 3 4 Active Antenna When using a portable aerial requring a power source if this feature is set to on you can eliminate the need for a power source For best results it is recommended to use an outdoor aerial 7 4 Other picture features 7 4 1 Zoom Press the ZOOM button on your remote cont...

Страница 25: ... this option you can increase and decrease the size of the PIP window You can change the PIP size by pressing the Size button when there is a PIP picture on the screen 7 4 3 3 Switching the locations of the Main screen and PIP screen When a sub window is open in front of the main window you can switch the locations of the main window and sub window by pressing the SWAP button on your remote contro...

Страница 26: ...the next page pressing the up button and to the previous page pressing the down button Press the INFO button to return to the Index page 8 3 Teletext image in the TV picture MIX With this feature you can watch the teletext information and the TV broadcast together Thus you can follow the teletext broadcast of the channel while you watch the TV broadcast To do this press TXT button in a channel wit...

Страница 27: ...the bottom of the teletext screen You can select the relevant topic by pressing the yellow or blue buttons on the remote control You can select the next page by pressing the red button and the previous page by pressing the green button Note Fastext and Toptext features are not available from every program 8 9 Clock The Clock function of the SIZE button press the SIZE button when you want to learn ...

Страница 28: ...ice connected using the RCA PHONO input move onto this option and press the OK button S VIDEO To watch the picture of the broadcast device connected using the S Video input move onto this option and press the OK button PC To be able to watch the images in PC mode move onto this option and press the OK button HDMI 1 To be able to watch the image when a connection is made via the HDMI 1 socket this ...

Страница 29: ...10 YUV Component input You can connect your external device supporting the suitable inputs to your TV via these inputs By pressing the AV button on your remote control select the external source input to which you connected your device 9 2 PC Mode Your LCD television can also be used as a PC monitor via the VGA input 9 2 1 PC Connection Connect the D Sub15 connector to the PC IN input on the rear ...

Страница 30: ... 9 14 9 or 4 3 formats Note 1 4 3 16 9 and 14 9 picture formats are supported in 16 9 panels Only 4 3 picture format is supported in 4 3 panels Note 2 In the Monitor mode you can make the Brightness Contrast Sharpness Red Green and Blue Settings from the PICTURE menu Switching to the HDMI mode Connect to the HDMI input at the back of your TV by using the connector located on your PC or your digita...

Страница 31: ...tting Increase the color Broadcast system setting if setting choice is available Select the correct broadcast system Problem in channel broadcasting Test with another channel No or defective teletext Television channel no teletext or aerial system Test another channel for fine tuning and shadowy pictures Very weak signal Check the aerial system No sound Temporary sound mute may be on Try pressing ...

Страница 32: ...igital 1000 Program memory Analogue 100 RF Aerial input 75 Ohm Co axial Sound systems Mono Stereo Nicam Batteries 2xUM 4 IEC R03 or AAA 1 5V Channels received VHF Band I Channel 2 4 VHF Band III Channel 5 12 UHF Channel 21 69 Cable TV S1 S20 S21 S41 Broadcasting systems received PAL BG PAL SECAM BG PAL SECAM BG DK PAL SECAM BG LL PAL I Note Your television has been manufactured in accordance with ...

Страница 33: ...ragkelly 31 27 24 21 48 7 Sutton Coldfield 46 40 43 50 37 22 Darvel 33 26 23 29 35 9 The Wreckin 26 33 23 29 25 20 Durris 22 28 25 32 67 5 Mindlands East Eitshal Lewis 33 26 23 29 49 Waltham 58 64 61 54 35 21 Keeylang Hill 40 46 43 50 1 South West Knock More 33 26 23 29 4 Beacon Hill 57 63 60 53 37 Rosemarkie 39 45 49 42 3 Caradon Hill 22 28 25 32 38 Rumster Forest 31 27 24 21 2 Huntshaw Cross 55 ...

Страница 34: ...d repairs or inexpert installation that fails to meet the requirements contained in the user instruction book Repairs or replacements to product installed or used on commercial or non household premises Important notes The product is guaranteed for domestic household use only The guarantee will be void if the product is installed or used in commercial or non household premises The product must be ...

Страница 35: ...e he will normally be there within 48hrs of receipt of your call excluding Bank Holidays or at your earliest convenience Before telephoning for service please check the trouble shooting guide in the instruction book as often minor problems are easily identified and resolved by following the instructions contained there in Service visits where there is no fault with the product could incur a charge...

Страница 36: ...BEF 801 ...

Отзывы: