background image

Note 1:

 Your TV will switch to the 

stand-by


mode in five minutes if there is no broadcast 

signal from aerial.

3.

 To power on your television, press any 

numerical key or 

P+

 or 

P-

 keys on the 

remote control. 

Note:

  If you are not going to use your 

television for a long time, unplug its power 

cable from the socket.

4

  Start

Remove your television carefully from its 

box. You can keep the packaging of your 

television to use in future.

Items supplied with your television

Mains lead (*)

Adaptor (*)

Remote control

2 batteries

Note: The Scart, VGA (*) and PHONO 

cables are not supplied with the 

device.

(*) These features are optional and may not 

be available on all models.

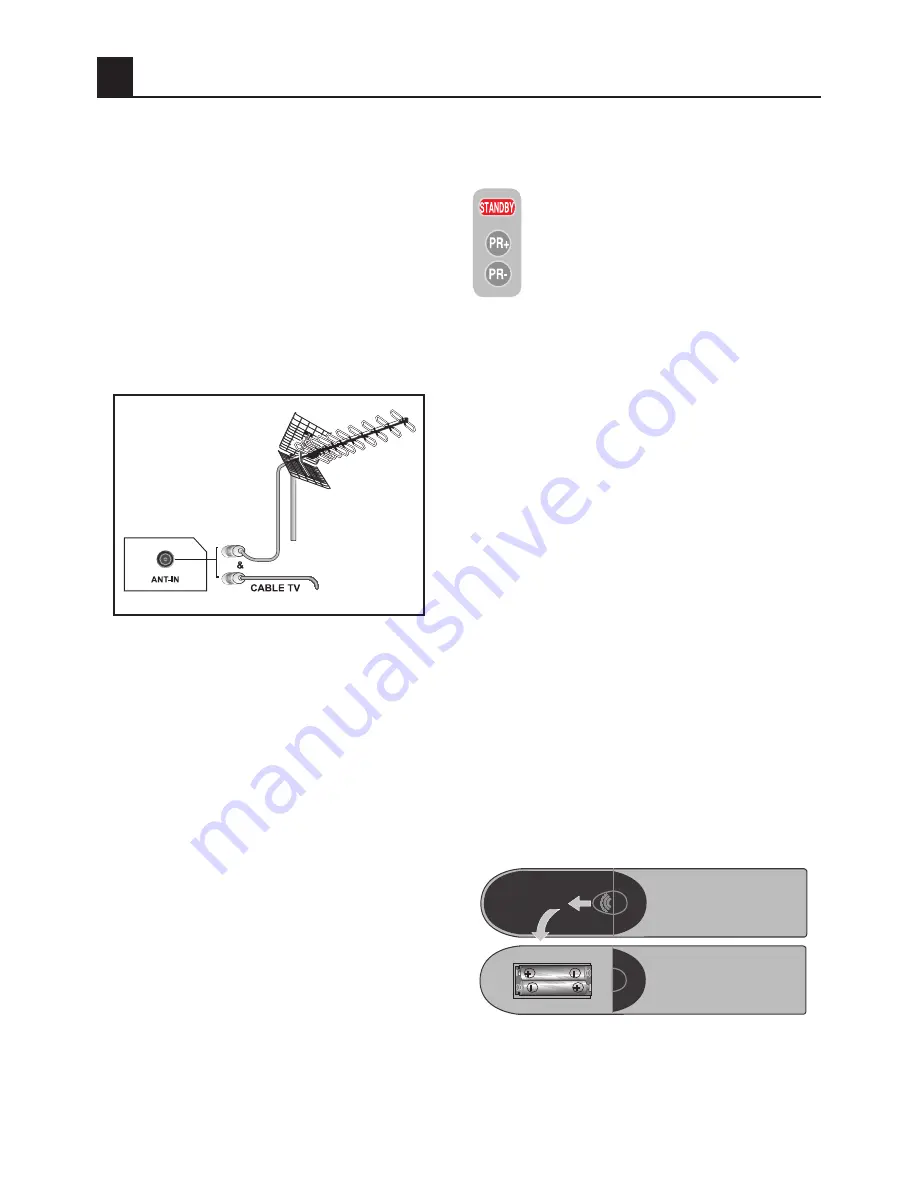
4.1-Aerial connection

If you use a 75 Ohm coaxial cable (round 

cable) as an aerial cable, connect the aerial 

plug directly to the aerial input located on 

the TV.

Motorized vehicles, energy lines and 

telecommunication lines affect your aerial. 

Therefore, be careful to install your aerial 

away from these and metal surface in such 

a way that it shall not move. Do not make 

your aerial cable longer than required and do 

not coil it. Make sure that it is not crimped 

passing through a window or door. Your 

aerial and cable might be affected by natural 

phenomena such as rain, wind, smoke and 

humidity over time. Periodically check your 

aerial and equipment.

4.2-Powering on your device 

and the initial use

1.

 Insert the mains lead or the adaptor into 

the appropriate power supply input located 

on the back panel of the LCD TV.

2.

 Insert the plug of the mains lead or 

adaptor, supplied with the TV into the mains 

socket.

Initial power on and performing 

settings

To set up your television, read the sections 

on the TV controls and making the channel 

settings.

4.3-Batteries

Open the lid of the battery compartment 

and make sure that you have placed the 

batteries in the correct direction. For this 

remote control, UM-4, IEC R03 or AAA 1.5 V 

batteries are suitable.

Do not throw your old batteries into the fire, 

discard them in a dedicated waste area for 

this purpose.

Do not mix used batteries with new ones or 

different types of batteries together.

The performance of the remote control will 

be reduced at a distance of 8 meters from or 

at an angle of 30 degrees beyond the centre 

of the TV.

Содержание 15LB250MID

Страница 1: ...LCD COLOUR TELEVISIONS Operating Instructions 15LB250MID ...

Страница 2: ...al Connections 8 5 3 External Connections Table 8 5 4 Remote Control 9 6 6 Performing the initial power on settings 10 6 1 TV controls 10 6 2 Turning on the TV and Setting the Channels 11 6 3 Performing Digital Tunings 11 6 4 Performing Analogue Tunings 14 7 7 The settings on your new television 17 7 1 Sound Menu Settings 17 7 2 Picture Menu Settings 17 7 3 Features Menu Settings 18 8 8 Teletext 1...

Страница 3: ...al broadcasts only informs you about changes in the program list briefly and provides program lists of all digital broadcasts for a number of forthcoming days You can display detailed information about each program by pressing a single button if this feature is supported by the broadcaster This television has a comprehensive and user friendly menu configuration 1 4 Receiving digital broadcasting c...

Страница 4: ...e feature CI slot input Software upgrade by air transmission 6 Digital Favorite channel lists A clearer picture made possible with a Digital Comb Filter DNR Noise reduction Manual fine tuning 100 Analogue Program memory 1000 Digital Program memory Returning to the last viewed program by single button SWAP Infrared remote control equipped with all functions Ability to watch NTSC video playback via ...

Страница 5: ...s on the TV The screen glass may break and cause serious injuries if something hits it 7 To ensure adequate ventilation please leave a clearance area of at least 10 cm around the television This clearance prevents the TV from overheating and consequently causing damage Using the device in dusty environments should also be avoided Never block the slots and openings by placing the TV on a bed sofa p...

Страница 6: ...or the adaptor must be within easy reach Turn off your device with the ON OFF button and then unplug it in order to disconnect it from mains Note 1 If you would like to operate your television by means of the lighter cable in a car then use the cable supplied with the product Using a different cable may damage your appliance Note 2 If your device has an adaptor then use the adaptor and AC mains le...

Страница 7: ...teries 20 Disposing of the exhausted batteries Dispose of the exhausted batteries in accordance with the local laws and regulations in order to protect our environment 21 Do not dispose of your TV with regular household waste Observe local laws and regulations for disposal Note 1 This is a Class A product During operation the TV can cause radio interference In this case the user may have to remedy...

Страница 8: ...ely then rewire as shown in the diagram to the left BLUE Neutral IMPORTANT The wires in the mains lead are coloured in accordance with the following code Blue Neutral Brown Live Yellow Green Earth As the colours in the mains lead of this appliance may not correspond with the coloured markings identifying the terminals in your plug proceed as follows The wire which is coloured green and yellow must...

Страница 9: ...make your aerial cable longer than required and do not coil it Make sure that it is not crimped passing through a window or door Your aerial and cable might be affected by natural phenomena such as rain wind smoke and humidity over time Periodically check your aerial and equipment 4 2 Powering on your device and the initial use 1 Insert the mains lead or the adaptor into the appropriate power supp...

Страница 10: ...ector 5 Audio input PHONO connector L 6 Audio input PHONO connector R 7 VGA PC connection input 8 PC audio input 9 CI Slot Input Note Above drawing for external connections is representational Their order and places on your TV may be different These features are optional and they are not available on all models 5 3 External Connections Table Panel Size 15 Scart 1 STD Audio Video PHONO Input STD VG...

Страница 11: ...ton Up movement button Menu Next page selection button in Txt mode Down movement button Menu Previous page selection button in Txt mode Left movement button Menu Right movement button Menu Menu selection confirm Volume down button Volume up button Program forward selection button Program backward selection button Red teletext button Green teletext button Yellow teletext button Blue teletext button...

Страница 12: ...e Selection Press the AV button on your remote control SOURCE menu will be displayed Select DIGITAL ANALOGUE or desired AV mode with Up Down movement buttons and confirm with OK button so that your television will switch to the source you have selected 6 1 4 Temporary sound mute MUTE To temporarily mute the sound of your television press the MUTE button on your remote control In that case MUTE sym...

Страница 13: ...e MENU button 6 3 Performing Digital Tunings You can either tune the Digital programs automatically or manually and store them in your television 6 3 1 Automatic Tuning of Channels and Storing in the Memory Press AV button on your remote control select DIGITAL tab from the SOURCE menu by using Up Down movement buttons and confirm by pressing the OK button Your TV will switch to Digital mode Press ...

Страница 14: ...l List With this option you can delete all channels in the existing channel list to store only the new channels in the desired frequency into the memory Note You can also assess Manual Search menu from the Manual Channel Search tab in the System Menu under Digital Features menu 6 3 3 Program Table With the program table you can see the stored channels in a list switch between TV channels and Radio...

Страница 15: ...by using the Up Down movement buttons and navigate through the program data with Right movement button To get further information about the program press INFO button and detailed information about the selected program will be displayed Press the GREEN button to display next day s program information press the RED button to display previous day s program information and press OK button to add Remin...

Страница 16: ...o be switched to Standby mode and turned on again Note 2 The password has been set as 0000 at the factory You can change the password as you wish under Change PIN item in the Access Control menu 6 3 5 3 User Interface Options With this feature you can decide whether to display in the list the channels that could not be unscrambled by the CI card installed on your television To do this you can sele...

Страница 17: ... given time please press the MENU button The Program Table which will allow you to sort the channels as you wish will be displayed after the auto search is complete 6 4 2 Manually searching and storing the channels 6 4 2 1 If you already know the channel number Press the MENU button Move to the SETUP menu by pressing the Down movement button in the Main Menu and confirm your selection with the OK ...

Страница 18: ...e function The AFC values of your television will automatically adjust and lock themselves to the channel However you might need it in case the television transmitters do not operate according to the standards To store in the memory the settings you have made select the Store tab and press the Right or Left movement button 6 4 4 Program table Press the MENU button Move to the PROGRAM TABLE tab by ...

Страница 19: ...e program that will be hidden by pressing the Up Down or Right Left movement buttons while you are in the program table Press the RED button The name of the program to be skipped shall appear in red You may perform this procedure for more than one program To view the skipped program directly enter the program number using the numeric buttons To cancel the program skipping process press again the R...

Страница 20: ...ou have adjusted by pressing the button on your remote control SOFT NATURAL and RICH are default values USER represents the values you stored in memory IMPORTANT NOTE Your TV is equipped with Digital Comb Filter feature to increase the picture quality This option can not be changed by the end user if it is set to ON 7 2 5 Picture Format With this option you can view the broadcast you watch in a fo...

Страница 21: ... pressing the up button and to the previous page pressing the down button Press the INFO button to return to the Index page 8 3 Page enlarge button DOUBLE Using this button you can watch the top half of the teletext page in an enlarged format To be able to view the bottom half of the enlarged page press the same button for the second time Once you press the same button the third time the page will...

Страница 22: ...ve the time information from the screen by pressing the same button 8 9 Fastext The colored buttons on the remote control are for the fastext feature When you select any page the titles on various subjects may appear on the screen in four different colors or inside colored frames red green yellow and blue By pressing the button pertaining to the relevant color on the remote control you can access ...

Страница 23: ...DECODER CAMCORDER VIDEO GAME SCART SOCKET Your TV is equipped with 4 inputs including aerial input which allows for the external device connection These inputs are 1 Aerial input 2 VGA input optional 3 SCART input 1 4 PHONO input You can connect your external device supporting the suitable inputs to your TV via these inputs By pressing the AV button on your remote control select the external sourc...

Страница 24: ...t the AUTOCONFIGURATION tab and press OK button You can adjust the volume level of the source you have connected to the Audio In input at the back of your TV by using the VOL VOL buttons Note In the Monitor mode you can make the Brightness Contrast Sharpness Red Green and Blue Settings from the PICTURE menu 10 Help and tips The television does not function Make sure that the power cable of the tel...

Страница 25: ... on and off the TV No picture and sound No sound picture available No picture sound available Low quality picture Foggy picture Double picture Line on the picture Distorted picture Distorted broadcast on some channels Horizontal lines exist Vertical fluttering in the picture Weak color No color The remote control does not function TV does not respond to the commands Fluttering in the teletext 11 Te...

Страница 26: ...ragkelly 31 27 24 21 48 7 Sutton Coldfield 46 40 43 50 37 22 Darvel 33 26 23 29 35 9 The Wreckin 26 33 23 29 25 20 Durris 22 28 25 32 67 5 Mindlands East Eitshal Lewis 33 26 23 29 49 Waltham 58 64 61 54 35 21 Keeylang Hill 40 46 43 50 1 South West Knock More 33 26 23 29 4 Beacon Hill 57 63 60 53 37 Rosemarkie 39 45 49 42 3 Caradon Hill 22 28 25 32 38 Rumster Forest 31 27 24 21 2 Huntshaw Cross 55 ...

Страница 27: ...d repairs or inexpert installation that fails to meet the requirements contained in the user instruction book Repairs or replacements to product installed or used on commercial or non household premises Important notes The product is guaranteed for domestic household use only The guarantee will be void if the product is installed or used in commercial or non household premises The product must be ...

Страница 28: ...me he will normally be there within 48hrs of receipt of your call excluding Bank Holidays or at your earliest convenience Before telephoning for service please check the trouble shooting guide in the instruction book as often minor problems are easily identified and resolved by following the instructions contained there in Service visits where there is no fault with the product could incur a charg...

Страница 29: ...FAU 801 ...

Отзывы: